
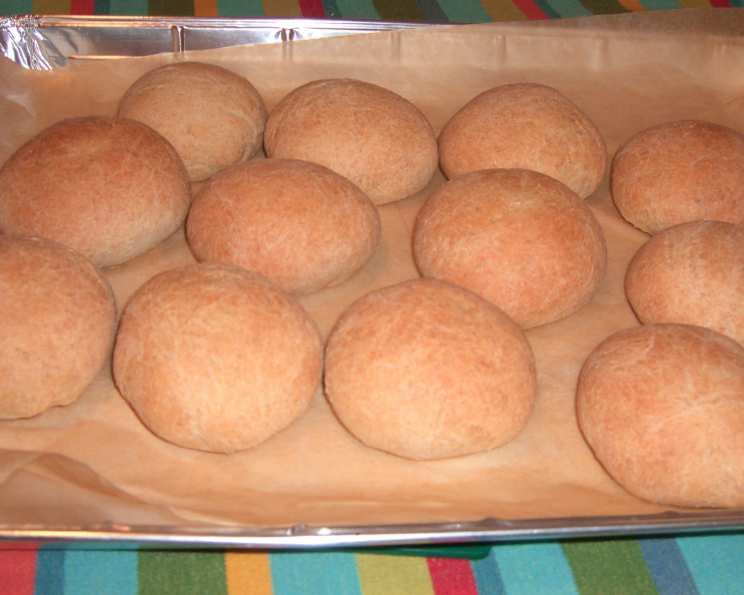
The Soulful Simplicity of 100% Whole Wheat Rolls
I’ll never forget the smell of my grandmother’s kitchen on baking day. The warm, earthy aroma of whole wheat hung in the air, a comforting scent that promised homemade goodness. Her specialty was 100% whole wheat rolls – soft, slightly sweet, and utterly irresistible. They were more than just bread; they were a symbol of her love, a taste of home that I carry with me to this day. Recreating her rolls always brings back those cherished memories.
Recipe Overview
- Prep Time: 30 minutes
- Rise Time (First): 1 hour
- Rise Time (Second): 30 minutes
- Cook Time: 20 minutes
- Total Time: 2 hours 20 minutes
- Yield: 20-25 Rolls
- Dietary Type: Vegetarian
Ingredients
- 2 tablespoons yeast
- 2 cups lukewarm water (105-125 degrees, 16 oz.)
- 1/4 cup honey (2 oz.)
- 3/4 cup olive oil (6 oz.)
- 2 eggs, at room temperature
- 2 teaspoons salt
- 7 cups whole wheat flour
Equipment Needed
- Large mixing bowl
- Measuring cups and spoons
- Oiled bowl for rising
- Baking sheet (oiled or non-stick)
- Clean kitchen towel
- Stand mixer (optional, but recommended)
Instructions
-
Begin by activating the yeast. In a small bowl, combine the 2 tablespoons of yeast, 2 cups of lukewarm water (ensuring it’s between 105-125 degrees Fahrenheit for optimal activation), and 1/4 cup of honey. Let this mixture stand for about 5 minutes, or until the yeast becomes foamy, indicating that it’s active and ready to use.
-
In a large mixing bowl (or the bowl of your stand mixer), combine the remaining ingredients: 3/4 cup of olive oil, 2 eggs (make sure they are at room temperature for better incorporation), and 2 teaspoons of salt. Whisk these ingredients together until they are well combined.
-
Once the yeast mixture is foamy, add it to the wet ingredients in the large mixing bowl. Gradually incorporate the 7 cups of whole wheat flour, adding it slowly while mixing on low speed with a dough hook attachment (if using a stand mixer) or kneading by hand. Continue to knead the dough until it begins to pull away from the sides of the bowl and forms a slightly sticky, yet manageable, dough. This process may take about 5-7 minutes with a mixer or 8-10 minutes by hand.
-
Prepare a large bowl by lightly oiling it. Place the dough in the oiled bowl, turning it to coat all sides with oil. This will prevent the dough from sticking as it rises. Cover the bowl with a clean kitchen towel or plastic wrap and place it in a warm place to rise for about one hour, or until the dough has doubled in size. The warmth encourages the yeast to work its magic.
-
After the first rise, gently punch down the dough to release the air. Remove the dough from the bowl and place it on a lightly floured surface.
-
Shape the dough into rolls. Divide the dough into 20-25 equal portions, depending on your desired roll size. Roll each portion into a ball, aiming for a diameter of about 2 inches. Remember, these will expand as they bake, so don’t make them too large.
-
Place the shaped rolls onto a baking sheet that has been either oiled or lined with non-stick baking paper, leaving some space between each roll to allow for expansion during the second rise. Cover the baking sheet with a clean kitchen towel and let the rolls rise for another 30 minutes.
-
While the rolls are undergoing their second rise, preheat your oven to 375 degrees Fahrenheit (190 degrees Celsius). This ensures the oven is at the optimal temperature when the rolls are ready to bake.
-
Once the rolls have risen for the second time, place the baking sheet in the preheated oven and bake for approximately 20 minutes, or until the rolls are golden brown on top. Keep a close eye on them to prevent burning, as oven temperatures can vary.
-
Remove the baked rolls from the oven and let them cool slightly on the baking sheet before transferring them to a wire rack to cool completely. Enjoy these wholesome and delicious 100% whole wheat rolls while they are still warm!
Expert Tips & Tricks
- Water Temperature is Key: Make sure the water for the yeast is lukewarm, not hot. Hot water will kill the yeast and prevent the dough from rising.
- Room Temperature Eggs: Using eggs at room temperature helps them incorporate more easily into the dough, resulting in a smoother texture.
- Kneading Time: Don’t skimp on the kneading! Proper kneading develops the gluten in the flour, which gives the rolls their structure and chewiness. If using a stand mixer, check the dough often. Over-kneading can also make the dough tough.
- Warm Rising Environment: A warm, draft-free environment is crucial for optimal rising. If your kitchen is cold, you can place the dough in a slightly warmed oven (turned off, of course!) or near a warm stove.
- Doneness Test: To check if the rolls are fully baked, insert a toothpick into the center of a roll. If it comes out clean, the rolls are done. You can also tap on the bottom of a roll; if it sounds hollow, it’s ready.
- Gluten Development: Whole wheat flour can sometimes result in a denser loaf. To combat this, consider using a “windowpane test” after kneading. Stretch a small piece of dough thin enough to see light through it without tearing. If it passes, you’ve developed enough gluten.
Serving & Storage Suggestions
These 100% whole wheat rolls are delicious served warm with a pat of butter, alongside a hearty soup or stew, or as a wholesome sandwich bread.
- Serving: Serve warm, ideally within a few hours of baking, for the best texture and flavor.
- Storage:
- Room Temperature: Store in an airtight container at room temperature for up to 2 days.
- Refrigerator: For longer storage, refrigerate the rolls in an airtight container for up to 5 days.
- Freezer: For long-term storage, freeze the rolls in a freezer-safe bag or container for up to 2-3 months. Thaw at room temperature before reheating.
- Reheating: To reheat, wrap the rolls in foil and warm them in a preheated oven at 350 degrees Fahrenheit for about 5-10 minutes, or until heated through. You can also microwave them for a shorter period, but this may affect their texture.
Nutritional Information
Here’s an estimated nutritional breakdown per roll (based on 25 rolls):
| Nutrient | Amount per Serving | % Daily Value |
|---|---|---|
| Calories | 190.7 kcal | N/A |
| Calories from Fat | 69 g | 37% |
| Total Fat | 7.8 g | 11% |
| Saturated Fat | 1.2 g | 5% |
| Cholesterol | 14.9 mg | 4% |
| Sodium | 193.7 mg | 8% |
| Total Carbohydrate | 27.4 g | 9% |
| Dietary Fiber | 3.9 g | 15% |
| Sugars | 2.9 g | N/A |
| Protein | 5.3 g | 10% |
Note: Nutritional information is an estimate and may vary based on specific ingredients and portion sizes.
Variations & Substitutions
- Sweet Rolls: Add a touch more honey (up to 1/2 cup) to the dough for a sweeter roll. You can also brush the tops with melted butter and sprinkle with cinnamon sugar before baking.
- Savory Rolls: Incorporate herbs like rosemary, thyme, or oregano into the dough for a savory twist. You could also add shredded cheese, such as cheddar or Parmesan.
- Vegan Rolls: Substitute the eggs with flax eggs (1 tablespoon ground flaxseed mixed with 3 tablespoons water per egg, let sit for 5 minutes). You can also use plant-based milk instead of water, adjusting the flour accordingly.
- Sprouted Wheat Flour: For a nuttier flavor and potentially improved digestibility, substitute some of the whole wheat flour with sprouted wheat flour. Start with a 1:1 ratio and adjust as needed.
FAQs (Frequently Asked Questions)
Q: Why are my whole wheat rolls dense and not as fluffy as white bread rolls?
A: Whole wheat flour contains more bran, which can weigh down the dough. Ensure you knead the dough adequately to develop the gluten and allow for sufficient rising time in a warm environment.
Q: Can I use instant yeast instead of active dry yeast?
A: Yes, you can substitute instant yeast directly into the dry ingredients without proofing it in water first. Use the same quantity as specified in the recipe.
Q: My dough didn’t rise. What could be the problem?
A: Several factors can prevent dough from rising, including using expired yeast, water that is too hot or too cold, or a too-cold environment. Make sure your yeast is active and the rising environment is warm.
Q: Can I make the dough ahead of time and bake the rolls later?
A: Yes, you can prepare the dough, let it rise once, then punch it down and refrigerate it for up to 24 hours. When ready to bake, shape the rolls and let them rise again before baking.
Q: How do I prevent the rolls from drying out during baking?
A: Baking the rolls with a pan of hot water on the lower rack of the oven can create steam, which helps keep the rolls moist.
Final Thoughts
Baking these 100% whole wheat rolls is a truly rewarding experience. Not only will you fill your kitchen with the most amazing aroma, but you’ll also create something wholesome and delicious that you can share with those you love. I encourage you to give this recipe a try, experiment with different variations, and make it your own. And don’t hesitate to share your feedback – I’d love to hear how they turn out for you! Perhaps you could enjoy them alongside a comforting bowl of chili or a fresh garden salad. Happy baking!