
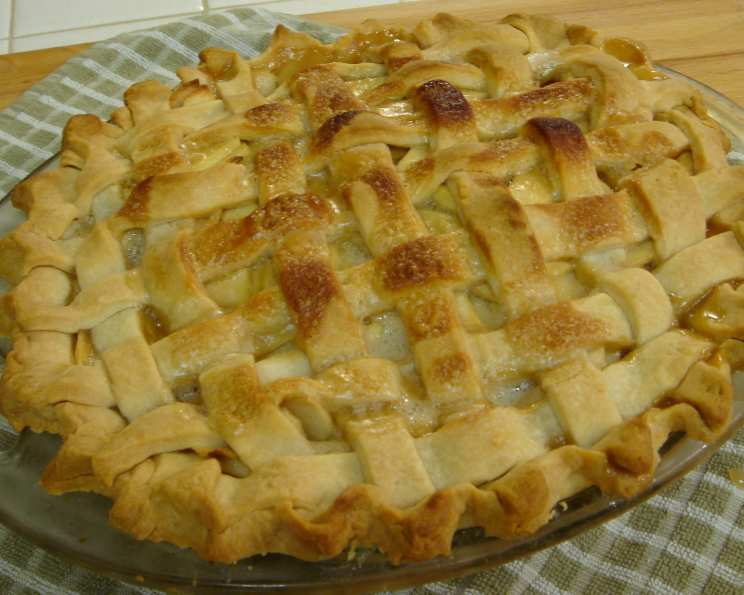
Unlocking Time: The Secrets of 100 Year-Old Pie Crust
The scent of baking pie crust always takes me back to my grandmother’s kitchen. It wasn’t just the aroma of warm butter and flour; it was the tangible feeling of love and tradition that filled the air. I remember standing on a small stool, watching her weathered hands expertly crimp the edges of a pie, a skill passed down through generations. She always said her crust recipe was “older than dirt,” and while I chuckled at the time, I now realize the wisdom in her words. This recipe I’m about to share feels connected to that same lineage – a testament to enduring deliciousness.
Recipe Overview
- Prep Time: 20 minutes
- Cook Time: Variable, based on pie filling
- Total Time: 20 minutes (prep) + Baking Time
- Servings: Varies, based on pie size
- Yield: 4 8-inch pie crusts or 3 9-inch pie crusts
- Dietary Type: Vegetarian (can be made vegan with shortening substitution)
Ingredients
- 4 cups all-purpose flour
- 1 3/4 cups vegetable shortening (or lard for a richer flavor, or vegan shortening for a vegan crust)
- 3 tablespoons white sugar
- 2 teaspoons salt
- 1 egg
- 1/2 cup cold water
Equipment Needed
- Large mixing bowl
- Pastry cutter (or food processor with dough blade)
- Measuring cups and spoons
- Plastic wrap
- Rolling pin
- Clean, floured surface
- Pie dish (8 or 9 inch)
Instructions
- In a large mixing bowl, combine the all-purpose flour, vegetable shortening, white sugar, and salt.
- Using a pastry cutter (or your fingertips), cut the shortening into the flour mixture until it resembles coarse crumbs. The smaller the pieces of shortening, the flakier your crust will be.
- In a separate small bowl, whisk together the egg and cold water.
- Gradually add the egg and water mixture to the flour mixture. Use the pastry cutter (or pulse in a food processor) to combine until the dough just comes together. Be careful not to overmix; overmixing develops the gluten in the flour, resulting in a tough crust.
- Form the dough into a disc, wrap it tightly with plastic wrap, and chill in the refrigerator for at least 30 minutes, or up to 2 days. Chilling the dough allows the gluten to relax, making it easier to roll out and preventing shrinkage during baking.
- When ready to bake, remove the dough from the refrigerator and let it sit at room temperature for about 5-10 minutes to soften slightly.
- Lightly flour a clean work surface and your rolling pin.
- Divide the dough into the desired number of portions (4 for 8-inch pies or 3 for 9-inch pies).
- Roll out one portion of the dough into a circle slightly larger than your pie dish.
- Carefully transfer the rolled-out dough to your pie dish. Gently press it into the bottom and up the sides of the dish. Trim any excess dough with a knife or kitchen shears.
- Crimp the edges of the crust using your fingers or a fork. For a decorative touch, you can use a pie crimper.
- If you are making a pre-baked crust (blind baking), prick the bottom of the crust several times with a fork to prevent it from puffing up during baking. Line the crust with parchment paper and fill with pie weights or dried beans.
- Bake the crust in a preheated oven at 375°F (190°C) for 15-20 minutes, or until lightly golden brown. If blind baking, remove the parchment paper and pie weights after 15 minutes and bake for another 5-10 minutes, or until the crust is golden brown.
- If you are using the crust for a filled pie, follow the baking instructions in your pie recipe. This crust is suitable for any type of pie, whether it’s a fruit pie, a cream pie, or a savory pie. It can be used for a full top crust, a lattice top, or decorative cut-outs.
Expert Tips & Tricks
- Keep everything cold: The key to a flaky pie crust is to keep all the ingredients cold. Use ice-cold water and chilled shortening. Some bakers even chill their flour before starting.
- Don’t overmix: Overmixing develops the gluten in the flour, resulting in a tough crust. Mix the dough until it just comes together.
- Rest the dough: Chilling the dough allows the gluten to relax, making it easier to roll out and preventing shrinkage during baking.
- Blind baking: For pies with fillings that don’t require baking (such as cream pies), pre-bake the crust completely before adding the filling. This is called blind baking.
- Egg Wash: For a glossy, golden-brown crust, brush the crust with an egg wash (1 egg beaten with 1 tablespoon of water) before baking.
- Prevent a Soggy Bottom: To prevent a soggy bottom crust, try brushing the crust with a thin layer of melted chocolate or egg white before adding the filling.
- Use a Marble Rolling Pin or Surface: Marble stays cool, helping to keep the butter or shortening in your dough from melting as you roll it out.
Serving & Storage Suggestions
Serve your pie warm or cold, depending on the filling. Fruit pies are often best served warm, while cream pies are best served chilled. Leftover pie should be stored in the refrigerator, covered, for up to 3 days. You can also freeze baked pie for up to 2 months. To reheat frozen pie, thaw it in the refrigerator overnight and then warm it in a preheated oven at 350°F (175°C) for 10-15 minutes, or until heated through. Unbaked pie dough can be stored in the refrigerator for up to 2 days or frozen for up to 2 months. Thaw frozen dough in the refrigerator overnight before using.
Nutritional Information
(Estimated, per serving, crust only)
| Nutrient | Amount per Serving | % Daily Value |
|---|---|---|
| Calories | 450 kcal | 23% |
| Total Fat | 30g | 46% |
| Saturated Fat | 12g | 60% |
| Cholesterol | 20mg | 7% |
| Sodium | 300mg | 13% |
| Total Carbohydrate | 40g | 13% |
| Dietary Fiber | 1g | 4% |
| Sugars | 3g | – |
| Protein | 5g | 10% |
Variations & Substitutions
- Gluten-Free Crust: Substitute the all-purpose flour with a gluten-free all-purpose flour blend. You may need to add a binding agent, such as xanthan gum, to help hold the crust together.
- Vegan Crust: Substitute the vegetable shortening with vegan shortening and omit the egg. Add an extra tablespoon or two of cold water if needed to bring the dough together.
- Whole Wheat Crust: Substitute up to half of the all-purpose flour with whole wheat flour for a nuttier flavor and added fiber.
- Herb Crust: Add 1-2 tablespoons of chopped fresh herbs, such as rosemary or thyme, to the flour mixture for a savory pie crust.
- Sweet Crust: Add a teaspoon of vanilla extract or citrus zest to the egg and water mixture for a sweeter crust.
FAQs (Frequently Asked Questions)
Q: Why is my pie crust tough?
A: Overmixing the dough develops the gluten in the flour, resulting in a tough crust. Be careful not to overmix.
Q: How do I prevent my pie crust from shrinking during baking?
A: Chill the dough for at least 30 minutes before rolling it out. This allows the gluten to relax and prevents shrinkage.
Q: Can I make this pie crust ahead of time?
A: Yes, the dough can be made ahead of time and stored in the refrigerator for up to 2 days or frozen for up to 2 months.
Q: What is blind baking?
A: Blind baking is pre-baking the crust before adding the filling. This is necessary for pies with fillings that don’t require baking, such as cream pies.
Q: How do I prevent my pie crust from getting soggy?
A: Brush the bottom of the crust with a thin layer of melted chocolate or egg white before adding the filling.
Final Thoughts
This “100 Year-Old Pie Crust” recipe isn’t just about ingredients and techniques; it’s about connecting with a culinary legacy. The simple act of creating this crust, with its flaky layers and comforting aroma, has the power to transport you to a time when homemade goodness was a way of life. So, gather your ingredients, embrace the process, and create a pie that not only tastes delicious but also carries a piece of history within each bite. I encourage you to try this recipe, experiment with different fillings, and share your creations with loved ones. And don’t forget to let me know how it turns out! Happy baking!