
15-Minute Liver Treats: A Homemade Delight for Your Furry Friend
My old Labrador, Gus, was the reason I first experimented with homemade dog treats. He was a picky eater, and the store-bought options never seemed to excite him. One day, rummaging through my fridge, I had the slightly mad idea of using some leftover chicken livers. The resulting concoction, a simple blend of liver, flour, and cornmeal, baked into little squares, turned out to be his absolute favorite. The way his tail would wag furiously at the mere whiff of them made all the kitchen experiments worthwhile. I knew then that I’d stumbled upon something special – a simple, healthy, and delicious treat that brought pure joy to my best friend.
Recipe Overview:
- Prep Time: 5 minutes
- Cook Time: 15 minutes
- Total Time: 20 minutes
- Yields: Approximately 20 treats
- Dietary Type: High Protein
Ingredients:
- 1 lb chicken liver
- 1 cup flour (all-purpose)
- 1 cup cornmeal
- 1 egg
Equipment Needed:
- Blender
- Mixing Bowl
- Jelly Roll Pan
- Pam or cooking spray
Instructions:
- Preheat your oven to 400 degrees Fahrenheit (200 degrees Celsius). This high heat will help the treats cook quickly and evenly.
- In a blender, combine the chicken livers and any liquid present in the packaging. Liquify the mixture until it is completely smooth. This is a crucial step to ensure a uniform texture in the final treats.
- Add the egg to the liquified liver mixture in the blender. Process for another minute to thoroughly combine the egg with the liver.
- Pour the blended mixture from the blender into a mixing bowl.
- Add the flour and cornmeal to the bowl.
- Mix all the ingredients together until well combined. The batter should be thick but pourable.
- Spray a jelly roll pan with Pam or another non-stick cooking spray. Make sure to coat the entire pan to prevent the treats from sticking.
- Pour the mixture into the prepared jelly roll pan, spreading it evenly.
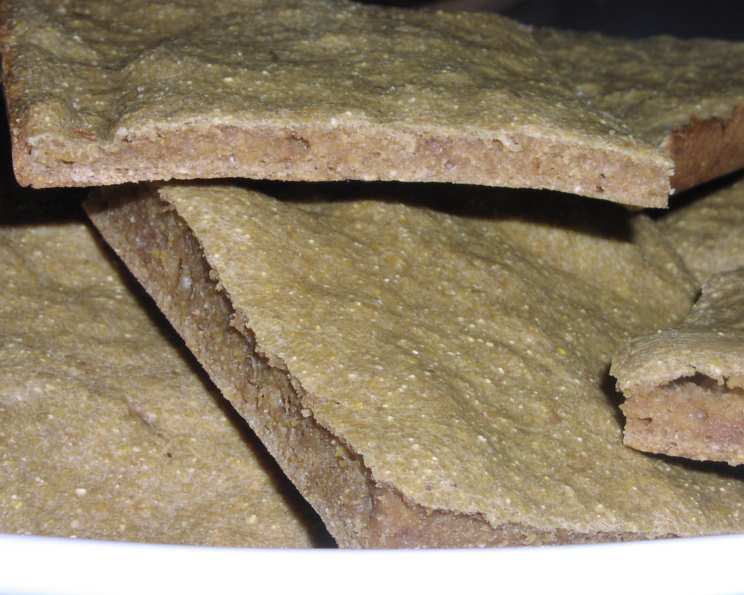
- Bake in the preheated oven for 15 minutes. Keep a close eye on them; baking times can vary slightly depending on your oven. The treats are done when they are firm to the touch and slightly browned around the edges.
- Remove the pan from the oven and let it cool slightly. While the treats are still warm, cut them into small squares. This is easier to do while they are still pliable.
- Store the treats in the freezer to prevent spoilage. Due to the fresh liver content, these treats don’t have a long shelf life at room temperature.
Expert Tips & Tricks:
- Liver Quality: Use fresh, high-quality chicken livers for the best flavor and nutritional value. If you’re using frozen livers, make sure to thaw them completely before blending.
- Texture Control: The ratio of flour to cornmeal can be adjusted slightly to alter the texture of the treats. More flour will result in a chewier treat, while more cornmeal will make them more crumbly.
- Even Baking: For even baking, ensure the batter is spread evenly across the jelly roll pan. You can use a spatula to smooth it out.
- Cutting Technique: A pizza cutter works well for cutting the treats into uniform squares.
- Preventing Sticking: If you don’t have Pam, line the jelly roll pan with parchment paper for easy removal.
- Oven Calibration: All ovens are different. If your treats are browning too quickly, reduce the oven temperature by 25 degrees Fahrenheit. Conversely, if they are taking longer than 15 minutes to cook, increase the temperature slightly.
- Smell Reduction: The smell of cooking liver can be strong. Ensure good ventilation by opening a window or turning on your kitchen exhaust fan.
Serving & Storage Suggestions:
These homemade liver treats are best served as a reward or training aid for your dog. Given their high protein content, they should be given in moderation as part of a balanced diet. Store the treats in an airtight container in the freezer for up to 2-3 months. Thaw a small portion as needed. Do not leave the treats at room temperature for extended periods, as they will spoil quickly. They will keep in the refrigerator for 2-3 days.
Nutritional Information:
Please note that the following nutritional information is an estimate and may vary depending on the specific ingredients used.
| Nutrient | Amount per Serving (approx. 1 treat) | % Daily Value (Dog) |
|---|---|---|
| Calories | 25 kcal | N/A |
| Protein | 3g | N/A |
| Fat | 1g | N/A |
| Carbohydrates | 2g | N/A |
| Fiber | 0.2g | N/A |
| Cholesterol | 15mg | N/A |
| Sodium | 2mg | N/A |
Variations & Substitutions:
- Grain-Free Option: Substitute the all-purpose flour with almond flour or coconut flour for a grain-free alternative. Adjust the amount of flour as needed to achieve the desired consistency.
- Vegetable Boost: Add pureed vegetables like carrots, sweet potatoes, or spinach to the batter for added nutrients. Reduce the amount of flour slightly to compensate for the added moisture.
- Flavor Enhancement: While this recipe is simple, you can add a small amount of dog-friendly herbs like parsley or rosemary for added flavor. Remember to consult your vet before introducing new ingredients to your dog’s diet.
- Different Liver Types: You can experiment with other types of liver, such as beef or pork liver, but chicken liver is generally preferred due to its milder flavor.
- Egg Substitute: If your dog has an egg allergy, you can try using a flax egg as a substitute (1 tablespoon of ground flaxseed mixed with 3 tablespoons of water, let sit for 5 minutes to thicken).
FAQs (Frequently Asked Questions):
Q: Can I use a different type of flour?
A: Yes, you can substitute all-purpose flour with whole wheat flour, almond flour, or coconut flour, but the texture of the treats may vary slightly.
Q: How do I know when the treats are done?
A: The treats are done when they are firm to the touch and slightly browned around the edges. A toothpick inserted into the center should come out clean.
Q: Can I add garlic powder to these treats?
A: While garlic is okay in small amounts, it’s always best to consult with your veterinarian before adding garlic to your dog’s diet to ensure it’s safe for your specific pet. The original recipe idea included it, but your pet’s health is most important.
Q: How long will these treats last?
A: These treats should be stored in the freezer for up to 2-3 months to maintain their freshness. They can be kept in the refrigerator for 2-3 days.
Q: Can I make these treats in a different shape?
A: Absolutely! Use cookie cutters to create fun shapes or roll the dough into small balls before baking.
Final Thoughts:
These 15-minute liver treats are a simple and rewarding way to show your furry friend some love. Not only are they packed with protein and nutrients, but they’re also incredibly easy to make with just a few basic ingredients. I encourage you to give this recipe a try and experience the joy of creating homemade treats for your beloved dog. Feel free to experiment with variations and flavors to find the perfect combination that your pup will adore. And don’t forget to share your feedback and success stories – I’d love to hear how your dog enjoys these tasty liver treats!