
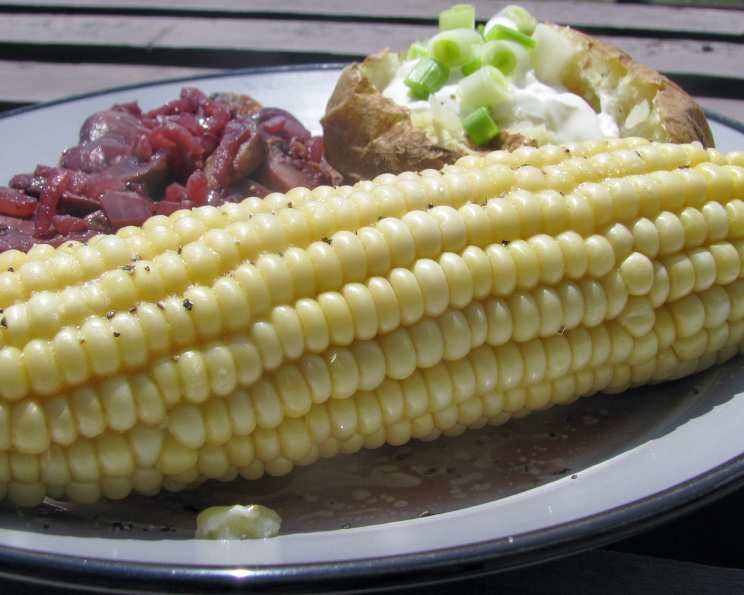
2-Minute Corn on the Cob: A Summer Staple, Simplified
There’s something magical about the taste of fresh corn on the cob in the summer. I still remember trips to my local farmers market as a kid, the sweet aroma of the corn hanging in the air, mixed with the buzz of summer. The feeling of anticipation as my mom expertly shucked the ears, revealing perfect rows of sunshine-yellow kernels. We’d slather them with butter and salt, and those simple, sweet bites were the epitome of summer bliss. Little did I know, years later, that I would stumble upon a method so quick and easy, it would revolutionize my corn-on-the-cob game forever.
Recipe Overview
- Prep Time: 1 minute
- Cook Time: 2 minutes
- Total Time: 3 minutes
- Servings: 1 ear
- Yield: 1 serving
- Dietary Type: Vegetarian, Gluten-Free
Ingredients
- 1 ear of corn, in its husk
- 1 paper towel
- Salt, to taste (optional)
- Butter, to taste (optional)
Equipment Needed
- Microwave
Instructions
- Begin by carefully peeling back the outer layer or two of the husk of the ear of corn, removing any noticeably dirty or damaged pieces. The goal is to leave the majority of the husk intact, along with the silk underneath.
- Dampen the paper towel thoroughly with water. You want it to be wet, but not dripping.
- Wrap the damp paper towel completely around the ear of corn, covering the husk and silk.
- Place the wrapped ear of corn in the microwave.
- Microwave on high for 2 minutes.
- Carefully remove the ear of corn from the microwave. Be cautious, as it will be hot.
- Peel away the remaining husk and remove the silk. The silk should come off easily.
- Season the cooked corn with salt and butter to your liking. Serve immediately and enjoy.
Important Notes for Multiple Ears:
- For two ears of corn, microwave on high for 4 minutes.
- Add two minutes of cooking time for each additional ear of corn.
- Microwaves vary. If the corn is not fully cooked, add 30 seconds at a time until desired tenderness is reached.
Expert Tips & Tricks
- Choosing the right corn: Look for ears of corn with bright green husks that are tightly wrapped around the ear. The silk should be golden brown and slightly sticky. Avoid ears with dry or discolored husks, or those that feel lightweight.
- Husk Prep: Leaving most of the husk on helps trap moisture, steaming the corn from the inside out. It also helps to protect the kernels from direct microwave radiation, preventing them from drying out.
- Paper Towel Dampness: The paper towel should be wet enough to create steam, but not sopping wet that it makes the corn soggy.
- Microwave Placement: Place the corn in the center of the microwave turntable for even cooking. If you don’t have a turntable, rotate the corn halfway through the cooking time.
- Doneness Check: If you’re unsure if the corn is done, carefully pierce a kernel with a fork. It should be tender and juicy.
- Flavor Infusion: Before microwaving, try rubbing the corn with a little olive oil and your favorite herbs or spices for added flavor. Garlic powder, chili powder, or smoked paprika are excellent choices.
- Preventing Burns: Be extremely cautious when removing the corn from the microwave, as it will be very hot. Use oven mitts or tongs to handle the corn and peel back the husk.
- Silk Removal Hack: Microwaving the corn in the husk makes the silk incredibly easy to remove. It should practically fall off. If there are a few stubborn strands, a quick scrub with a clean kitchen towel will do the trick.
Serving & Storage Suggestions
Serve your 2-minute corn on the cob immediately for the best flavor and texture. The kernels are at their sweetest and juiciest right after cooking. Arrange the corn on a platter or individual plates, and provide a variety of toppings such as butter, salt, pepper, chili flakes, lime wedges, or grated cheese.
If you happen to have leftover corn, you can store it in an airtight container in the refrigerator for up to 3 days. To reheat, you can microwave it for a short time, steam it, or grill it. Keep in mind that reheated corn may not be as tender and juicy as freshly cooked corn.
- Room Temperature: Cooked corn should not be left at room temperature for more than two hours due to the risk of bacterial growth.
- Refrigeration: Store leftover corn in an airtight container in the refrigerator for up to 3 days.
- Freezing: While not ideal, cooked corn can be frozen. Cut the kernels off the cob and freeze them in a single layer on a baking sheet before transferring them to a freezer bag. Frozen corn will lose some of its texture but is still suitable for soups, stews, or casseroles.
Nutritional Information
| Nutrient | Amount per Serving | % Daily Value |
|---|---|---|
| Calories | 88 kcal | 4% |
| Total Fat | 1.4g | 2% |
| Saturated Fat | 0.3g | 2% |
| Cholesterol | 0mg | 0% |
| Sodium | 15mg | 1% |
| Total Carbohydrate | 19g | 7% |
| Dietary Fiber | 2g | 7% |
| Sugars | 6g | N/A |
| Protein | 3g | 6% |
Nutritional information is an estimate and may vary based on specific ingredients and portion sizes.
Variations & Substitutions
- Spicy Corn: Sprinkle chili powder, cayenne pepper, or a drizzle of hot sauce onto the corn before microwaving for a spicy kick.
- Mexican Street Corn (Elote) Inspired: After microwaving, slather the corn with mayonnaise, sprinkle with cotija cheese, chili powder, and a squeeze of lime juice.
- Garlic Herb Corn: Rub the corn with garlic butter and your favorite fresh herbs, such as parsley, thyme, or rosemary, before microwaving.
- Vegan Corn: Use a vegan butter alternative or olive oil instead of butter.
- Grilled Corn (After Microwaving): For a smoky flavor, quickly grill the microwaved corn for a few minutes, turning occasionally, until lightly charred. This will add a nice depth of flavor and visual appeal.
FAQs (Frequently Asked Questions)
Q: Why do I need to leave the husk on?
A: The husk helps to steam the corn from the inside out, keeping it moist and tender. It also makes the silk easier to remove after cooking.
Q: Can I use frozen corn on the cob?
A: Yes, you can. Increase the cooking time by a minute or two, depending on the size of the ear and the power of your microwave.
Q: What if my microwave doesn’t have a turntable?
A: If your microwave doesn’t have a turntable, rotate the corn halfway through the cooking time to ensure even cooking.
Q: How do I know when the corn is done?
A: The kernels should be tender and juicy. Carefully pierce a kernel with a fork to check for doneness.
Q: Can I add salt to the water when wrapping the corn in the paper towel?
A: While it’s not necessary, adding a pinch of salt to the water can help to season the corn slightly.
Final Thoughts
This 2-minute corn on the cob recipe is a game-changer for anyone who loves fresh corn but doesn’t have a lot of time. It’s quick, easy, and delivers delicious, perfectly cooked corn every time. I encourage you to give it a try and see for yourself how simple it is to enjoy this summer staple. Feel free to experiment with different seasonings and toppings to create your own signature corn on the cob. And don’t forget to share your feedback – I’d love to hear what you think! Why not pair this corn on the cob with a grilled steak and a refreshing summer salad for a complete and satisfying meal? Happy cooking!