
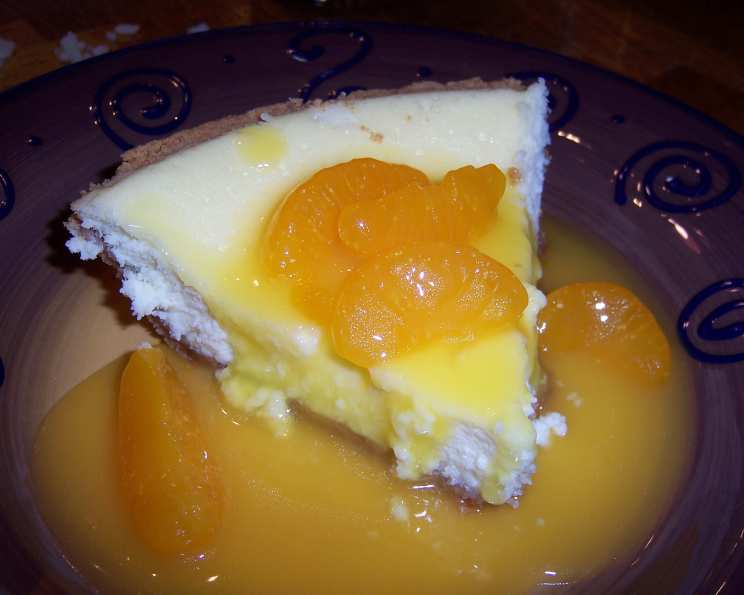
The Enigmatic 20-Pound Cheesecake: A Slice of Detroit History
My grandmother’s kitchen was a portal to another world, a fragrant haven where butter and sugar reigned supreme. Among her many culinary treasures, a faded, yellowed newspaper clipping always held a special mystique. It was a recipe for something called “20-Pound Cheesecake,” a name that conjured images of a Herculean dessert, a creamy titan amongst mere cakes. I remember her chuckling as she explained that the name was probably a slight exaggeration, a testament to the cake’s richness and satisfying heft. That clipping, and the memory of sharing a slice with her, is what sparked my lifelong love of baking.
Recipe Overview
- Prep Time: 20 minutes
- Cook Time: 1 hour 40 minutes
- Total Time: Several hours (includes cooling and chilling)
- Servings: 10-12
- Yield: One 8-inch cheesecake
- Dietary Type: Not suitable for gluten-free or dairy-free diets
Ingredients
-
For the Crust:
- 1 1/2 cups graham cracker crumbs
- 1/4 cup sugar
- 8 tablespoons (1 stick) butter, melted
- 1/2 teaspoon cinnamon
-
For the Filling:
- 1 (8 ounce) package cream cheese, softened
- 3/4 cup sugar
- 1 cup sour cream
- 1 cup heavy cream
- 1/4 teaspoon salt
- 3 eggs
- 2 egg yolks
- 1 teaspoon lemon juice
- 1/4 teaspoon vanilla extract
Equipment Needed
- 8-inch springform pan
- Mixing bowls
- Electric mixer (stand or hand-held)
- Measuring cups and spoons
- Rubber spatula
Instructions
- Preheat your oven to 350°F (175°C).
- Prepare the crust: In a medium mixing bowl, combine the graham cracker crumbs, 1/4 cup sugar, melted butter, and cinnamon. Stir until the crumbs are evenly moistened and the mixture resembles wet sand.
- Press the crust: Press the crumb mixture evenly onto the bottom and up the sides of the 8-inch springform pan. Use the bottom of a measuring cup to help compact the crust firmly.
- Bake the crust: Bake the crust in the preheated oven for 10 minutes. Remove from the oven and let cool completely. This step helps the crust set and prevents it from becoming soggy.
- Reduce oven temperature: Reduce the oven temperature to 275°F (135°C). This lower temperature is key to achieving a creamy, crack-free cheesecake.
- Prepare the filling: In a large mixing bowl, cream the softened cream cheese and the remaining 3/4 cup sugar together using an electric mixer until light and fluffy. Make sure the cream cheese is truly softened to avoid lumps in the final product.
- Add remaining ingredients: Add the sour cream, heavy cream, and salt to the cream cheese mixture. Mix until just combined. Be careful not to overmix at this stage.
- Incorporate eggs and yolks: Add the eggs and egg yolks, one at a time, mixing well after each addition. Finally, stir in the lemon juice and vanilla extract. Mix until the batter is smooth and homogenous.
- Pour into crust: Pour the cheesecake filling into the cooled graham cracker crust.
- Bake the cheesecake: Bake in the preheated 275°F oven for 1 1/2 hours (90 minutes), or until the cake is set. The cheesecake should be slightly jiggly in the center but mostly firm.
- Cooling process: Remove the cheesecake from the oven and let it cool completely at room temperature until the sides pull away slightly from the springform pan. This gradual cooling process helps prevent cracking.
- Chill: Unmold the cheesecake from the springform pan and chill it in the refrigerator, covered loosely, for at least 4 hours, or preferably overnight. This chilling time allows the flavors to meld and the cheesecake to set completely.
- Serving: Remove the cheesecake from the refrigerator 30 minutes before serving to allow it to soften slightly.
Expert Tips & Tricks
- Preventing Cracks: The key to a crack-free cheesecake is low and slow baking. The low temperature and gradual cooling prevent the sudden expansion and contraction that can cause cracks. Also, avoid opening the oven door frequently during baking.
- Water Bath: For an even more decadent and creamy texture, consider baking the cheesecake in a water bath. Wrap the bottom of the springform pan tightly in aluminum foil to prevent water from seeping in. Place the wrapped pan in a larger roasting pan and add hot water to the roasting pan until it reaches halfway up the sides of the springform pan. Bake as directed.
- Softening Cream Cheese: Make sure your cream cheese is fully softened before mixing. You can leave it at room temperature for a couple of hours or microwave it in 15-second intervals until soft but not melted.
- Avoiding Overmixing: Overmixing the batter after adding the eggs can incorporate too much air, which can lead to cracks. Mix just until the ingredients are combined.
- Flavor Enhancements: Feel free to add a touch of lemon zest to the filling for a brighter flavor. You can also add a swirl of raspberry or chocolate sauce before baking.
Serving & Storage Suggestions
Serve the 20-Pound Cheesecake chilled, plain or with your favorite toppings. Fresh berries, whipped cream, chocolate sauce, or a fruit compote are all excellent choices.
- Room Temperature: Cheesecake can be left at room temperature for no more than two hours.
- Refrigerator: Store leftover cheesecake in an airtight container in the refrigerator for up to 5 days.
- Freezer: For longer storage, wrap individual slices tightly in plastic wrap and then place them in a freezer-safe bag or container. Frozen cheesecake can last for up to 2 months. Thaw overnight in the refrigerator before serving.
Nutritional Information
(Estimates based on 12 servings)
| Nutrient | Amount per Serving | % Daily Value |
|---|---|---|
| Calories | 420 kcal | 21% |
| Total Fat | 32g | 49% |
| Saturated Fat | 20g | 100% |
| Cholesterol | 175mg | 58% |
| Sodium | 280mg | 12% |
| Total Carbohydrate | 28g | 9% |
| Dietary Fiber | 0g | 0% |
| Sugars | 20g | N/A |
| Protein | 6g | 12% |
Variations & Substitutions
- Gluten-Free Crust: Substitute the graham cracker crumbs with gluten-free graham-style crackers or a blend of almond flour and gluten-free oats.
- Different Flavors: Experiment with different extracts, such as almond, coconut, or maple, to customize the flavor of the filling.
- Fruit Swirls: Swirl in your favorite fruit puree (such as raspberry, strawberry, or blueberry) into the batter before baking for a beautiful and flavorful cheesecake.
- Chocolate Cheesecake: Add melted chocolate or cocoa powder to the batter for a rich chocolate cheesecake.
FAQs (Frequently Asked Questions)
Q: Why is it called “20-Pound Cheesecake” if it doesn’t actually weigh 20 pounds?
A: The name is likely an exaggeration, referring to the cake’s dense, rich texture and satisfying weightiness rather than its actual weight.
Q: How do I prevent my cheesecake from cracking?
A: Baking at a low temperature (275°F) and allowing the cheesecake to cool gradually will help prevent cracking. Avoid opening the oven door frequently.
Q: Can I use a different size pan?
A: While the recipe is designed for an 8-inch springform pan, you can use a 9-inch pan, but the cheesecake may be slightly thinner and require less baking time.
Q: How do I know when the cheesecake is done?
A: The cheesecake is done when the edges are set and the center is slightly jiggly but not liquid.
Q: Can I make this cheesecake ahead of time?
A: Absolutely! Cheesecake is a great make-ahead dessert. In fact, it’s best to make it a day or two in advance to allow the flavors to meld and the texture to set.
Final Thoughts
This “20-Pound Cheesecake” might not actually tip the scales, but it certainly delivers a heavyweight punch of creamy, decadent flavor. This recipe, passed down through generations, is more than just a dessert; it’s a slice of history, a taste of nostalgia, and a reminder of the simple pleasures in life. So, gather your ingredients, preheat your oven, and prepare to be transported back to my grandmother’s kitchen, where the aroma of baking cheesecake filled the air and every bite was a moment of pure bliss. Don’t hesitate to adapt it to your preferences, and most importantly, share it with loved ones. Enjoy!