
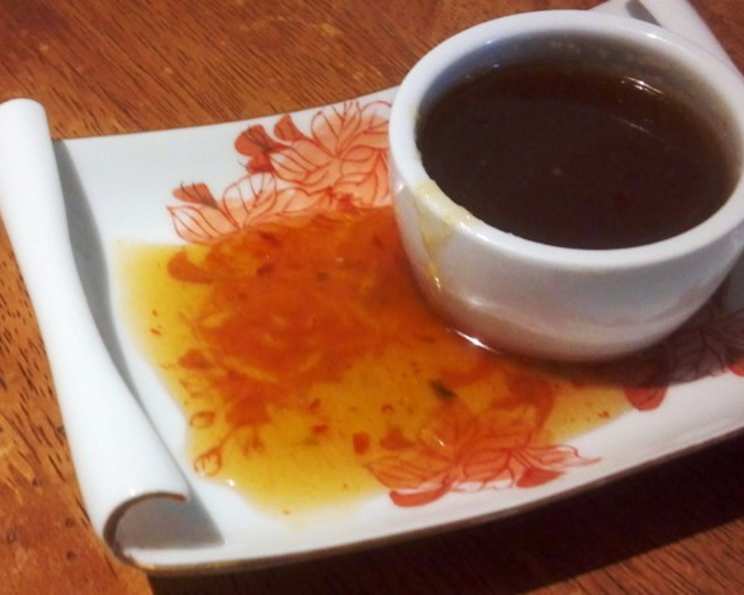
2bleu’s Sweet Thai Chili Sauce (Super Easy)
The scent of chilies always brings me back to my grandmother’s kitchen. She had a small garden overflowing with peppers of every color and heat level. I remember watching her, eyes watering, as she chopped them up, carefully balancing sweet and spicy to create the most incredible sauces and condiments. This recipe for Sweet Thai Chili Sauce reminds me of those days, a simple yet vibrant flavor explosion that can elevate even the simplest dish.
Recipe Overview
- Prep Time: 12 minutes
- Cook Time: 15-20 minutes
- Total Time: 30-32 minutes
- Yields: 1/2 cup
- Serves: 8
- Dietary Type: Gluten-Free
Ingredients
- 12 fresh Thai chiles, Dragon’s eye, stems cut off and seeded (adjust seeds to your heat liking)
- 2 serrano peppers, chopped (seeded if desired, or jalapeno)
- 1 green onion, chopped
- 1/2 cup rice vinegar
- 1/4 cup apple cider vinegar
- 2 teaspoons sesame oil (or peanut oil)
- 1 teaspoon salt
- 1/4 cup sugar
- 1/2 cup honey
- 2 garlic cloves, peeled and smashed
- 2 teaspoons fresh ginger, slices
- Red food coloring (optional)
Equipment Needed
- Small saucepan
- Stirring spoon
- Immersion blender or mini food processor
- Measuring cups and spoons
- 4 oz jars (for canning, optional)
Instructions
-
To a small saucepan, add all the ingredients: the Thai chiles, serrano peppers, green onion, rice vinegar, apple cider vinegar, sesame oil, salt, sugar, honey, garlic cloves, and fresh ginger slices.
-
Stir to combine all of the ingredients. Ensure that the sugar and salt are evenly distributed for consistent flavor.
-
Place the saucepan over medium-low heat and gently simmer, stirring occasionally. This is crucial to prevent scorching and ensure even reduction.
-
Continue to simmer, stirring, until the sauce has reduced by half, or when it reaches a consistency similar to thick maple syrup. This typically takes about 15-20 minutes.
-
Monitor the sauce closely during the simmering process to prevent overcooking or burning. Adjust the heat as needed to maintain a gentle simmer.
-
Remove the saucepan from the heat and allow the sauce to cool slightly. This will make it easier to blend without splattering hot sauce.
-
Once cooled slightly, use an immersion blender or a mini food processor to finely chop all the ingredients. Blend until the sauce reaches your desired consistency. Alternatively, you can perform this step halfway through the cooking process and then again at the end for a smoother texture.
-
If desired, add red food coloring to indicate the heat level of the sauce, with darker red representing a spicier batch. This is purely for aesthetic purposes and does not affect the flavor.
-
Serve the Sweet Thai Chili Sauce warm over dishes such as fish, pork, chicken, or vegetables. It also makes a delightful addition to salads or as a glaze.
-
For storing any leftover sauce, cover it and refrigerate. The sauce can last for 6 months or longer in the refrigerator. Keep in mind that the chili sauce will get hotter as it sits, so adjust your serving sizes accordingly.
-
Canning Instructions (Optional): If you plan to can the sauce, follow your canning booklet for detailed sterilization instructions. Use 4 oz jars. Hot pack the sauce into the sterilized jars. Process in a boiling water bath for 10 minutes. Properly stored, canned Sweet Thai Chili Sauce can last up to 2 years.
Expert Tips & Tricks
- Adjusting the Heat: The heat level of this sauce is easily customizable. For a milder sauce, remove more seeds from the Thai chiles and serrano peppers. For a spicier sauce, leave more seeds in or add an extra pepper or two.
- Achieving the Perfect Consistency: The key to a great Sweet Thai Chili Sauce is the right consistency. Simmering it down to the consistency of thick maple syrup is ideal. If you prefer a thinner sauce, reduce the simmering time.
- Flavor Enhancement: Consider adding a small amount of fish sauce (about 1/2 teaspoon) for an extra layer of umami flavor.
- Ginger Preparation: Grating the ginger instead of slicing it will help it incorporate more smoothly into the sauce.
- Blending Technique: When using an immersion blender, start on a low speed to prevent splattering, gradually increasing the speed as the ingredients begin to blend.
- Safety Note for Canning: Ensure that all canning equipment is properly sterilized and follow safety guidelines to prevent spoilage.
Serving & Storage Suggestions
This Sweet Thai Chili Sauce is incredibly versatile. Serve it warm as a dipping sauce for spring rolls, chicken wings, or grilled shrimp. Drizzle it over stir-fries, noodles, or roasted vegetables. It’s also a fantastic addition to sandwiches, burgers, and tacos.
To store leftovers, allow the sauce to cool completely before transferring it to an airtight container. Refrigerate for up to 6 months. The sauce may thicken slightly in the refrigerator, but it will return to its original consistency when warmed.
Canned sauce should be stored in a cool, dark place and can last up to 2 years. Once opened, refrigerate any unused portion.
Nutritional Information
| Nutrient | Amount per Serving | % Daily Value |
|---|---|---|
| Calories | 129.7 kcal | N/A |
| Calories from Fat | 12 g | 10% |
| Total Fat | 1.4 g | 2% |
| Saturated Fat | 0.2 g | 0% |
| Cholesterol | 0 mg | 0% |
| Sodium | 298.7 mg | 12% |
| Total Carbohydrate | 30.3 g | 10% |
| Dietary Fiber | 1.2 g | 4% |
| Sugars | 27.4 g | 109% |
| Protein | 1.4 g | 2% |
Note: Nutritional information is an estimate and can vary based on specific ingredients and preparation methods.
Variations & Substitutions
- Milder Version: Substitute the Thai chiles with milder peppers like Anaheim or Poblano.
- Vegan Option: Ensure that the honey used is ethically sourced or substitute it with agave nectar or maple syrup.
- Spicier Version: Add a pinch of cayenne pepper or a dash of hot sauce for an extra kick.
- Citrus Twist: Add the zest of one lime or lemon for a bright, citrusy flavor.
- Smoked Flavor: Use smoked paprika in place of some of the regular paprika for a smoky flavor profile.
- Garlic Lovers: Add an extra clove or two of garlic for a more pronounced garlic flavor.
FAQs (Frequently Asked Questions)
Q: How long does Sweet Thai Chili Sauce last?
A: When stored properly in the refrigerator, Sweet Thai Chili Sauce can last for up to 6 months. Canned sauce can last up to 2 years in a cool, dark place.
Q: Can I make this sauce without honey?
A: Yes, you can substitute the honey with agave nectar or maple syrup. The flavor may be slightly different, but it will still be delicious.
Q: What is the best way to adjust the heat level?
A: The easiest way to control the heat is by adjusting the number of seeds you leave in the chiles. Removing more seeds will result in a milder sauce.
Q: Can I use dried chiles instead of fresh?
A: While fresh chiles are preferred for the best flavor, you can use dried chiles in a pinch. Rehydrate them in hot water for about 30 minutes before using.
Q: Why does my sauce get hotter over time?
A: The capsaicin in the chiles continues to release over time, resulting in a gradual increase in heat.
Final Thoughts
I truly believe that this Sweet Thai Chili Sauce will become a staple in your kitchen. It’s so easy to make, incredibly versatile, and bursting with flavor. Don’t be afraid to experiment with the ingredients and adjust the heat level to your liking. I encourage you to try it on everything from grilled meats to stir-fried vegetables – you won’t be disappointed! And remember to share your creations and feedback; I’m eager to hear how you’ve made this recipe your own. Pair it with some perfectly grilled chicken skewers for an easy and delicious meal. Happy cooking!