
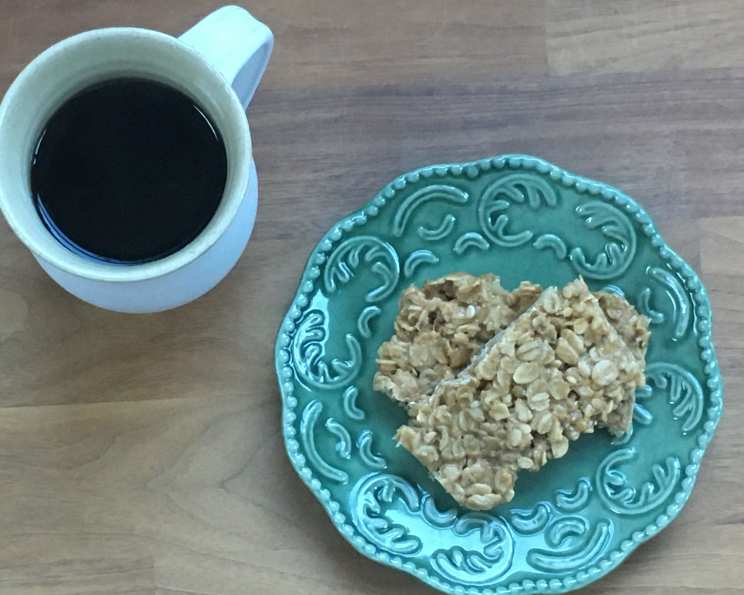
The Easiest Granola Bars You’ll Ever Make: Just 3 Ingredients!
There’s something about the smell of homemade granola that instantly transports me back to my college days. I remember countless late nights spent studying in our dorm kitchen, fueled by instant coffee and whatever snacks we could scrounge up. More often than not, that meant a batch of vaguely healthy (and surprisingly delicious) granola bars cobbled together from pantry staples. These weren’t fancy affairs, no intricately layered parfaits or gourmet ingredients – just simple, honest fuel to get us through exams. The recipe was so basic, so forgiving, even sleep-deprived students couldn’t mess it up. And these 3-ingredient granola bars taste just like that taste of simpler times.
Recipe Overview
- Prep Time: 5 minutes
- Cook Time: 5 minutes
- Total Time: 10 minutes + 6 hours (refrigeration)
- Servings: 12
- Yield: 12 bars
- Dietary Type: Adaptable (see variations)
Ingredients
- ¾ cup honey
- 1 cup creamy peanut butter
- 3 cups oats
- 1 pinch salt (optional)
Equipment Needed
- Medium saucepan
- 8×8 inch baking pan
- Foil or parchment paper
- Spatula
- Measuring cups and spoons
Instructions
-
Line an 8×8 inch baking pan with foil or parchment paper, leaving an overhang on the sides for easy removal. Lightly spray the lining with cooking spray to prevent sticking. This step is crucial for clean removal later!
-
In a medium saucepan, combine the peanut butter and honey. Place the saucepan over medium-low heat.
-
Heat the peanut butter and honey, stirring constantly, until the mixture is completely melted and smooth. This should take approximately 5 minutes. Avoid boiling the mixture, as this can make the bars too hard. A gentle melting is what we’re after.
-
Remove the saucepan from the heat. Immediately add the oats and the optional pinch of salt.
-
Stir well to ensure that all the oats are evenly coated with the peanut butter and honey mixture. The mixture will be thick and sticky.
-
Pour the oat mixture into the prepared baking pan.
-
Using a spatula or your hands (lightly dampened to prevent sticking), firmly press the mixture evenly into the pan. The more firmly you press, the more cohesive your bars will be. Aim for a compact and uniform layer.
-
Cover the pan with plastic wrap or foil and refrigerate for at least 6 hours, or preferably overnight, to allow the bars to firm up completely. This step is essential for achieving the right texture.
-
Once the granola mixture is fully chilled and firm, lift the block of granola from the pan using the foil or parchment paper overhang.
-
Place the granola block on a cutting board and use a sharp knife to cut it into 12 equal-sized bars.
-
Wrap the granola bars individually to extend their shelf life.
Expert Tips & Tricks
- Peanut Butter Perfection: Use a good quality, creamy peanut butter for the best flavor and texture. Natural peanut butter works well, but be sure to stir it thoroughly before measuring, as the oil tends to separate.
- Oat Options: Rolled oats (also known as old-fashioned oats) are ideal for this recipe. Quick-cooking oats can be used in a pinch, but they may result in a slightly softer bar. Steel-cut oats are not recommended, as they require a longer cooking time.
- Heat Control: Keep the heat low when melting the peanut butter and honey. High heat can cause the mixture to burn or become too hard.
- Pressing Power: Pressing the oat mixture firmly into the pan is key to preventing the bars from crumbling. Use the bottom of a measuring cup or a piece of parchment paper to help press the mixture evenly.
- Too Sticky? If the mixture is too sticky to handle, lightly dampen your hands with water or spray them with cooking spray.
- Troubleshooting Hard Bars: If your bars turn out too hard, it may be due to overcooking the peanut butter and honey mixture. Next time, reduce the heat or cooking time.
- Troubleshooting Crumbly Bars: If your bars are too crumbly, try adding a tablespoon or two of additional peanut butter or honey to help bind the ingredients together. Pressing the mixture more firmly into the pan can also help.
Serving & Storage Suggestions
These granola bars are perfect as a quick breakfast, an afternoon snack, or a pre- or post-workout energy boost. Serve them chilled or at room temperature.
Store the granola bars in an airtight container in the refrigerator for up to 1 week, or in the freezer for up to 2 months. If freezing, wrap the bars individually in plastic wrap to prevent freezer burn. Thaw frozen bars in the refrigerator or at room temperature before serving.
Nutritional Information
(Approximate values per bar)
| Nutrient | Amount per Serving | % Daily Value |
|---|---|---|
| Calories | 171 kcal | 9% |
| Total Fat | 7g | 11% |
| Saturated Fat | 1g | 5% |
| Cholesterol | 0mg | 0% |
| Sodium | 57mg | 2% |
| Total Carbohydrate | 24g | 8% |
| Dietary Fiber | 3g | 12% |
| Sugars | 10g | – |
| Protein | 6g | 12% |
Variations & Substitutions
- Gluten-Free: Ensure that you use certified gluten-free oats.
- Vegan: Use maple syrup or agave nectar in place of honey.
- Nut-Free: Substitute the peanut butter with sunflower seed butter (sunbutter) or tahini.
- Chocolate Chip Granola Bars: Stir in ½ cup of chocolate chips (dark, milk, or white) after adding the oats.
- Dried Fruit Granola Bars: Add ½ cup of your favorite dried fruits, such as raisins, cranberries, or chopped apricots, after adding the oats.
- Nutty Granola Bars: Include ½ cup of chopped nuts, such as almonds, walnuts, or pecans, after adding the oats.
- Spice It Up: Add ½ teaspoon of ground cinnamon, nutmeg, or ginger to the mixture for a warm, spiced flavor.
- Seeds: Add in flax seeds, chia seeds, or hemp seeds for an extra nutritional boost.
- Coconut: Mix in some shredded coconut for added texture and flavor.
FAQs (Frequently Asked Questions)
Q: Can I use chunky peanut butter?
A: Yes, you can use chunky peanut butter, but it will result in a slightly more textured granola bar.
Q: My granola bars are too sticky. What did I do wrong?
A: You may have used too much honey or not pressed the mixture firmly enough into the pan. Next time, reduce the amount of honey slightly and ensure that you press the mixture firmly.
Q: Can I bake these instead of refrigerating them?
A: While this recipe is designed for refrigeration, you could experiment with baking at a low temperature (around 250°F) for about 20-30 minutes to achieve a slightly different texture.
Q: How long do these granola bars last?
A: These granola bars will last for up to 1 week in the refrigerator or up to 2 months in the freezer.
Q: Can I use a different type of sweetener besides honey?
A: Yes, you can substitute honey with maple syrup or agave nectar. The taste may vary slightly, but the consistency should remain similar.
Final Thoughts
These 3-ingredient granola bars are a testament to the fact that simple can be truly satisfying. They’re a blank canvas for your creativity – feel free to experiment with different add-ins and variations to create your perfect personalized snack. So ditch the store-bought bars, gather your ingredients, and get ready to enjoy a delicious and wholesome treat that you made yourself. I’d love to hear about your creations, so feel free to share your variations and feedback! Perhaps you’ll discover your own dorm-room staple that brings back memories for years to come.