
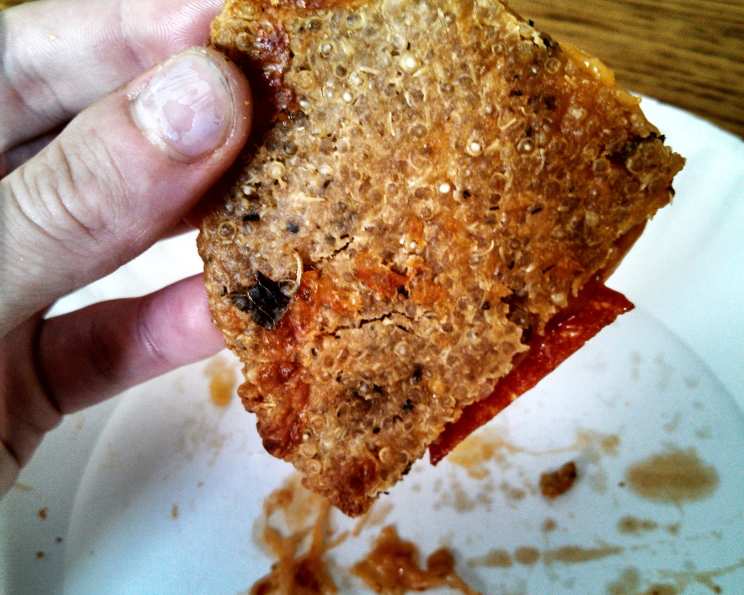
Unleash Your Inner Pizzaiolo: 3-Ingredient Quinoa Pizza Crust (No Soaking!)
I remember one particularly hectic Friday night, juggling a catering order and the demands of two hungry kids. Pizza seemed like the only solution, but the thought of the usual doughy, carb-heavy crust filled me with dread. Then, I recalled a conversation with a health-conscious friend who’d raved about a quinoa crust. Intrigued, I started experimenting. The first few attempts were disasters – either too soggy or rock-hard. But after countless iterations (and some frantic Googling), I landed on this incredibly simple, surprisingly delicious, three-ingredient version. Now, it’s my go-to for a quick, healthy, and satisfying pizza fix.
Recipe Overview
- Prep Time: 5 minutes
- Cook Time: 45 minutes
- Total Time: 50 minutes
- Servings: 1
- Yield: 1 pizza
- Dietary Type: Gluten-Free
Ingredients
- ¼ cup uncooked quinoa
- ½ cup water
- ¼ – ½ cup almond flour (or all-purpose flour)
- 1 teaspoon olive oil (or canola oil)
Equipment Needed
- Small saucepan
- Small mixing bowl
- Baking sheet
- Parchment paper
Instructions
-
Begin by preheating your oven to 425 degrees Fahrenheit. This high temperature is key to achieving a crispy crust.
-
In a small saucepan, combine the quinoa and water. Add a tiny pinch of salt (optional, but it enhances the flavor). Bring the mixture to a boil over medium-high heat.
-
Once boiling, immediately reduce the heat to a low simmer. Cover the saucepan tightly and let it simmer for approximately 15 minutes, or until the quinoa is soft and fluffy.
Important Note: You’re not aiming for completely dry quinoa here. There should be a couple of teaspoons of water remaining in the pan after the cooking time. This residual moisture is crucial for binding the crust together. However, don’t overdo it – if there’s too much water, drain the quinoa slightly.
-
While the quinoa is still warm, transfer it to a small mixing bowl. Add the remaining liquid from the saucepan (again, a tablespoon or two at most), the olive oil, and the almond flour.
-
Using your hands (this is the most effective method!), thoroughly combine all the ingredients. Mush everything together until a dough-like texture is achieved. The mixture should be moist enough to hold together, but not sticky. Adjust the amount of almond flour as needed to achieve the right consistency. If the dough is too wet, add a bit more flour, a tablespoon at a time. If it’s too dry, add a tiny splash of water.
-
(Optional, but highly recommended for flavor!) Now is the time to add any desired seasonings to the dough. I often use a blend of cheese, garlic powder, onion powder, basil, oregano, dill, and a pinch of sriracha for a little kick. Feel free to experiment with your favorite herbs and spices. A simple Italian seasoning blend also works wonderfully.
-
Line a baking sheet with parchment paper. This prevents the crust from sticking and makes for easy cleanup.
-
Transfer the quinoa dough onto the prepared baking sheet. Using your hands or a spatula, shape the dough into a circle. Aim for a crust that is approximately 1 centimeter (about ⅓ inch) thick and about 6 inches in diameter. Don’t worry about making it perfectly round; a rustic shape is perfectly acceptable.
-
Bake the crust for 10 minutes. Then, carefully flip the crust over and bake for another 10 minutes. This flipping process is essential for achieving an evenly crisped crust.
-
Continue baking and flipping the crust every few minutes, until both sides are golden brown and crispy to the touch. The total baking time will vary depending on your oven, but it usually takes around 25-30 minutes in total. The key is to keep a close eye on the crust and adjust the baking time as needed. If you skip the flipping, you run the risk of a soggy, unevenly cooked crust.
-
Remove the crust from the oven and carefully remove the parchment paper.
-
Now comes the fun part – adding your favorite pizza toppings! Spread a layer of tomato sauce, sprinkle with cheese, and add any other toppings you desire.
-
Return the pizza to the baking sheet (without the parchment paper this time) and bake for another 10 minutes, or until the cheese is melted and bubbly and the toppings are heated through.
-
Remove the pizza from the oven, let it cool slightly, cut it into pieces, and enjoy!
Expert Tips & Tricks
- Don’t skip the flipping! This is the most crucial step in achieving a crispy crust.
- Pre-cooking your toppings (especially vegetables like mushrooms or peppers) can help prevent the crust from becoming soggy.
- For an extra crispy crust, try brushing it with a little olive oil before adding the toppings.
- If you’re short on time, you can cook the quinoa in advance and store it in the refrigerator until you’re ready to make the crust.
- Experiment with different flours. While almond flour adds a slightly nutty flavor, you can also use all-purpose flour, gluten-free flour blends, or even oat flour.
- Add a touch of sweetness to the dough by incorporating a teaspoon of honey or maple syrup.
- To prevent sticking, make sure your parchment paper is of good quality.
- If you desire a thicker crust, gently press the dough into a smaller circle on the baking sheet before baking.
Serving & Storage Suggestions
Serve your quinoa pizza immediately for the best flavor and texture. Leftovers can be stored in an airtight container in the refrigerator for up to 3 days. To reheat, bake in a preheated oven at 350 degrees Fahrenheit until warmed through and the crust is crispy, or microwave for a quicker (but less crispy) option. Freezing is not recommended as it can affect the texture of the crust.
Nutritional Information
| Nutrient | Amount per Serving | % Daily Value |
|---|---|---|
| Calories | 297 kcal | – |
| Total Fat | 7.8g | 12% |
| Saturated Fat | 4.3g | 21% |
| Cholesterol | 0mg | 0% |
| Sodium | 6.3mg | 0% |
| Total Carbohydrate | 48.9g | 16% |
| Dietary Fiber | 6.2g | 24% |
| Sugars | 0.1g | 0% |
| Protein | 10g | 19% |
Note: Nutritional information is an estimate and may vary based on specific ingredients and portion sizes.
Variations & Substitutions
- Vegan Pizza: Use vegan cheese and plant-based toppings.
- Spicy Pizza: Add a pinch of red pepper flakes to the dough or use a spicy tomato sauce.
- Mediterranean Pizza: Top with feta cheese, olives, sun-dried tomatoes, and artichoke hearts.
- Pesto Pizza: Use pesto instead of tomato sauce as the base.
- Breakfast Pizza: Top with scrambled eggs, bacon, and cheese.
- Different Flours: Try using brown rice flour or tapioca flour for a different flavor and texture.
FAQs (Frequently Asked Questions)
Q: Can I use pre-cooked quinoa for this recipe?
A: Yes, you can! Just make sure to use ½ cup of cooked quinoa and reduce the amount of water accordingly.
Q: Can I make this recipe ahead of time?
A: You can cook the quinoa ahead of time, but it’s best to assemble and bake the crust right before serving for the best texture.
Q: My crust is too soggy. What did I do wrong?
A: Make sure you don’t add too much water when cooking the quinoa. Also, be sure to flip the crust frequently during baking to ensure it crisps up evenly.
Q: Can I use regular cheese instead of almond cheese?
A: Absolutely! Feel free to use any cheese you prefer.
Q: What other toppings work well with this crust?
A: The possibilities are endless! Get creative and use your favorite pizza toppings. Vegetables, meats, and different cheeses all work well.
Final Thoughts
I hope this simple quinoa pizza crust recipe inspires you to get creative in the kitchen and enjoy a healthier version of a classic comfort food. It’s a fantastic way to use up leftover quinoa and experiment with different flavors and toppings. Don’t be afraid to adjust the recipe to suit your own tastes and preferences. Once you’ve mastered the basic crust, the possibilities are endless! Share your creations and feedback – I’d love to see what delicious pizzas you come up with! Why not try pairing it with a light salad and a glass of sparkling water for a complete and satisfying meal?