
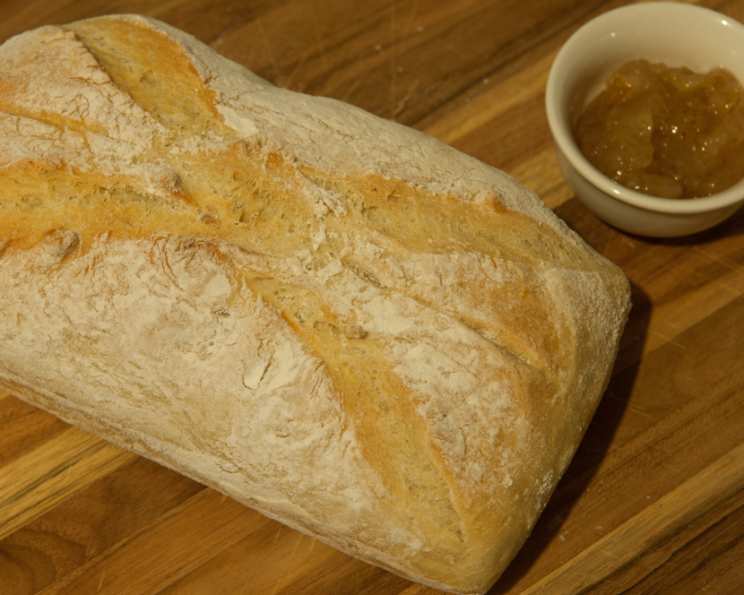
5-Minute Artisan Bread: Fresh Bread, Effortlessly
The aroma of freshly baked bread has always been a siren song for me. My grandmother, a woman who could coax magic from the simplest ingredients, had a knack for baking that filled our home with warmth and a comforting, yeasty scent. I can still picture her flour-dusted hands deftly shaping dough, the rhythmic thud as she kneaded it on a well-worn wooden board, and the sheer joy on her face as she pulled a golden-brown loaf from the oven. I yearned to capture that magic, but the traditional kneading and proving always seemed daunting. Until I discovered this game-changing 5-minute artisan bread recipe. It’s brought the joy of fresh bread back into my life without the fuss.
Recipe Overview
- Prep Time: 5 minutes
- Rise Time: 2 hours
- Cook Time: 30 minutes
- Total Time: 2 hours 35 minutes (includes rise time)
- Yields: 4 1-pound loaves
- Dietary Type: Vegetarian
Ingredients
- 3 cups lukewarm water
- 2 tablespoons granulated yeast or (7 1/4 g) packets granulated yeast
- 1 1/2 tablespoons kosher salt or 1 1/2 tablespoons other coarse salt
- 6 1/2 cups unsifted unbleached all-purpose flour (not strong)
Equipment Needed
- 5-quart bowl or resealable, lidded (not airtight) plastic food container or food-grade bucket
- Wooden spoon, high-capacity food processor (14 cups or larger) fitted with the dough attachment, or heavy-duty stand mixer fitted with the dough hook
- Serrated knife
- Baking sheet or pizza peel
- Empty broiler tray
- Oven
Instructions
-
Prepare the Water: Warm the water slightly. It should feel just a little warmer than body temperature. Warm water will help the dough rise to the right point for storage in about 2 hours. If using cold water, it will need 3-4 hours.
-
Combine Water and Yeast: Add the yeast to the water in a 5-quart bowl or, preferably, in a resealable, lidded (not airtight) plastic food container or food-grade bucket. Don’t worry about getting it all to dissolve at this stage.
-
Mix in Flour and Salt: Mix in the flour and salt – kneading is unnecessary. Add all of the flour at once, measuring it in with dry-ingredient measuring cups, by gently scooping up the flour, then sweeping the top level with a knife or spatula. Don’t press down into the flour as you scoop, or you’ll throw off the measurement. Mix with a wooden spoon, a high-capacity food processor (14 cups or larger) fitted with the dough attachment, or a heavy-duty stand mixer fitted with the dough hook until the mixture is uniform. If you’re hand mixing and it becomes too difficult to incorporate all the flour with the spoon, you can reach into your mixing vessel with very wet hands and press the mixture together. Don’t knead; it isn’t necessary. You’re finished when everything is uniformly moist, without dry patches. It takes a few minutes and will yield a dough that is wet and loose enough to conform to the shape of its container.
-
Allow to Rise: Cover the bowl or container with a lid (not airtight, or it could explode the lid off). Allow the mixture to rise at room temperature until it begins to collapse (or at least flattens on the top), approximately 2 hours, depending on room temperature and initial water temperature. Longer rising times, up to 5 hours, won’t harm the result.
-
Refrigerate and Store: You can use a portion of the dough any time after this rising period. Fully refrigerated dough is less sticky and easier to work with than dough at room temperature. The dough can be stored in the fridge for up to 14 days.
-
Prepare for Baking: Prepare your loaf tin, tray, or whatever you’re baking it in/on. Sprinkle the surface of your refrigerated dough with flour. Pull up and cut off a grapefruit-size piece of dough (approximately 1 lb), using a serrated knife.
-
Shape the Loaf: Hold the mass of dough in your hands and add a little more flour as needed so it won’t stick to your hands. Gently stretch the surface of the dough around to the bottom on all four sides, rotating the ball a quarter-turn as you go. Most of the dusting flour will fall off – that’s fine; it isn’t meant to be incorporated. The bottom of the loaf may appear to be a collection of bunched ends, but it will sort itself out during resting and baking.
-
Rest and Rise: Rest the loaf and let it rise in the form, on the tray/pizza peel, for about 40 minutes. Depending on the age of the dough, you may not see much rise during this period. That’s fine; more rising will occur during baking.
-
Preheat the Oven: Twenty minutes before baking, preheat the oven to 450°F. Place an empty broiler tray for holding water on any other shelf that won’t interfere with the rising bread.
-
Dust and Slash: Dust the top of the loaf liberally with flour, which will allow the slashing knife to pass without sticking. Slash a quarter-inch deep cross, diagonal lines, or tic-tac-toe pattern on top using a serrated knife.
-
Bake: After a 20-minute preheat, you’re ready to bake, even though the oven thermometer won’t be at full temperature yet. Put your loaf in the oven. Pour about 1 cup of hot water (from the tap) into the broiler tray and close the oven to trap the steam.
-
Baking Time: Bake for about 30 minutes, or until the crust is nicely browned and firm to the touch.
-
Cool and Enjoy: Let the bread cool slightly before slicing and enjoying!
-
Store Remaining Dough: Store the rest of the dough in the fridge in your lidded (not airtight) container and use it over the next 14 days. The flavor and texture improves, becoming like sourdough. Even 24 hours of storage improves the flavor.
Expert Tips & Tricks
- Water Temperature is Key: Don’t overheat the water, or you risk killing the yeast. Aim for slightly warmer than body temperature.
- Don’t Over-Flour: Be mindful of the amount of flour you add when shaping the loaf. Too much flour will result in a dense bread.
- Steam is Essential: The steam created by the hot water in the broiler tray is crucial for achieving a beautiful crust. If you don’t have a broiler tray, you can use a cast-iron skillet.
- Slash Deeply: Don’t be afraid to slash deeply into the loaf. This allows the bread to expand properly during baking and prevents cracking.
- Experiment with Baking Surfaces: Try baking the bread on a preheated pizza stone for an even crispier crust.
- Remoska Baking: If you have a Remoska cooker, this bread bakes beautifully in it. Follow the same shaping and resting instructions and bake until golden brown.
Serving & Storage Suggestions
This artisan bread is fantastic served warm with a pat of butter, a drizzle of olive oil, or alongside a hearty soup or stew. It’s also perfect for sandwiches or toast. Store leftover bread at room temperature in a bread bag or airtight container for up to 2-3 days. For longer storage, wrap tightly in plastic wrap and freeze for up to 2 months. To reheat, thaw completely and bake in a preheated oven at 350°F for 10-15 minutes, or until warmed through.
Nutritional Information
| Nutrient | Amount per Serving | % Daily Value |
|---|---|---|
| Calories | 783.3 kcal | N/A |
| Calories from Fat | 27g | N/A |
| Total Fat | 3 g | 4% |
| Saturated Fat | 0.5 g | 2% |
| Cholesterol | 0 mg | 0% |
| Sodium | 2632.4 mg | 109% |
| Total Carbohydrate | 160.6 g | 53% |
| Dietary Fiber | 9.1 g | 36% |
| Sugars | 0.6 g | N/A |
| Protein | 26.4 g | 52% |
Note: Nutritional information is an estimate and may vary based on specific ingredients and preparation methods.
Variations & Substitutions
- Whole Wheat Bread: Substitute 1-2 cups of the all-purpose flour with whole wheat flour for a nuttier flavor and added fiber.
- Herb-Infused Bread: Add 1-2 tablespoons of dried herbs, such as rosemary, thyme, or oregano, to the flour mixture for a savory twist.
- Olive Bread: Add 1/2 cup of chopped olives to the dough for a Mediterranean-inspired loaf.
- Cheese Bread: Add 1 cup of shredded cheese, such as Parmesan or cheddar, to the dough for a cheesy delight.
- Sweet Bread: Add 1/4 cup of sugar and 1 teaspoon of cinnamon to the flour mixture for a slightly sweet bread.
- Gluten-Free: Use a gluten-free all-purpose flour blend, but be prepared for a slightly different texture and rise. You may need to experiment with the amount of water.
FAQs (Frequently Asked Questions)
Q: Can I use active dry yeast instead of instant yeast?
A: Yes, you can. Just make sure to proof the active dry yeast in the lukewarm water for 5-10 minutes before adding it to the flour.
Q: My dough didn’t rise much. What could be the reason?
A: Possible reasons include using expired yeast, water that was too hot or too cold, or a room that was too cold. Ensure your yeast is fresh and the water is lukewarm.
Q: Can I freeze the dough instead of refrigerating it?
A: Yes, you can freeze the dough after the initial rise. Divide the dough into portions, wrap tightly in plastic wrap, and freeze for up to 3 months. Thaw completely in the refrigerator before shaping and baking.
Q: My bread is too dense. What did I do wrong?
A: Over-flouring the dough during shaping is a common cause of dense bread. Be gentle and use just enough flour to prevent sticking.
Q: The crust is getting too dark before the inside is cooked. What should I do?
A: Tent the loaf with aluminum foil during the last 10-15 minutes of baking to prevent the crust from burning.
Final Thoughts
This 5-minute artisan bread recipe is a true gift for anyone who craves the taste and aroma of fresh bread but doesn’t have the time for traditional methods. It’s incredibly simple, forgiving, and yields a delicious loaf that’s sure to impress. Don’t be afraid to experiment with different variations and find your perfect loaf. So, go ahead, embrace the simplicity, and experience the joy of homemade bread! I encourage you to try it and share your creations with me. I would suggest pairing it with a creamy tomato soup.