
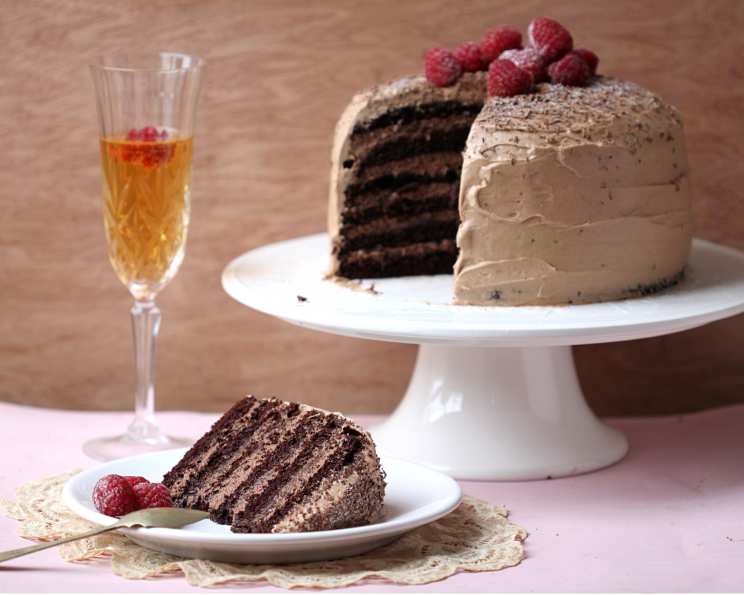
6 Layer Dreamy Chocolate Mousse Cake – Paula Deen
The scent of chocolate always takes me back to my grandmother’s kitchen. She wasn’t a fancy baker, but her chocolate cake was legendary. It was simple, unfussy, and every bite felt like a warm hug. This 6-Layer Dreamy Chocolate Mousse Cake? It’s that feeling amplified sixfold. It’s a celebration of chocolate, pure and simple, and a guaranteed showstopper at any gathering, just like the cakes Grandma used to make. It’s a labor of love, sure, but one that rewards you handsomely with every decadent layer.
Recipe Overview
- Prep Time: 1 hour
- Cook Time: 25 minutes
- Total Time: 5 hours, 25 minutes (includes chilling time)
- Servings: 16
- Yields: 16 pieces of cake
- Dietary Type: Not specified
Ingredients
For the Cake:
- 2 cups all-purpose flour
- 2 cups sugar
- ¾ cup unsweetened cocoa powder
- 1 ½ teaspoons baking powder
- 1 ½ teaspoons baking soda
- 1 teaspoon salt
- 1 cup milk
- 1 cup strong brewed coffee
- ¾ cup vegetable oil
- 2 large eggs
For the Dreamy Chocolate Mousse:
- 1 (1/4 ounce) envelope unflavored gelatin
- 3 tablespoons cold water
- ¼ cup boiling water
- 1 cup sugar
- ½ cup unsweetened cocoa powder
- 3 cups heavy whipping cream
For the Chocolate Fudge Frosting:
- 1 cup sugar
- 1 cup heavy whipping cream
- 5 (1 ounce) unsweetened chocolate squares
- 10 tablespoons butter
- 1 cup confectioners’ sugar
For the Garnish:
- Grated chocolate
- Chocolate curls (optional)
Equipment Needed
- 3 (9-inch) square or round cake pans
- Electric mixer
- Serrated knife
- Cake plate
- Wire racks
- Small bowl
- Medium bowl
- Medium saucepan
Instructions
-
Preheat your oven to 350°F (175°C). Grease and flour 3 (9-inch) square or round cake pans. This step is crucial to prevent the cake from sticking.
-
In a large bowl, combine the dry ingredients: flour, sugar, cocoa, baking powder, baking soda, and salt. Whisk them together to ensure even distribution.
-
Add the wet ingredients: milk, coffee, oil, and eggs to the dry ingredients.
-
Beat the mixture at medium speed with an electric mixer until smooth. Don’t overmix; just combine until everything is incorporated.
-
Pour the batter evenly into the prepared pans. Use a kitchen scale if you want absolutely even layers.
-
Bake for 23 to 25 minutes, or until a wooden pick inserted in the center comes out clean. Start checking at 23 minutes. If the pick has wet batter, continue baking for a few more minutes. Be careful not to overbake, as this will result in a dry cake.
-
Let cool in the pans for 10 minutes. This allows the cake to firm up slightly, making it easier to remove.
-
Remove the cakes from the pans and let them cool completely on wire racks. Make sure they are completely cool before frosting.
-
Using a serrated knife, carefully cut each cake layer in half horizontally to make 6 layers. A long, thin serrated knife works best for this task. Gently saw back and forth to avoid tearing the cake.
-
Place 1 layer, cut side up, on a cake plate.
-
Spread with one-fifth of the Dreamy Chocolate Mousse. Be generous with the mousse!
-
Repeat the procedure with the remaining cake layers and mousse, stacking them carefully.
-
Freeze the cake for 1 hour. This helps the layers set and makes frosting easier.
-
Spread the Chocolate Fudge Frosting evenly over the top and sides of the cake. Make sure the frosting is at a spreadable consistency. If it’s too thin, chill it for a bit longer. If it’s too thick, gently warm it.
-
Garnish the sides of the cake with grated chocolate.
-
Garnish the top of the cake with chocolate curls, if desired. This adds an elegant touch!
Mousse Preparation:
-
In a small bowl, soften the gelatin in 3 tablespoons cold water. Let it stand for 2 minutes. This allows the gelatin to bloom and dissolve properly.
-
Add ¼ cup boiling water, stirring until the gelatin dissolves completely. Set aside to cool slightly.
-
In a small bowl, combine the sugar and cocoa powder. This prevents cocoa clumps in the mousse.
-
In a medium bowl, beat the heavy whipping cream at medium speed with an electric mixer until foamy.
-
Gradually add the sugar-cocoa mixture, beating until stiff peaks form. Be careful not to overwhip, as this can turn the cream grainy.
-
Stir in the gelatin mixture. Gently fold it in to avoid deflating the whipped cream.
-
Cover and chill for 4 hours. This is essential for the mousse to set properly.
Chocolate Fudge Frosting Preparation:
-
In a medium saucepan, combine the sugar and cream.
-
Bring the mixture to a boil over medium-high heat, then reduce the heat and simmer for 6 minutes, stirring frequently. This creates a rich, caramel-like base for the frosting.
-
Remove from heat and add the chocolate and butter, stirring until melted and smooth. Make sure there are no lumps.
-
Let cool for 10 minutes.
-
Whisk in the confectioners’ sugar.
-
Let the mixture cool until it reaches a spreadable consistency. You can place it in the refrigerator for a short period to speed up the process, but be careful not to let it get too firm.
Expert Tips & Tricks
- For a richer chocolate flavor, use dark chocolate cocoa powder.
- If you don’t have strong brewed coffee, you can use hot water mixed with instant espresso powder.
- To get perfectly even cake layers, use a cake leveler or a long serrated knife and a ruler.
- If you’re short on time, you can use store-bought chocolate frosting, but the homemade frosting really makes this cake special.
- For a neater presentation, chill the cake for a bit longer after frosting and then trim the edges with a sharp knife.
Serving & Storage Suggestions
Serve the cake chilled. It’s best enjoyed within 2-3 days of making it, as the mousse can start to soften after that. Store leftover cake in an airtight container in the refrigerator. It can also be frozen for up to a month. Thaw it in the refrigerator overnight before serving.
Nutritional Information
| Nutrient | Amount per Serving | % Daily Value |
|---|---|---|
| Calories | 719 kcal | N/A |
| Calories from Fat | 416 g | 58% |
| Total Fat | 46.3 g | 71% |
| Saturated Fat | 23.6 g | 117% |
| Cholesterol | 126 mg | 41% |
| Sodium | 260.2 mg | 10% |
| Total Carbohydrate | 78.5 g | 26% |
| Dietary Fiber | 4.1 g | 16% |
| Sugars | 57.6 g | 230% |
| Protein | 7 g | 14% |
Note: Percent Daily Values are based on a 2,000 calorie diet.
Variations & Substitutions
- For a mocha twist, add a tablespoon of instant espresso powder to the cake batter.
- You can substitute the vegetable oil with melted coconut oil for a slightly different flavor.
- To make a gluten-free version, use a gluten-free all-purpose flour blend.
- Add a layer of raspberry jam between the cake layers for a fruity complement to the chocolate.
- For a peanut butter version, swirl peanut butter into the mousse or frosting.
FAQs (Frequently Asked Questions)
Q: Can I make the mousse ahead of time?
A: Yes, the mousse can be made up to 24 hours in advance. Store it in the refrigerator until ready to use.
Q: Can I use different sized cake pans?
A: Yes, but you may need to adjust the baking time accordingly. Smaller pans will require longer baking times, while larger pans will require shorter baking times.
Q: How do I prevent the cake layers from sticking to the pan?
A: Grease and flour the pans thoroughly before pouring in the batter. You can also use parchment paper to line the bottoms of the pans.
Q: The frosting is too thick. What should I do?
A: Gently warm the frosting in the microwave or over a double boiler until it reaches a spreadable consistency. Be careful not to overheat it.
Q: Can I freeze the entire cake?
A: Yes, you can freeze the entire cake for up to a month. Wrap it tightly in plastic wrap and then in aluminum foil before freezing. Thaw it in the refrigerator overnight before serving.
Final Thoughts
This 6-Layer Dreamy Chocolate Mousse Cake is more than just a dessert; it’s an experience. From the rich, moist cake to the airy mousse and the decadent fudge frosting, every layer is a testament to the power of chocolate. Gather your ingredients, roll up your sleeves, and prepare to create a showstopper that will have everyone begging for seconds. Don’t be afraid to get creative with the garnishes and make it your own. And most importantly, don’t forget to savor every single bite!