
Auntie Anne’s 6-Week Bran Muffins: A Culinary Keepsake
The scent alone transports me back to my Auntie Anne’s kitchen – a warm, comforting aroma of cinnamon and baked goodness always wafting through the air. Her bran muffins were legendary, a perfect balance of healthy and delicious that even my pickiest cousins devoured. I remember sneaking into the kitchen as a child, hoping to steal a warm muffin fresh from the oven, the sweet, buttery topping melting in my mouth. This recipe, scribbled on a well-worn index card, is more than just a muffin recipe; it’s a piece of my childhood.
Recipe Overview
- Prep Time: 15 minutes
- Cook Time: 15-20 minutes (regular), 8-10 minutes (mini)
- Total Time: 30-35 minutes
- Servings: 24-30 muffins
- Yield: 24-30 muffins
- Dietary Type: Vegetarian
Ingredients
- 3 cups Bran Buds Cereal (Kellogg’s All Bran cereal preferred – the little stick type cereal…not flakes)
- 1 cup boiling water
- 1 1/2 cups oil
- 1 1/2 cups brown sugar
- 2 eggs, beaten
- 2 cups buttermilk
- 2 1/2 cups flour
- 2 1/2 teaspoons baking soda
- 1 teaspoon salt
Optional Topping
- Butter (optional)
- Cinnamon Sugar (optional)
Equipment Needed
- Large mixing bowls
- Measuring cups and spoons
- Muffin tins (regular or mini)
- Oven
Instructions
-
Preheat your oven to 400°F (200°C). This high temperature helps the muffins rise quickly and create a lovely dome.
-
In a large mixing bowl, pour 1 cup of boiling water over 1 1/2 cups of the Bran Buds cereal. Let this mixture stand while you prepare the other ingredients. This allows the bran to soften and become more palatable, contributing to a moist and tender muffin.
-
In a separate large bowl, combine the remaining 1 1/2 cups of dry Bran Buds, flour, baking soda, and salt. Whisk these dry ingredients together thoroughly to ensure even distribution of the baking soda, which is crucial for leavening.
-
In another separate bowl, cream together the oil and brown sugar until well combined. This can be done with a whisk or an electric mixer. The mixture should be smooth and slightly lighter in color.
-
Add the beaten eggs to the oil and sugar mixture and beat well. Ensure the eggs are fully incorporated into the wet ingredients for a homogenous batter.
-
Add the buttermilk alternately with the dry ingredients to the wet ingredients. Begin by adding about one-third of the dry ingredients, followed by half of the buttermilk. Mix until just combined. Then, add another third of the dry ingredients, followed by the remaining buttermilk. Finish with the final third of the dry ingredients. Be careful not to overmix, as this can lead to tough muffins.
-
Add the 1 1/2 cups of soaked bran buds to the batter and mix well. Make sure the soaked bran is evenly distributed throughout the mixture.
-
Store the batter in the refrigerator for up to 6 weeks. This is what makes these muffins so convenient! The batter can be made well in advance and baked fresh whenever you want a warm muffin.
-
When ready to bake, fill muffin tins approximately two-thirds full with batter.
-
Bake in the preheated 400°F (200°C) oven. Bake regular-size muffins for 15-20 minutes, or mini muffins for 8-10 minutes, or until a wooden skewer inserted into the center comes out clean.
-
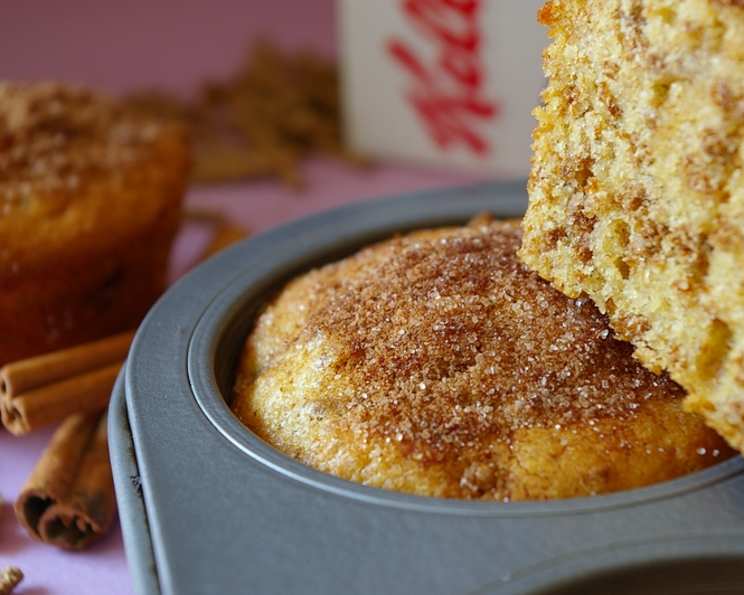
While the muffins are still warm, optionally dip the tops in melted butter and then cinnamon sugar. This adds a delicious, sweet crust that perfectly complements the bran. If you’re trying to reduce the sugar, you can skip the butter and just dip the hot muffins in cinnamon sugar. The sugar will still stick to the warm muffins.
Expert Tips & Tricks
- Don’t overmix the batter! Overmixing develops the gluten in the flour, resulting in tough, chewy muffins. Mix until just combined.
- Use an ice cream scoop to fill the muffin tins evenly. This ensures that all the muffins are the same size and bake at the same rate.
- For extra moist muffins, add a tablespoon of applesauce or mashed banana to the batter.
- To prevent the muffins from sticking to the tins, use paper liners or grease the tins well with cooking spray.
- If you don’t have buttermilk, you can make a substitute by adding 1 tablespoon of lemon juice or white vinegar to a liquid measuring cup and then filling the cup to the 2-cup line with milk. Let it stand for 5 minutes before using.
- For a richer flavor, try using melted coconut oil instead of vegetable oil.
Serving & Storage Suggestions
Serve these muffins warm, straight from the oven, for the best flavor and texture. They are delicious on their own or paired with a cup of coffee or tea.
Leftover muffins can be stored at room temperature in an airtight container for up to 3 days. For longer storage, keep them in the refrigerator for up to a week, or freeze them for up to 2 months. To reheat, warm them in the oven at 350°F (175°C) for a few minutes, or microwave them for a quick snack. Frozen muffins can be thawed at room temperature or in the refrigerator before reheating.
Nutritional Information
Note: Nutritional information is an estimate and may vary based on specific ingredients and portion sizes.
| Nutrient | Amount per Serving | % Daily Value |
|---|---|---|
| Calories | 262 kcal | – |
| Calories from Fat | 131 kcal | – |
| Total Fat | 14.6 g | 22% |
| Saturated Fat | 2.1 g | 10% |
| Cholesterol | 16.3 mg | 5% |
| Sodium | 336.3 mg | 14% |
| Total Carbohydrate | 33.4 g | 11% |
| Dietary Fiber | 5.2 g | 20% |
| Sugars | 17.4 g | – |
| Protein | 3.4 g | 6% |
Variations & Substitutions
- Add-ins: Stir in 1/2 cup of chopped nuts, dried fruit (such as raisins, cranberries, or chopped dates), chocolate chips, or shredded coconut to the batter for added flavor and texture.
- Spice it up: Add 1/2 teaspoon of ground cinnamon, nutmeg, or ginger to the dry ingredients for a warm, spiced flavor.
- Citrus zest: Add the zest of one orange or lemon to the batter for a bright, citrusy flavor.
- Gluten-free: Substitute a gluten-free all-purpose flour blend for the regular flour. Be sure to use a blend that contains xanthan gum or guar gum to help bind the ingredients together.
- Dairy-free: Use a non-dairy milk, such as almond milk, soy milk, or oat milk, in place of the buttermilk. You can also use a dairy-free yogurt substitute.
- Reduce sugar: Reduce the amount of brown sugar by 1/4 cup or substitute with a sugar alternative like stevia or monk fruit sweetener.
FAQs (Frequently Asked Questions)
Q: Why does this recipe call for boiling water?
A: The boiling water helps to soften the bran buds, making them more palatable and contributing to a moister muffin. It also helps to release more of the bran’s flavor.
Q: Can I use a different type of bran cereal?
A: While Kellogg’s All Bran cereal is preferred, you can use other bran cereals. However, be aware that the texture and flavor of the muffins may be slightly different. Avoid using bran flakes as they don’t provide the same texture.
Q: Can I freeze the baked muffins?
A: Yes, baked muffins freeze very well. Allow them to cool completely before wrapping them individually in plastic wrap and placing them in a freezer bag. They can be stored in the freezer for up to 2 months.
Q: How do I prevent the muffins from being too dry?
A: Avoid overbaking the muffins, and make sure to measure the ingredients accurately. Also, adding a tablespoon of applesauce or mashed banana to the batter can help to keep them moist.
Q: Can I make this recipe vegan?
A: Yes, you can substitute the eggs with flax eggs (1 tablespoon ground flaxseed mixed with 3 tablespoons water, let sit for 5 minutes) and use non-dairy buttermilk.
Final Thoughts
These 6-Week Bran Muffins are more than just a recipe; they are a testament to the power of simple, homemade goodness. My Auntie Anne’s recipe has stood the test of time, and I hope you enjoy making and sharing these muffins as much as my family does. Whether you bake them for a quick breakfast, a healthy snack, or a special treat, they are sure to be a hit. Don’t hesitate to experiment with variations and make them your own. And most importantly, share the love and enjoy the deliciousness!