
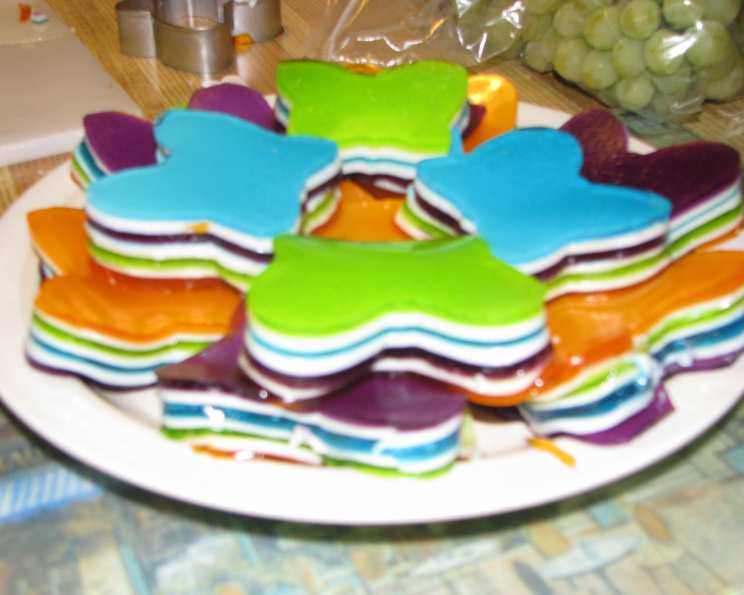
Rainbow Delight: Mastering the Art of 7-Layer Jello
The echoes of childhood birthday parties still linger in my memory, a kaleidoscope of colors and sugary glee. But amidst the frosted cakes and balloon animals, one dessert always commanded my attention: the mesmerizing 7-Layer Jello. It wasn’t just the vibrant hues or the wobbly texture that captivated me; it was the anticipation of each layer, the subtle differences in flavor, and the sheer artistry of its construction. This wasn’t mere gelatin; it was edible stained glass, a testament to patience and a celebration of pure, unadulterated fun. Recreating this childhood classic still brings a smile to my face, and I’m thrilled to share the secrets to perfecting this delightful treat.
Recipe Overview
- Prep Time: 30 minutes
- Cook Time: 0 minutes
- Total Time: 2 hours (plus chilling time)
- Servings: 27
- Yield: 1 (9×12 inch) pan
- Dietary Type: Not specified (can be modified to be gluten-free)
Ingredients
- 4 (3 ounce) boxes Jello gelatin, in different colors
- 6 (1/4 ounce) packets unflavored gelatin
- 1 (14 ounce) can sweetened condensed milk
Equipment Needed
- 9″x12″ pan
- Measuring cups and spoons
- Mixing bowls
- Whisk or fork
- Refrigerator
Instructions
- Begin by very lightly greasing a 9″x12″ pan. This will help with easy removal later.
- For the first layer, mix 1 box of your chosen color of Jello gelatin and 1 packet of unflavored gelatin with 1 cup of boiling water. Ensure both gelatins are fully dissolved.
- Pour this mixture into the prepared pan.
- Refrigerate until the layer is set, approximately 20 minutes. The consistency should be firm enough to support the next layer without mixing.
- While the first layer is setting, prepare the milk mixture. Dissolve 2 packets of unflavored gelatin in 1/4 cup of cold water. Let it sit for a few minutes to bloom.
- In a separate bowl, combine 1 can of sweetened condensed milk and 1 3/4 cup of boiling water.
- Add the bloomed gelatin to the sweetened condensed milk mixture. Stir until completely dissolved.
- Cool the milk mixture to room temperature. This is crucial to prevent it from melting the gelatin layer below.
- Once the milk mixture is at room temperature and the first Jello layer is set, carefully pour 1 cup of the milk mixture over the first Jello layer.
- Refrigerate until the milk layer is set, about 20-30 minutes.
- Repeat Step 2 with your next choice of Jello flavor, ensuring the dissolved Jello is at room temperature before gently pouring it over the set milk layer.
- Alternate Jello and milk layers, ending with your final Jello flavor.
- Keep in mind that as you add more layers, the setting time will increase.
- The Jello layers can be mixed up just before you need them to save time, but avoid mixing all of them at once at the very beginning, as they might start gelling before you have a chance to pour them into the pan.
- Once all layers are set, cut the Jello into 2″ squares or use small cookie or canapé cutters for fun shapes. Serve chilled.
Expert Tips & Tricks
- Greasing the Pan: Don’t overdo it with the grease. A very light coating of cooking spray is sufficient. Too much grease will cause the layers to slide around.
- Temperature Control: Room temperature is key! Always ensure that your gelatin mixtures are cool (but not setting) before pouring them onto the previous layer. This prevents the previous layer from melting and creating a muddy appearance.
- Patience is a Virtue: Rushing the setting process will lead to disaster. Allow each layer to fully set before adding the next. If you’re short on time, you can place the pan in the freezer for a few minutes to speed up the process, but monitor it closely!
- Bubble Troubles: If you notice bubbles forming on the surface of your Jello layers, gently skim them off with a spoon before refrigerating. This will create a smoother, more professional finish.
- Flavor Combinations: Experiment with different flavor combinations to create unique and exciting desserts. For example, try pairing complementary flavors like lime and coconut, or contrasting flavors like cherry and pistachio.
- Layer Consistency: For a firmer 7-layer Jello (more like Jello Jigglers), follow the recipe as is. For a softer, more traditional Jello texture, reduce the amount of unflavored gelatin slightly.
Serving & Storage Suggestions
Serve your 7-Layer Jello chilled, straight from the refrigerator. Presentation is key! Arrange the colorful squares on a platter or serving dish for a visually appealing treat.
Leftovers can be stored in an airtight container in the refrigerator for up to 3-4 days. The Jello may become slightly watery over time, but it will still be safe to eat.
Freezing is not recommended, as it can alter the texture of the gelatin and make it grainy.
Nutritional Information
Here’s an estimated nutritional breakdown per serving:
| Nutrient | Amount per Serving | % Daily Value |
|---|---|---|
| Calories | 100.4 kcal | N/A |
| Calories from Fat | 11 g | 11% |
| Total Fat | 1.3 g | 1% |
| Saturated Fat | 0.8 g | 4% |
| Cholesterol | 5 mg | 1% |
| Sodium | 80.4 mg | 3% |
| Total Carbohydrate | 19.4 g | 6% |
| Dietary Fiber | 0 g | 0% |
| Sugars | 18.8 g | 75% |
| Protein | 3.5 g | 6% |
Note: Nutritional information is an estimate and may vary based on specific ingredients and serving sizes.
Variations & Substitutions
- Vegan Option: Substitute the sweetened condensed milk with a vegan alternative like coconut condensed milk or cashew condensed milk. Ensure your gelatin is also plant-based (agar-agar can be used as a substitute).
- Sugar-Free: Use sugar-free Jello and a sugar-free condensed milk alternative to reduce the sugar content.
- Fruit Infusion: Add small pieces of fruit (such as berries or mandarin oranges) to the Jello layers for added texture and flavor. Ensure the fruit is well-drained before adding it to prevent the Jello from becoming watery.
- Themed Colors: Coordinate the Jello colors to match a specific theme or holiday. For example, red, white, and blue for the Fourth of July, or green and red for Christmas.
- Layer Variations: Add a layer of whipped cream (or a dairy-free alternative) between the Jello layers for a richer, more decadent dessert.
FAQs (Frequently Asked Questions)
Q: Can I use different sized pans for this recipe?
A: Yes, you can, but you may need to adjust the amount of Jello and milk mixture used per layer to achieve the desired thickness. A smaller pan will result in thicker layers.
Q: How do I prevent the layers from bleeding into each other?
A: The most important factor is ensuring that each layer is fully set before adding the next, and that the next layer is at room temperature. Patience is key!
Q: Can I speed up the setting process?
A: You can place the pan in the freezer for a few minutes to speed up the setting process, but monitor it closely to prevent the Jello from freezing solid.
Q: What if my milk mixture is lumpy?
A: Make sure the gelatin is completely dissolved in the cold water before adding it to the hot milk mixture. Whisk vigorously to ensure a smooth consistency. If lumps persist, you can strain the mixture before using it.
Q: How do I get the Jello out of the pan cleanly?
A: The light greasing of the pan in the first step is crucial. You can also dip the bottom of the pan in warm water for a few seconds to loosen the Jello before inverting it onto a serving platter.
Final Thoughts
Now that you’re armed with the knowledge and secrets to create a stunning 7-Layer Jello, it’s time to unleash your inner artist and get cooking! Don’t be afraid to experiment with different flavors, colors, and textures to create a truly unique dessert that will impress your family and friends. And most importantly, have fun! After all, this recipe is all about celebrating the simple joys of life, one colorful layer at a time. I encourage you to try this recipe, share your creations with others, and let me know what you think. Perhaps a scoop of vanilla ice cream or a dollop of whipped cream would be a delightful accompaniment to your masterpiece. Happy cooking!