
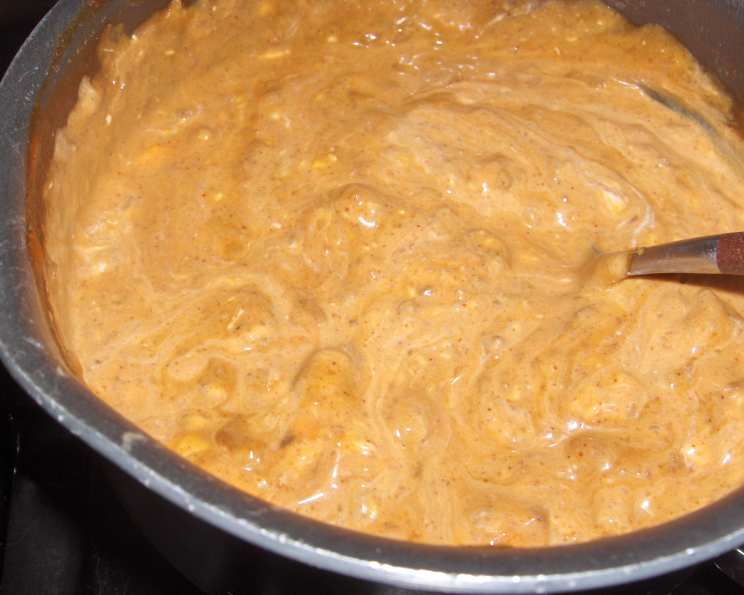
Abby’s Easy Chili Dip: A Crowd-Pleasing Classic
The first time I encountered this dip was at a college football game watch party. Amidst the roar of the crowd and the vibrant energy, this unassuming bowl of bubbling deliciousness stole the show. The host, a friend’s aunt named Abby, simply shrugged when I asked for the recipe, saying it was so easy it barely qualified as cooking. Little did I know, that simple combination of chili and cream cheese would become a staple in my own entertaining repertoire, a guaranteed crowd-pleaser that never fails to disappear in minutes.
Recipe Overview
- Prep Time: 2 minutes
- Cook Time: 3 minutes
- Total Time: 5 minutes
- Servings: 4
- Yield: About 2 cups
- Dietary Type: Varies (check ingredient labels for gluten-free or dairy-free options)
Ingredients
- 1 (15 ounce) can chili (with or without beans, your preference!)
- 1 (8 ounce) package cream cheese, softened
Equipment Needed
- Saucepan
- Spatula or Spoon
Instructions
- In a saucepan, combine the chili and softened cream cheese.
- Place the saucepan over medium heat.
- Stir constantly until the cream cheese is completely melted and the chili and cream cheese are fully combined. This should take approximately 3 minutes. Be careful not to let the mixture burn or stick to the bottom of the pan; frequent stirring is key.
- Once the dip is smooth and heated through, remove from heat.
- Serve immediately with your favorite dippers.
Expert Tips & Tricks
- Softening the Cream Cheese: Ensure the cream cheese is properly softened before adding it to the chili. This will make it easier to incorporate and prevent lumps in the final dip. You can leave it at room temperature for about 30 minutes or microwave it in 15-second intervals, being careful not to melt it completely.
- Spice Level Control: Choose a chili that matches your desired spice level. Mild, medium, or hot—it’s all up to personal preference! You can also add a pinch of cayenne pepper or a dash of hot sauce for extra heat.
- Microwave Method: For an even quicker preparation, this dip can be made in the microwave. Combine the ingredients in a microwave-safe bowl and microwave on high for 1 minute, stir, and then continue microwaving in 30-second intervals until melted and smooth, stirring between each interval.
- Slow Cooker Option: For parties or gatherings, keep the dip warm in a slow cooker. Combine the ingredients in the slow cooker and cook on low for 1-2 hours, or until melted and combined, stirring occasionally.
- Enhancing Flavor: For a more complex flavor profile, consider adding a tablespoon of your favorite taco seasoning or a dash of smoked paprika. A squeeze of lime juice at the end can also brighten the flavors.
Serving & Storage Suggestions
Serve Abby’s Easy Chili Dip warm with a variety of dippers such as:
- Tortilla chips (a classic choice)
- Corn chips
- Crackers
- Pretzel crisps
- Vegetable sticks (carrots, celery, bell peppers)
- Pita bread
For a more substantial appetizer, consider topping the dip with shredded cheddar cheese, diced onions, chopped cilantro, or a dollop of sour cream.
Storage: Leftover dip can be stored in an airtight container in the refrigerator for up to 3-4 days. Reheat gently in a saucepan on low heat or in the microwave, stirring frequently, until heated through. Freezing is not recommended as the cream cheese can change texture upon thawing.
Nutritional Information
(Estimated values per serving, based on typical chili and cream cheese brands)
| Nutrient | Amount per Serving | % Daily Value |
|---|---|---|
| Calories | 318 kcal | 16% |
| Total Fat | 26g | 40% |
| Saturated Fat | 15g | 75% |
| Cholesterol | 81mg | 27% |
| Sodium | 727mg | 30% |
| Total Carbohydrate | 14g | 5% |
| Dietary Fiber | 5g | 18% |
| Sugars | 2g | N/A |
| Protein | 10g | 20% |
Note: Nutritional information is an estimate and may vary based on specific ingredients and portion sizes.
Variations & Substitutions
- Spicy Kick: Add diced jalapeños or a dash of your favorite hot sauce to the chili for an extra spicy kick.
- Bean-Free Option: Use chili without beans for a smoother texture or to accommodate dietary restrictions.
- Vegetarian Version: Use a vegetarian or vegan chili alternative. Look for options made with plant-based protein sources like lentils or beans.
- Cheese Lovers: Stir in shredded cheddar, Monterey Jack, or pepper jack cheese along with the cream cheese for an extra cheesy experience.
- Healthy Swap: Use reduced-fat cream cheese for a slightly lighter version.
- Sour Cream Base: For a tangier dip, substitute half of the cream cheese with sour cream or Greek yogurt.
FAQs (Frequently Asked Questions)
Q: Can I make this dip ahead of time?
A: Yes, you can prepare the dip up to a day in advance. Store it in an airtight container in the refrigerator and reheat it gently before serving.
Q: My cream cheese is lumpy. How can I fix it?
A: Make sure your cream cheese is softened properly before combining it with the chili. If it’s still lumpy, continue stirring over low heat until smooth, or use an immersion blender to create a smoother texture.
Q: Can I use a different type of cheese?
A: While cream cheese provides the classic creamy texture, you can experiment with other soft cheeses like Neufchâtel or even a goat cheese for a tangier flavor.
Q: What if my dip is too thick?
A: Add a tablespoon of milk or water at a time until the dip reaches your desired consistency.
Q: Can I add ground beef or sausage to this recipe?
A: Absolutely! Brown and drain your ground meat of choice before adding it to the saucepan with the chili and cream cheese. This will add extra protein and flavor to your dip.
Final Thoughts
Abby’s Easy Chili Dip is more than just a recipe; it’s a symbol of effortless entertaining and shared moments. Its simplicity is its strength, and its deliciousness is undeniable. Whether you’re hosting a game day gathering, a casual get-together, or simply craving a comforting snack, this dip is sure to be a hit. So, gather your ingredients, fire up the stove, and get ready to experience the magic of this classic dip. Don’t be afraid to experiment with variations and make it your own. And most importantly, don’t forget to share the love (and the recipe!) with your friends and family. I bet they’ll ask for it again and again!