
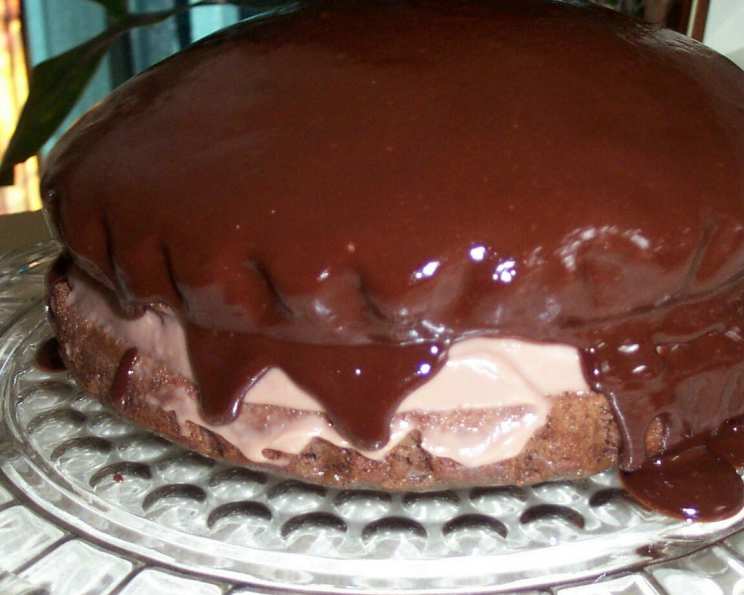
All Chocolate Boston Cream Pie: A Decadent Dream
My earliest memories of baking are tied to chocolate. Not just any chocolate, but the deeply rich, almost bitter scent of cocoa powder swirling into melted butter. My grandmother, a woman who believed chocolate could solve any problem, always had a Boston Cream Pie in her repertoire. While hers was the classic vanilla version, I remember dreaming of a chocolate iteration. This recipe, my take on that childhood fantasy, delivers an intensely chocolate experience in every bite, honoring her legacy while adding a personal twist.
Recipe Overview
- Prep Time: 45 minutes
- Cook Time: 20-25 minutes
- Total Time: 5 hours, 10-15 minutes (includes chilling time)
- Servings: 8-10
- Yield: 1 pie
- Dietary Type: Not Gluten-Free
Ingredients
CAKE
- 2 cups all-purpose flour
- 2 cups sugar
- 1 cup butter, softened
- 1 cup water
- ¼ cup sifted unsweetened cocoa powder, sifted
- 2 large eggs, lightly beaten
- ½ cup buttermilk
- 1 ¼ teaspoons baking soda
- 2 teaspoons vanilla
CHOCOLATE CREAM FILLING
- 1 (3 ounce) package instant chocolate pudding mix
- 1 ¼ cups half-and-half cream or 1 ¼ cups full-fat milk
- 1 (8 ounce) container Cool Whip frozen whipped topping, thawed
CHOCOLATE GLAZE
- ½ cup butter
- ¼ cup unsweetened cocoa powder, sifted
- 6 tablespoons 18% table cream or 6 tablespoons half-and-half cream
- 1 cup confectioners’ sugar
- 1 teaspoon vanilla
Equipment Needed
- Two 9-inch round cake pans
- Parchment paper
- Large mixing bowl
- Medium saucepan
- Whisk
- Electric mixer
- Cooling rack
- Heavy-bottomed saucepan
- Cake platter or large plate
Instructions
-
Preheat your oven to 350°F (175°C). This ensures even baking and prevents the cakes from becoming overly dry.
-
Grease two 9-inch round cake pans thoroughly with butter or cooking spray. Then, line the bottoms with parchment paper circles for easy release. Grease the parchment paper lightly as well. This double-layered approach will help prevent the cakes from sticking.
-
Combine the flour and sugar in a large bowl. Set this aside for now. This ensures that the dry ingredients are evenly distributed before the wet ingredients are added.
-
In a medium saucepan, combine the softened butter, water, and sifted cocoa powder. Heat the mixture over medium heat, stirring frequently, just until it comes to a boil. Be careful not to burn the mixture, as this will affect the final taste of the cake. Sifting the cocoa powder prevents lumps.
-
Pour the hot chocolate mixture over the flour mixture. Whisk to combine completely, ensuring no lumps remain. The heat from the chocolate mixture will help activate the gluten in the flour, resulting in a moist cake.
-
Whisk in the lightly beaten eggs, buttermilk, baking soda, and vanilla until everything is well combined. The buttermilk adds a subtle tang and helps to tenderize the cake. The baking soda provides lift, making the cake light and airy.
-
Divide the cake batter evenly between the prepared cake pans. Using a kitchen scale can help ensure even layers.
-
Bake for approximately 20-25 minutes, or until the cakes test done. Insert a toothpick into the center of each cake; if it comes out clean or with a few moist crumbs attached, the cakes are ready. Avoid overbaking, which can lead to dry cakes.
-
Cool the cakes in the pans for 10 minutes before inverting them onto a cooling rack to cool completely. Letting them cool slightly in the pans helps prevent them from breaking apart.
-
For the chocolate cream filling: In a bowl, combine the instant chocolate pudding mix and half-and-half cream (or full-fat milk). Beat with an electric mixer on high speed until the mixture thickens, about 3-4 minutes. The instant pudding mix provides structure and flavor to the filling.
-
Add the thawed Cool Whip topping and beat on low speed for about 2 minutes, or until thoroughly combined. The Cool Whip adds lightness and airiness to the filling.
-
Chill the filling until set, about 6-8 minutes. This prevents the filling from being too runny when assembling the pie.
-
For the chocolate glaze: In a heavy-bottomed saucepan, heat the butter, sifted cocoa powder, and 18% cream (or half-and-half cream) over medium heat. Bring the mixture to a simmer, stirring constantly. A heavy-bottomed pan helps prevent scorching.
-
Remove the pan from the heat. Slowly add the vanilla and confectioners’ sugar, whisking until smooth. Be careful to add the confectioners’ sugar slowly to prevent lumps from forming. Sifting the cocoa powder again prevents lumps.
-
Place one cake round upside down onto a cake platter or large plate.
-
Top with the chocolate pudding mixture, spreading it evenly over the cake layer. Don’t be shy with the filling – a generous layer is what makes this pie so decadent!
-
Place the second cake layer over the top of the pudding mixture.
-
Allow the glaze to cool slightly until it reaches a thick, pourable texture. This will ensure it coats the cake nicely without running off completely.
-
Slowly pour the glaze over the cooled cake, allowing it to run down the sides.
-
Place the pie in the refrigerator to chill for a minimum of 4 hours before slicing and serving. This allows the filling and glaze to set properly.
Expert Tips & Tricks
- For an even richer chocolate flavor, add a tablespoon of instant espresso powder to the chocolate mixture while heating it on the stovetop. The coffee will enhance the chocolate notes.
- If you don’t have buttermilk on hand, you can make a quick substitute by adding 1 ½ teaspoons of lemon juice or white vinegar to ½ cup of milk. Let it sit for 5 minutes before using.
- To prevent the cake layers from drying out, brush them with a simple syrup made from equal parts sugar and water, heated until the sugar dissolves, before assembling the pie.
- If the glaze becomes too thick, add a tablespoon of cream at a time until it reaches the desired consistency.
Serving & Storage Suggestions
Serve this All Chocolate Boston Cream Pie chilled. A dollop of whipped cream or a dusting of cocoa powder adds a beautiful final touch. Leftovers should be stored in an airtight container in the refrigerator. The pie will keep well for up to 3 days. While freezing isn’t recommended due to the whipped topping in the filling, individual slices can be frozen for up to a month. Thaw in the refrigerator before serving.
Nutritional Information
| Nutrient | Amount per Serving | % Daily Value |
|---|---|---|
| Calories | 913.2 kcal | N/A |
| Calories from Fat | 457g | 50% |
| Total Fat | 50.8 g | 78% |
| Saturated Fat | 33.2 g | 165% |
| Cholesterol | 159.9 mg | 53% |
| Sodium | 716.7 mg | 29% |
| Total Carbohydrate | 110.9 g | 36% |
| Dietary Fiber | 3 g | 12% |
| Sugars | 79.6 g | 318% |
| Protein | 8.7 g | 17% |
Note: Nutritional information is an estimate and may vary based on specific ingredients and preparation methods.
Variations & Substitutions
- Gluten-Free: Substitute the all-purpose flour with a gluten-free all-purpose flour blend. Be sure to check that your pudding mix and Cool Whip are also gluten-free.
- Dairy-Free: Use non-dairy milk, vegan butter, and a dairy-free whipped topping alternative. You’ll also need to ensure your instant pudding mix is dairy-free.
- Mint Chocolate: Add a teaspoon of peppermint extract to both the filling and the glaze for a refreshing twist.
- Mexican Chocolate: Add a pinch of cayenne pepper and cinnamon to the cake batter and glaze for a spicy and warm flavor profile.
- Coffee Infused: Replace half the water in the cake with strong brewed coffee for a mocha flavor.
FAQs (Frequently Asked Questions)
Q: Can I use a boxed chocolate cake mix instead of making the cake from scratch?
A: Yes, you can use one box of Duncan Hines deviled food chocolate cake mix (or similar) baked in two 8-inch round pans instead.
Q: Why do I need to sift the cocoa powder?
A: Sifting the cocoa powder removes any lumps, ensuring a smooth and even batter and glaze.
Q: Can I make the cake layers ahead of time?
A: Absolutely! The cake layers can be made a day in advance, wrapped tightly in plastic wrap, and stored at room temperature.
Q: How do I know when the glaze is the right consistency?
A: The glaze should be thick enough to coat the cake evenly but still pourable. If it’s too thin, it will run off the cake; if it’s too thick, it will be difficult to spread.
Q: Can I use regular whipped cream instead of Cool Whip?
A: Yes, you can use freshly whipped cream, but it might not hold its shape as well as Cool Whip. Stabilize the whipped cream with a bit of gelatin or cornstarch for best results.
Final Thoughts
This All Chocolate Boston Cream Pie is more than just a dessert; it’s a celebration of chocolate in its purest form. From the tender cake layers to the luscious filling and glossy glaze, every element works in harmony to create an unforgettable experience. I encourage you to bake this pie, share it with loved ones, and create your own sweet memories. And if you make any delicious tweaks, please let me know! Happy baking!