
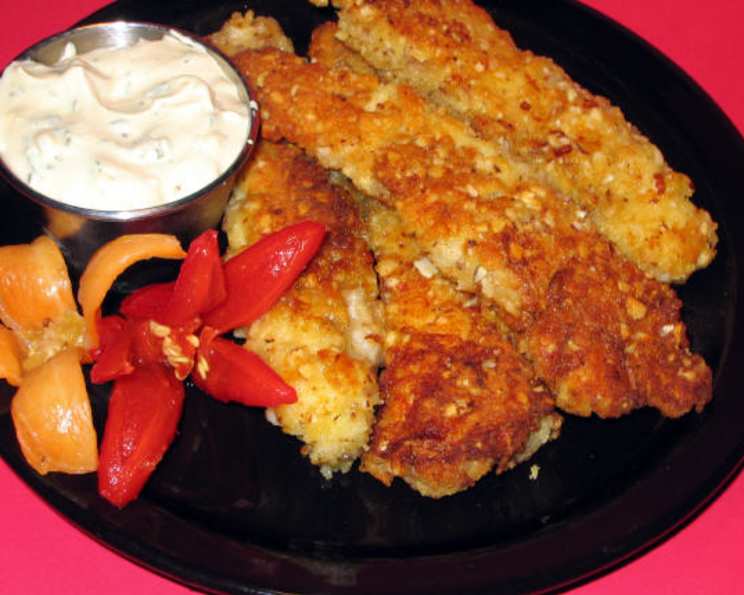
Almond Crusted Chicken Fingers: A Culinary Classic Reimagined
The aroma of toasted almonds always takes me back to my grandmother’s kitchen. She wasn’t a fancy chef, but she had a knack for making simple dishes extraordinary. One of my fondest memories is helping her prepare chicken cutlets with a crispy almond coating. The sweet, nutty fragrance filling the air, the satisfying crunch with each bite – it was pure comfort food. These Almond Crusted Chicken Fingers are my take on that cherished recipe, simplified for busy weeknights, but still packed with flavor and love.
Recipe Overview
- Prep Time: 15 minutes
- Cook Time: 10-12 minutes
- Total Time: 25-27 minutes
- Servings: 2
- Dietary Type: Gluten-Free Optional
Ingredients
- 1/2 cup skim milk
- 1 large egg
- 1/2 cup all-purpose flour (or gluten-free blend for a gluten-free option)
- 1/4 cup ground almonds
- 3/4 teaspoon salt, divided
- 2 boneless, skinless chicken breasts
- 1 tablespoon vegetable oil
- Black pepper, to taste
Equipment Needed
- Shallow bowls
- Whisk
- Large frying pan
- Baking sheet
- Tongs
Instructions
-
Begin by preheating your oven to 400°F (200°C). Lightly grease a baking sheet to prevent sticking.
-
Prepare the wet mixture: In a shallow bowl, whisk together the skim milk and egg until well combined. Set aside.
-
Create the dry coating: Place half of the all-purpose flour in another shallow bowl. In a separate bowl, combine the ground almonds with the remaining flour. To each of these bowls, add 1/4 teaspoon of the salt. Mix well.
-
Prepare the chicken: Slice the boneless, skinless chicken breasts into finger-sized strips, about 1/2 inch thick. Sprinkle both sides of the chicken strips generously with the remaining 1/4 teaspoon of salt and black pepper.
-
Coat the chicken: This is where the magic happens! Lightly coat each chicken strip with the flour, followed by a dip in the milk mixture, and finally, coat thoroughly with the almond mixture, ensuring the almonds adhere well. Press the coating on gently to ensure it sticks.
-
Sear the chicken: Heat the vegetable oil in a large frying pan over medium-high heat. The oil should be shimmering but not smoking.
-
Cook in batches: Carefully add the chicken strips to the hot pan, making sure not to overcrowd it. Cook in two batches, adding more oil if necessary, until golden brown on each side, about 1 to 2 minutes per side. Remember, the chicken will not be fully cooked at this stage; this step is simply to create a beautiful, crispy crust.
-
Bake to perfection: Transfer the partially cooked chicken fingers to the prepared baking sheet. Bake in the center of the preheated oven until the chicken is cooked through and reaches an internal temperature of 165°F (74°C), about 6 to 8 minutes. A meat thermometer is your best friend here!
-
Rest and serve: Remove the chicken fingers from the oven and let them rest for a minute or two before serving. This allows the juices to redistribute, resulting in a more tender and flavorful bite.
Expert Tips & Tricks
- Achieving Maximum Crunch: For an extra crispy crust, try toasting the ground almonds lightly in a dry pan before mixing them with the flour. This enhances their nutty flavor and creates a more satisfying crunch.
- Preventing Soggy Coating: Make sure the frying pan is hot enough before adding the chicken. If the pan isn’t hot enough, the chicken will absorb more oil, resulting in a soggy crust.
- Consistent Sizing: Cut the chicken strips as uniformly as possible to ensure even cooking. This prevents some pieces from being overcooked while others are still raw.
- Flavor Boost: Add a pinch of garlic powder or paprika to the almond mixture for an extra layer of flavor.
- Make-Ahead Prep: The chicken can be coated with the almond mixture ahead of time and stored in the refrigerator for up to 2 hours. This is a great time-saver for busy weeknights. Just remember to bring the chicken to room temperature for about 15 minutes before frying.
Serving & Storage Suggestions
Serve these Almond Crusted Chicken Fingers immediately for the best taste and texture. They pair perfectly with a vibrant coleslaw, crispy oven-baked fries, or a simple green salad. For a fun dipping sauce, try honey mustard, ranch dressing, or a homemade aioli.
Leftover chicken fingers can be stored in an airtight container in the refrigerator for up to 3 days. To reheat, bake them in a preheated oven at 350°F (175°C) for about 5-7 minutes, or until heated through. Reheating in the oven will help retain the crispiness of the crust. Microwaving is not recommended, as it can make the chicken soggy. Freezing is not recommended as the texture of the almond crust will degrade.
Nutritional Information
| Nutrient | Amount per Serving | % Daily Value* |
|---|---|---|
| Calories | 450 kcal | 23% |
| Total Fat | 25g | 38% |
| Saturated Fat | 3g | 15% |
| Cholesterol | 150mg | 50% |
| Sodium | 750mg | 31% |
| Total Carbohydrate | 25g | 8% |
| Dietary Fiber | 3g | 12% |
| Sugars | 2g | 4% |
| Protein | 30g | 60% |
*Percent Daily Values are based on a 2,000 calorie diet.
Variations & Substitutions
- Gluten-Free: Use a gluten-free all-purpose flour blend in place of the regular flour. Ensure the ground almonds are certified gluten-free, as some may be processed in facilities that also handle wheat.
- Dairy-Free: Substitute the skim milk with almond milk or another dairy-free alternative.
- Nut-Free: For those with nut allergies, substitute the ground almonds with crushed pretzels or breadcrumbs.
- Spice it Up: Add a pinch of cayenne pepper or a dash of hot sauce to the egg mixture for a spicy kick.
- Herbaceous Twist: Mix in finely chopped fresh herbs, such as parsley or thyme, to the almond mixture for a more complex flavor.
- Parmesan Crust: Add grated Parmesan cheese to the almond mixture for a savory, cheesy twist.
FAQs (Frequently Asked Questions)
Q: Can I use almond flour instead of ground almonds?
A: While you can use almond flour, the texture will be slightly different. Ground almonds provide a coarser, more rustic texture, whereas almond flour is finer. The recipe is optimized for ground almonds, which create a better crust.
Q: How do I prevent the almond coating from falling off during cooking?
A: Ensure that you are pressing the almond mixture firmly onto the chicken strips after dipping them in the milk and flour. This helps the coating adhere better. Also, avoid overcrowding the pan, as this can lower the oil temperature and cause the coating to separate.
Q: Can I bake the chicken fingers instead of frying them?
A: Yes, you can bake them, but the texture will be slightly different. For best results, lightly spray the almond-coated chicken fingers with cooking oil before baking. Bake at 400°F (200°C) for about 15-20 minutes, or until cooked through. However, pan-searing before baking is recommended to achieve a desirable crust.
Q: What’s the best way to tell if the chicken is cooked through?
A: The most reliable way is to use a meat thermometer. Insert the thermometer into the thickest part of the chicken strip. The internal temperature should reach 165°F (74°C).
Q: Can I freeze these chicken fingers?
A: While you can freeze them, the texture of the almond crust may change slightly. For best results, freeze the chicken fingers on a baking sheet in a single layer until solid, then transfer them to an airtight container or freezer bag. Reheat in the oven for optimal crispness.
Final Thoughts
These Almond Crusted Chicken Fingers are more than just a quick and easy meal; they’re a reminder of simpler times, of family traditions, and of the joy of sharing good food. I encourage you to try this recipe and make it your own. Don’t be afraid to experiment with different flavors and seasonings to create a dish that perfectly suits your taste. And most importantly, share it with the people you love. These chicken fingers are especially good when dipped in a creamy garlic aioli alongside some crispy oven fries. Bon appétit!