
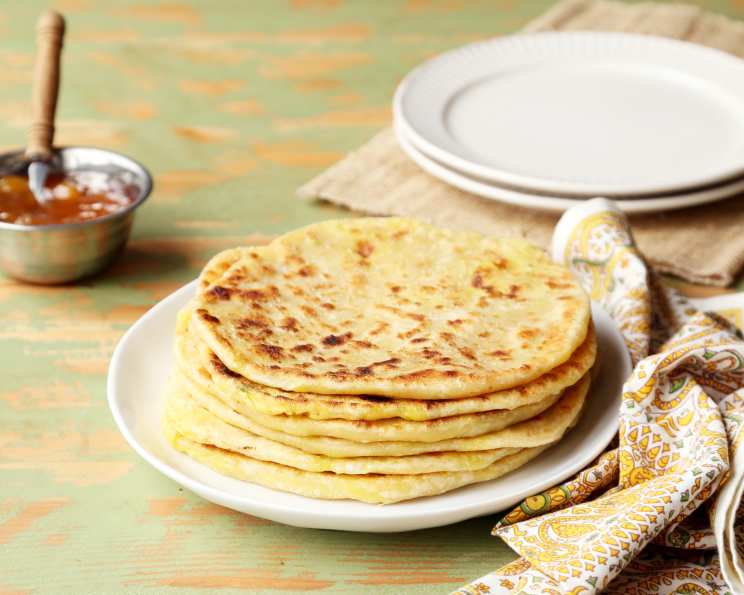
Aloo Paratha: A Taste of Home
The memory is etched in my mind: the aroma of spiced potatoes sizzling on a hot tawa, a simple flatbread transforming into a comforting, golden-brown disc. As a child, visiting my grandmother in Punjab was synonymous with waking up to the scent of her Aloo Parathas. Each bite was a warm embrace, a reminder of family, tradition, and the love poured into every fold of that humble potato-stuffed bread. It’s a taste I’ve chased ever since, a flavour that instantly transports me back to her sun-drenched kitchen, a place where food was more than sustenance; it was a language of love.
Recipe Overview
- Prep Time: 25 minutes
- Cook Time: 50 minutes
- Total Time: 1 hour 15 minutes
- Servings: 2-3
- Yields: 10-15 parathas
- Dietary Type: Vegetarian (can be made vegan)
Ingredients
For the Dough:
- 2 cups flour
- ½ cup water (Use more as needed)
- 1 pinch salt
- 1 tablespoon oil
For the Filling:
- 2 medium potatoes
- ¼ teaspoon salt
- ½ teaspoon mustard seeds (Rai)
- 1 onion, chopped
- 1 teaspoon turmeric powder
- 2 chopped green chili peppers
- 2 tablespoons chopped cilantro (green coriander)
- 2 tablespoons oil, to cook
- ¼ cup flour, for rolling
Equipment Needed
- Large mixing bowl
- Skillet or tawa
- Potato masher or fork
- Rolling pin
- Clean kitchen towel
- Spatula
Instructions
-
Prepare the Dough: In a large mixing bowl, combine the flour, salt, and oil. Gradually add the water, mixing until a soft dough forms. You might need a little more water depending on the type of flour you’re using.
-
Knead the Dough: Turn the dough out onto a lightly greased surface and knead for 5-7 minutes until it becomes smooth and pliable. The dough should be soft but not sticky.
-
Rest the Dough: Place the dough back in the bowl, cover it with a damp cloth, and let it rest for at least 1 hour. This allows the gluten to relax, resulting in a softer paratha.
-
Boil the Potatoes: While the dough rests, prepare the potato filling. Place the potatoes in a pot with 2 cups of water. Bring to a boil, then reduce the heat to medium and cook until the potatoes are tender, about 20-25 minutes. You should be able to easily pierce them with a fork.
-
Cool and Mash the Potatoes: Once the potatoes are cooked, drain the water and let them cool down enough to handle. Peel the skin off and mash the potatoes using a potato masher or a fork until smooth.
-
Prepare the Potato Filling: Heat the oil in a skillet over medium heat. Add the mustard seeds and let them splutter for a few seconds. Then, add the chopped onions and sauté until they turn translucent and slightly golden brown.
-
Add Spices: Stir in the turmeric powder, chopped green chili peppers, and salt. Fry for another minute until fragrant.
-
Combine Filling Ingredients: Add the mashed potatoes to the skillet and mix well with the spices. Fry for 5 minutes, stirring constantly to prevent sticking.
-
Finish the Filling: Remove the skillet from the heat and garnish with chopped cilantro. Let the filling cool slightly before assembling the parathas.
-
Divide the Dough and Filling: Divide the dough into 10-15 equal parts, depending on the desired size of your parathas. Divide the potato mixture into the same number of portions. The potato balls should be slightly larger than the dough balls.
-
Stuff the Parathas: Roll one dough ball into a 3-inch diameter circle. Place a potato ball in the center of the circle.
-
Seal the Filling: Gently pull the edges of the dough circle together, encasing the potato filling completely. Pinch the edges tightly to seal the filling inside, creating a ball.
-
Repeat: Repeat the process with the remaining dough and filling.
-
Rest Stuffed Dough Balls: Let the stuffed dough balls settle for 3-4 minutes before rolling them. This helps prevent the filling from bursting out during rolling.
-
Roll the Parathas: To make rolling easier, lightly coat each stuffed ball in dry flour.
-
Gently Roll Out: Lightly press the ball on the sealed side and keep it on the topside when rolling. Roll the ball out gently into a 6-inch circle, using a rolling pin. If the dough sticks to the rolling pin or surface, lightly sprinkle dry flour on both sides of the semi-rolled paratha. Be careful not to press too hard, as this can cause the filling to leak.
-
Cook the Parathas: Place the paratha on a preheated skillet or tawa over medium heat.
-
Cook One Side: After a few seconds, you will see the paratha change color and puff up slightly in different places.
-
Flip and Cook Second Side: Flip the paratha over. You should see some golden-brown spots on the topside.
-
Add Oil: After a few seconds, spread 1 teaspoon of oil evenly over the paratha.
-
Cook Until Golden Brown: Flip the paratha again and lightly press the puffed areas with a spatula.
-
Cook Until Done: Flip again and press with the spatula, making sure the paratha is golden-brown and cooked through on both sides.
-
Serve: Serve the hot Aloo Parathas immediately with chutney, sauce, raita, or a dollop of butter.
Expert Tips & Tricks
- Dough Consistency is Key: The dough should be soft and pliable, not too stiff or too sticky. Adjust the amount of water accordingly.
- Don’t Overfill: Overfilling the paratha will make it difficult to roll and increase the chances of the filling leaking.
- Roll Gently: Roll the parathas gently and evenly to avoid tearing the dough.
- Resting is Important: Letting the dough and stuffed parathas rest is crucial for a softer and more pliable texture.
- Use a Hot Tawa: Make sure the tawa is hot before placing the paratha on it. This will ensure even cooking and a golden-brown color.
- Vegan Variation: Substitute the oil with vegan butter or a plant-based oil of your choice.
- Spice Level: Adjust the amount of green chilies to your preference for spice.
Serving & Storage Suggestions
Serve Aloo Parathas hot off the tawa for the best flavor and texture. They are traditionally served with a dollop of butter or ghee (clarified butter), yogurt, chutney, or raita (a yogurt-based condiment). Leftover Aloo Parathas can be stored in an airtight container in the refrigerator for up to 2-3 days. To reheat, warm them on a tawa or in a microwave. They can also be frozen for longer storage. Wrap each paratha individually in plastic wrap and then place them in a freezer bag. Frozen parathas can be reheated directly on a tawa or in a microwave.
Nutritional Information
(Estimated per paratha, values may vary based on specific ingredients and quantities)
| Nutrient | Amount per Serving | % Daily Value |
|---|---|---|
| Calories | 300 kcal | 15% |
| Total Fat | 12g | 18% |
| Saturated Fat | 2g | 10% |
| Cholesterol | 0mg | 0% |
| Sodium | 250mg | 10% |
| Total Carbohydrate | 40g | 13% |
| Dietary Fiber | 3g | 12% |
| Sugars | 2g | – |
| Protein | 7g | 14% |
Variations & Substitutions
- Add Herbs and Spices: Experiment with different herbs and spices in the potato filling, such as ginger, garlic, cumin, coriander powder, or garam masala.
- Vegetable Variations: Add other vegetables to the filling, such as grated carrots, peas, or spinach.
- Gluten-Free Aloo Paratha: Use gluten-free flour to make the dough for a gluten-free version.
- Paneer Aloo Paratha: Add crumbled paneer (Indian cheese) to the potato filling for a richer and more flavorful paratha.
- Methi Aloo Paratha: Add finely chopped fenugreek leaves (methi) to both the dough and the potato filling.
FAQs (Frequently Asked Questions)
Q: How do I prevent the filling from leaking while rolling the parathas?
A: Make sure to seal the filling completely inside the dough and roll gently. Avoid overfilling the parathas.
Q: Can I make the dough ahead of time?
A: Yes, you can make the dough ahead of time and store it in the refrigerator for up to 2 days. Bring it to room temperature before rolling.
Q: How do I keep the parathas soft?
A: Cook the parathas over medium heat and don’t overcook them. Also, resting the dough and stuffed parathas is crucial for a softer texture.
Q: Can I freeze Aloo Parathas?
A: Yes, you can freeze Aloo Parathas. Wrap each paratha individually in plastic wrap and then place them in a freezer bag.
Q: What can I serve with Aloo Parathas?
A: Aloo Parathas are delicious with yogurt, chutney, raita, pickles, or a dollop of butter.
Final Thoughts
Aloo Paratha is more than just a recipe; it’s an experience, a taste of tradition, and a comforting reminder of home. Don’t be intimidated by the steps – with a little practice, you’ll be creating your own golden-brown masterpieces in no time. I encourage you to try this recipe and share your own variations and experiences. Pair it with a cup of hot chai for the ultimate culinary experience. Enjoy!