
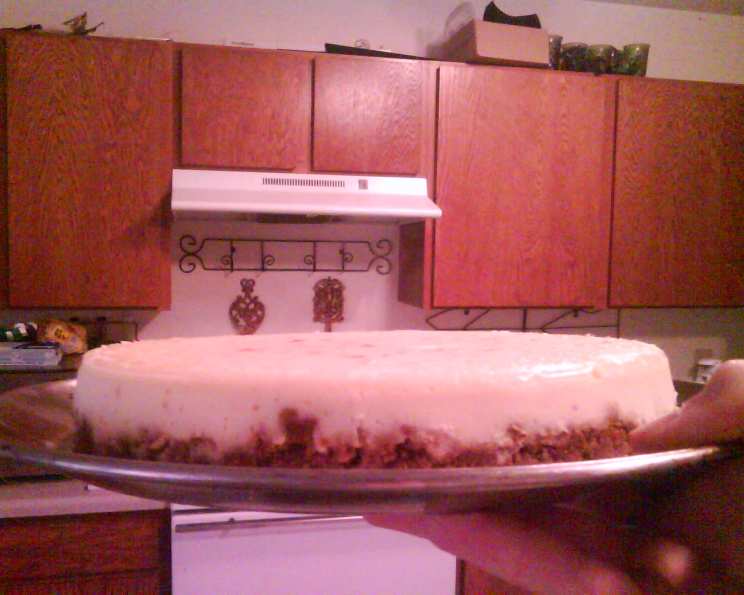
Alton Brown’s Deconstructed Sour Cream Cheesecake: A Culinary Masterpiece
The first time I tasted a cheesecake like this, it wasn’t even assembled. It was at a bustling culinary conference, and Chef Brown, in his signature no-nonsense style, was walking the room, offering tiny samples of the individual components: the buttery graham cracker crumbs, the impossibly smooth sour cream filling. He encouraged us to taste each element separately, then together, to truly understand the symphony of flavors. The experience transformed my perspective on what cheesecake could be – less of a sugary brick and more of an elegant, nuanced dessert. I’ve been chasing that experience ever since, and this recipe brings me pretty darn close.
Recipe Overview
- Prep Time: 30 minutes
- Cook Time: 1 hour
- Cooling Time: 6 hours
- Total Time: 7 hours 30 minutes
- Servings: 8-10
- Yield: 1 Cheesecake
- Dietary Type: Not Gluten-Free
Ingredients
For the Crust:
- 33 graham cracker squares, crumbled
- 4 ounces unsalted butter, melted, plus additional butter for brushing the pan
- 1 tablespoon sugar
For the Filling:
- 20 ounces cream cheese
- 1 1/4 cups sour cream
- 1 cup sugar
- 1 tablespoon vanilla extract
- 2 eggs
- 3 egg yolks
- 1/3 cup heavy cream
Equipment Needed
- 9 by 3-inch cake pan
- Parchment paper
- Small bowl
- Sheet pan
- Mixer with a paddle attachment
- Separate container for mixing liquids
- Water bath (a larger pan to hold the cake pan)
- Cake round or serving dish
Instructions
-
Preheat your oven to 300 degrees F (150 degrees C). Brush the inside of a 9 by 3-inch cake pan generously with melted butter. Cut a circle of parchment paper to fit the bottom of the pan and adhere it to the buttered surface. Also, adhere strips of parchment paper to the sides of the pan, creating a collar that extends a couple of inches above the rim. This will help with easy removal later.
-
In a small bowl, combine the crumbled graham crackers, the melted butter, and 1 tablespoon of sugar. Mix thoroughly until the crumbs are evenly moistened.
-
Press about two-thirds of the graham cracker mixture firmly into the bottom of the parchment-lined pan, creating a compact crust.
-
Spread the remaining graham cracker mixture onto a sheet pan in a thin, even layer.
-
Bake both the cake pan containing the crust and the sheet pan with the loose crumbs in the preheated oven for 10 minutes. This toasting step enhances the flavor and texture of the crust and topping.
-
Remove both from the oven and let them cool completely. Reserve the loose crumb mixture for the sides of the cheesecake later.
-
While the crust cools, prepare the filling. In a mixer fitted with a paddle attachment, beat the sour cream for about 10 seconds until it’s smooth. This helps to prevent lumps in the final product.
-
Add the cream cheese and sugar to the sour cream and mix on low speed for about 30 seconds to combine. Then, increase the speed to medium and continue mixing until the mixture is smooth and creamy, about 2-3 minutes. Be careful not to overmix, as this can incorporate too much air and cause the cheesecake to crack during baking. Scrape down the sides and bottom of the bowl with a spatula to ensure everything is evenly incorporated.
-
In a separate container, whisk together the vanilla extract, eggs, egg yolks, and heavy cream until well combined. This ensures the eggs are evenly distributed in the mixture, which helps create a smooth and consistent texture.
-
With the mixer on medium speed, slowly pour the liquid mixture into the cream cheese mixture, a little at a time. When about half of the liquid mixture is incorporated, stop the mixer and scrape down the bowl again. Continue adding the remaining liquid mixture slowly until everything is fully incorporated. The key is to add the liquid gradually to prevent curdling and maintain a smooth batter.
-
Once the filling is completely combined and smooth, gently pour it into the cooled crust. Try to avoid creating air bubbles. If you see any, gently tap the pan on the counter to release them.
-
Lower the oven temperature to 250 degrees F (120 degrees C).
-
Place the cheesecake pan inside a larger pan to create a water bath. Pour hot water into the larger pan, reaching about halfway up the sides of the cake pan. The water bath helps to ensure even baking and prevents the cheesecake from cracking.
-
Carefully place the water bath with the cheesecake into the preheated oven and bake for 1 hour.
-
After 1 hour, turn off the oven and open the oven door for one minute. This allows the cheesecake to cool down gradually, further preventing cracking.
-
Close the oven door and let the cheesecake sit in the turned-off oven for one more hour.
-
Remove the cheesecake from the water bath and let it cool completely at room temperature.
-
Once cooled, place the cheesecake in the refrigerator for at least 6 hours, or preferably overnight, to allow it to fully set.
-
When you’re ready to serve, gently warm the sides of the cake pan by placing it in a hot water bath for about 15 seconds. This will help loosen the cheesecake from the pan.
-
Invert the cheesecake onto a cake round or serving dish. Carefully peel away the parchment paper.
-
Take the reserved graham cracker crumb mixture and gently press it onto the sides of the cheesecake, creating a decorative and flavorful coating.
-
To slice the cheesecake, dip a long, thin knife into a hot water bath and wipe it dry before each slice. This will ensure clean, smooth cuts.
Expert Tips & Tricks
- Don’t overmix the filling: Overmixing incorporates too much air, which can lead to cracks on the surface during baking. Mix until just combined.
- Water bath is key: Don’t skip the water bath! It provides gentle, even heat that helps the cheesecake bake evenly and prevents it from drying out and cracking.
- Cooling is crucial: Allowing the cheesecake to cool gradually in the oven and then in the refrigerator is essential for a smooth, creamy texture. Resist the urge to rush the process!
- Room temperature ingredients: Make sure all of your ingredients are at room temperature before you begin. This helps them to combine more easily and create a smoother batter.
- To avoid a soggy crust: Be sure to press the crust mixture firmly into the bottom of the pan. This will help it hold its shape and prevent it from becoming soggy.
Serving & Storage Suggestions
Serve the deconstructed sour cream cheesecake chilled, garnished with fresh berries, a drizzle of chocolate sauce, or a dusting of cocoa powder. Leftovers can be stored in an airtight container in the refrigerator for up to 3-4 days. While freezing is not recommended due to potential texture changes in the sour cream, the cheesecake can be kept at room temperature for up to 2 hours before needing refrigeration.
Nutritional Information
| Nutrient | Amount per Serving | % Daily Value |
|---|---|---|
| Calories | 836.2 kcal | N/A |
| Calories from Fat | 495 g | 59% |
| Total Fat | 55.1 g | 84% |
| Saturated Fat | 29.2 g | 146% |
| Cholesterol | 249.6 mg | 83% |
| Sodium | 558.4 mg | 23% |
| Total Carbohydrate | 75.6 g | 25% |
| Dietary Fiber | 1.6 g | 6% |
| Sugars | 48.3 g | 193% |
| Protein | 11.7 g | 23% |
Note: Nutritional information is an estimate and may vary based on specific ingredients and portion sizes.
Variations & Substitutions
- Gluten-Free: Substitute gluten-free graham crackers or a gluten-free cookie crust for the graham cracker crust.
- Lemon Zest: Add 1-2 tablespoons of lemon zest to the filling for a bright, citrusy flavor.
- Chocolate Swirl: Melt semi-sweet chocolate and swirl it into the filling before baking for a decadent chocolate cheesecake.
- Berry Compote: Serve with a homemade berry compote for added sweetness and tartness.
- Different Spices: For Fall flavors, add a pinch of Cinnamon or Nutmeg to the Graham Cracker crust.
FAQs (Frequently Asked Questions)
Q: Why is a water bath necessary for this cheesecake?
A: The water bath provides gentle, even heat that prevents the cheesecake from drying out and cracking during baking. It ensures a smooth, creamy texture.
Q: Can I use a springform pan instead of a cake pan?
A: While you can use a springform pan, the 9×3-inch cake pan is specifically recommended for the best results with this recipe. If using a springform pan, make sure to wrap the bottom tightly with foil to prevent water from seeping in during the water bath.
Q: How do I know when the cheesecake is done?
A: The cheesecake is done when the edges are set, but the center still has a slight jiggle. It will continue to set as it cools.
Q: What if my cheesecake cracks despite using a water bath?
A: Cracking can still occur, even with a water bath. Make sure your oven temperature is accurate and avoid overbaking. Cooling it gradually also helps to minimize cracking.
Q: Can I make this cheesecake ahead of time?
A: Absolutely! In fact, it’s best to make this cheesecake at least a day in advance to allow it to fully set and develop its flavors.
Final Thoughts
Alton Brown’s deconstructed sour cream cheesecake is more than just a dessert; it’s a culinary experience. The balance of the buttery graham cracker crust, the rich and creamy filling, and the perfectly controlled baking process all contribute to a truly exceptional cheesecake. Don’t be intimidated by the steps – each one is essential for creating a masterpiece. So, preheat your oven, gather your ingredients, and prepare to impress your friends and family with this unforgettable dessert. And don’t hesitate to share your creations and feedback – I’d love to see your variations and hear about your experiences with this recipe!