
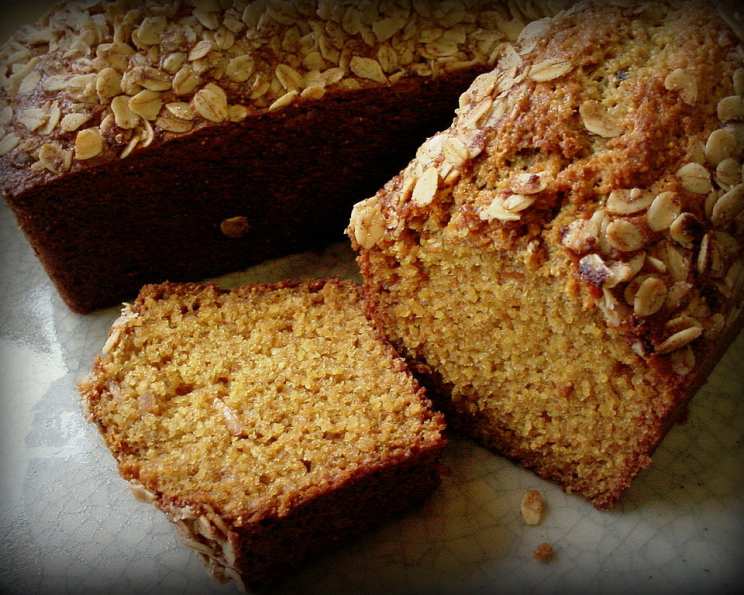
Amaranth Soda Bread: A Taste of Tradition, Reimagined
My grandmother, a woman whose kitchen was a sanctuary of warmth and unforgettable aromas, always had a loaf of soda bread ready. Not this particular amaranth version, mind you – her classic Irish soda bread was a staple. But the spirit of simple, wholesome baking, the sheer magic of transforming basic ingredients into a nourishing loaf, that’s what connects me to this recipe. Now, with dietary needs evolving, I’ve found a way to channel that memory, crafting a gluten-free, dairy-free soda bread that still carries that same comforting essence. This Amaranth Soda Bread isn’t just a recipe; it’s a heartfelt nod to the past, embraced with a modern twist.
Recipe Overview
- Prep Time: 20 minutes
- Cook Time: 55-65 minutes
- Total Time: 1 hour 15-25 minutes
- Servings: Approximately 8 slices
- Yield: 1 loaf
- Dietary Type: Gluten-Free, Dairy-Free, Egg-Free, Vegan
Ingredients
- 3/4 cup water, nut milk or stevia tea
- 3/4 teaspoon unbuffered vitamin C powder, corn-free (ascorbic acid)
- 2 3/4 cups amaranth flour, divided
- 3/4 cup arrowroot or tapioca starch
- 1/2 teaspoon salt
- 1 tablespoon anise or 1 tablespoon fennel seed, ground (optional)
- 2-4 tablespoons oil (such as olive, coconut, or avocado)
- 2 tablespoons boiling water
- 2 teaspoons baking soda
Equipment Needed
- Large mixing bowl
- Whisk
- Baking sheet
- Breadboard or waxed paper
- Sharp knife or razor blade
- Oven mitts
Instructions
-
Preheat your oven to 400°F (200°C). Make sure your oven rack is positioned in the center.
-
In a small bowl, combine the water (or nut milk/stevia tea) and the vitamin C powder. Stir well to dissolve the vitamin C crystals completely. The vitamin C helps improve the bread’s texture and rise.
-
In a large mixing bowl, combine 2 1/4 cups of the amaranth flour with the arrowroot (or tapioca starch), salt, and ground anise or fennel seed (if using). Whisk together lightly to ensure all the dry ingredients are evenly distributed.
-
Once the vitamin C crystals are dissolved, add the water mixture and the oil to the flour mixture.
-
Mix the batter until it starts to come together. Don’t overmix at this stage; just ensure everything is moistened.
-
Sprinkle a little of the remaining 1/2 cup of amaranth flour in a circle (about 8 inches in diameter) centered on a baking sheet. This will prevent the bread from sticking.
-
Put the rest of the flour on a breadboard or a piece of waxed paper. This will be used for kneading.
-
In a small bowl or measuring cup, combine the boiling water and baking soda. Be careful, as this mixture will fizz! Stir to dissolve the baking soda completely.
-
Add the baking soda mixture to the dough.
-
Stir vigorously. The dough will be very stiff and sticky at this point, don’t worry, that’s normal.
-
When the water is mostly absorbed, beat the dough hard for about 10 strokes. This helps develop the gluten-free “structure” of the bread.
-
Turn the dough out onto the floured board or waxed paper.
-
Roll the dough to coat it with flour. This prevents sticking and makes it easier to handle.
-
Working quickly, roll, pat, fold, and punch the dough for 2-3 minutes. This develops the dough and incorporates more air. The dough will absorb enough flour to become manageable, but it should still remain soft.
-
Gather the dough into a smooth ball and place it on the floured baking sheet.
-
Pat the dough into an approximately 8-inch round, about 1 inch thick at the edges, and mounded slightly in the center.
-
Use a sharp knife or razor blade to slash a deep “X” in the top of the dough. This allows steam to escape during baking and helps the bread rise evenly.
-
Pop the loaf into the preheated oven immediately.
-
Immediately reduce the oven temperature to 325°F (160°C).
-
Bake for 55-65 minutes.
-
Check for doneness. This can be a little tricky with gluten-free bread. The toothpick test isn’t always reliable.
-
To check for doneness effectively, use a clean oven mitt or paper towels to grab the loaf and crack it open slightly. Look deep inside – uncooked dough appears darker in color and has a wet, gummy texture.
-
If you see uncooked dough, put the loaf back in the oven for another 10 minutes and check again.
-
Note the cooking time for future reference, as oven temperatures can vary.
Expert Tips & Tricks
- Oil Matters: While you can make this recipe with as little as 2 tablespoons of oil, using 4 tablespoons (1/4 cup) significantly improves the flavor and texture, preventing dryness. Since there are no egg yolks (which would contribute fat), the extra oil is essential.
- Vitamin C Power: Don’t skip the vitamin C! It acts as a dough conditioner, helping to improve the bread’s structure and rise, which is especially important in gluten-free baking.
- Handling the Dough: The dough can be a little sticky, so don’t be afraid to use plenty of amaranth flour on your work surface.
- Slash Deep: Make sure your “X” slash is deep enough. This allows the bread to expand properly without cracking haphazardly.
- Cooling is Key: Allow the bread to cool slightly on a wire rack before slicing. This helps it to set and prevents it from being gummy.
Serving & Storage Suggestions
This amaranth soda bread is best enjoyed warm, straight from the oven, with a generous smear of your favorite dairy-free butter or a drizzle of olive oil. It pairs beautifully with soups, stews, or salads.
Due to the lack of gluten and eggs, this bread doesn’t keep very well. It’s best consumed within 1-2 days. Store it at room temperature in an airtight container. Freezing is not recommended, as it tends to affect the texture. To refresh slightly stale bread, you can lightly toast it.
Nutritional Information
Please note that these values are estimates and may vary based on specific ingredients and portion sizes.
| Nutrient | Amount per Serving | % Daily Value |
|---|---|---|
| Calories | 205 kcal | 10% |
| Total Fat | 8g | 12% |
| Saturated Fat | 1g | 5% |
| Cholesterol | 0 mg | 0% |
| Sodium | 470 mg | 20% |
| Total Carbohydrate | 30g | 10% |
| Dietary Fiber | 4g | 16% |
| Sugars | 0g | 0% |
| Protein | 5g | 10% |
Variations & Substitutions
- Sweet Soda Bread: Add 2 tablespoons of maple syrup or agave nectar to the batter for a slightly sweeter bread. You can also incorporate dried fruit like raisins or cranberries.
- Herbaceous Twist: Mix in 1-2 tablespoons of chopped fresh herbs, such as rosemary, thyme, or chives, for a savory flavor.
- Spice It Up: Add a pinch of red pepper flakes for a subtle kick.
- Nut-Free Option: If you’re using nut milk, you can substitute it with oat milk, rice milk, or soy milk.
- Flour Alternatives: While amaranth flour is the star of this recipe, you can experiment with other gluten-free flours like sorghum or millet flour, but the results may vary slightly.
FAQs (Frequently Asked Questions)
Q: Can I use regular milk instead of nut milk?
A: While this recipe is designed to be dairy-free, you can substitute regular milk if you don’t have any dietary restrictions. However, the flavor will be slightly different.
Q: Why is vitamin C powder used in this recipe?
A: Vitamin C (ascorbic acid) acts as a dough conditioner, improving the bread’s texture and rise, which is particularly helpful in gluten-free baking.
Q: The dough is very sticky. Is this normal?
A: Yes, amaranth flour tends to create a stickier dough than wheat flour. Don’t be afraid to use plenty of flour on your work surface to prevent sticking.
Q: How do I know when the bread is fully cooked?
A: The best way to check for doneness is to crack the loaf open slightly and look for uncooked dough inside. If it appears dark and gummy, it needs more time in the oven.
Q: Can I make this recipe ahead of time?
A: This bread is best enjoyed fresh. It doesn’t keep well, so it’s not ideal for making too far in advance. However, you can prepare the dry ingredients ahead of time and store them in an airtight container.
Final Thoughts
This Amaranth Soda Bread is more than just a gluten-free, dairy-free alternative; it’s a celebration of simple, wholesome ingredients and the joy of baking. I encourage you to give this recipe a try and experience the satisfaction of creating a delicious and nourishing loaf from scratch. Feel free to experiment with different flavors and variations to make it your own. And please, share your feedback and experiences – I’d love to hear how it turns out! Pair it with a comforting bowl of lentil soup or a vibrant salad for a complete and satisfying meal. Happy baking!