
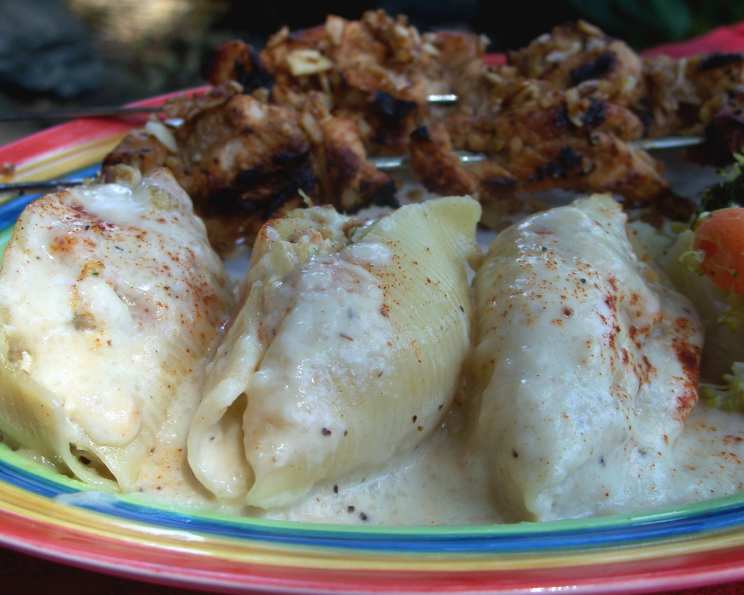
Amazing Chicken Stuffed Shells
I have a vivid memory of my grandmother making stuffed shells on Sunday afternoons. The aroma of simmering tomato sauce and cheesy goodness would fill her entire house. As a child, I was fascinated watching her deftly fill each shell, a delicate operation that she made look so effortless. It was always a joyous family gathering, fueled by laughter, conversation, and the sheer deliciousness of those comforting, savory shells. Now, I have recreated my own version of stuffed shells, adding my own twist to the classic recipe to make them incredibly amazing.
Recipe Overview
- Prep Time: 20 minutes
- Cook Time: 45 minutes
- Total Time: 1 hour 5 minutes
- Yields: 20 shells
- Dietary Type: Not specified
Ingredients
- 4 cups diced, cooked chicken
- 1 (6 ounce) box chicken flavor stuffing mix
- 1 cup mayonnaise
- 1 (10 3/4 ounce) can cream of chicken soup
- ½ can water
- 20 jumbo pasta shells
- ¼ teaspoon salt
- ¼ teaspoon pepper
- 1 teaspoon Mrs. Dash seasoning mix
Equipment Needed
- Large pot
- Large bowl
- 9×13-inch baking pan
- Cooking spray
- Aluminum foil
Instructions
-
Start by preheating your oven to 350 degrees F (175 degrees C). This ensures the oven is ready when the shells are stuffed and assembled.
-
Next, prepare the jumbo pasta shells according to the package directions. You want them cooked al dente, meaning they should still be slightly firm to the bite. Overcooked shells will be difficult to stuff and may fall apart. Once cooked, drain the shells and rinse them with cold water to stop the cooking process. This also helps prevent them from sticking together. Set aside to cool completely.
-
While the shells are cooking and cooling, prepare the chicken flavor stuffing according to the package instructions. Typically, this involves adding water and butter/margarine to the mix and simmering until the liquid is absorbed.
-
In a large bowl, combine the prepared stuffing, diced cooked chicken, mayonnaise, salt, pepper, and Mrs. Dash seasoning. Mix all ingredients thoroughly until well combined. Taste and adjust seasonings as needed. Feel free to add a pinch of garlic powder or onion powder for extra flavor.
-
Lightly coat a 9×13-inch baking pan with cooking spray. This prevents the shells from sticking to the pan during baking and makes cleanup easier.
-
Now comes the fun part: Stuff each shell with a large spoonful of the chicken mixture. Be generous with the filling, but don’t overstuff to the point where the shells become difficult to handle. Carefully place each stuffed shell in the prepared baking pan, arranging them in a single layer.
-
In a separate bowl, mix the cream of chicken soup with water. Stir until smooth and well combined.
-
Pour the soup mixture over the filled shells, ensuring that all the shells are evenly coated. This will help keep the shells moist and add flavor during baking.
-
Loosely cover the baking pan with aluminum foil. This prevents the shells from drying out and helps them cook evenly.
-
Bake in the preheated oven for 45 minutes. After 45 minutes, remove the foil and bake for another 5-10 minutes, or until the shells are heated through and the soup mixture is bubbly.
-
Remove from the oven and let cool for a few minutes before serving.
Expert Tips & Tricks
- For a richer flavor, use a combination of dark and white meat chicken.
- Add some chopped vegetables like celery, carrots, or onions to the stuffing mix for added texture and nutrients.
- If you don’t have Mrs. Dash seasoning, you can substitute with a blend of dried herbs such as oregano, basil, thyme, and rosemary.
- To prevent the shells from sticking together after cooking, toss them with a little olive oil or cooking spray.
- If you want a crispy top, sprinkle some shredded cheese (such as mozzarella or Parmesan) over the shells during the last 10 minutes of baking.
- Prepare ahead of time: Assemble the shells, cover, and refrigerate for up to 24 hours before baking. Add about 10 minutes to the baking time if baking directly from the fridge.
Serving & Storage Suggestions
Serve the chicken stuffed shells hot, right out of the oven. They are delicious on their own, but you can also serve them with a side of steamed vegetables, a simple salad, or garlic bread. For a prettier presentation, spoon some extra sauce over the top and sprinkle with a little fresh parsley.
Leftovers can be stored in an airtight container in the refrigerator for up to 3 days. To reheat, simply microwave the shells until heated through, or bake them in a preheated oven at 350 degrees F (175 degrees C) for about 15-20 minutes.
To freeze the stuffed shells, arrange them in a single layer on a baking sheet and freeze until solid. Then, transfer them to a freezer-safe container or bag. They can be stored in the freezer for up to 2 months. To reheat, bake from frozen in a preheated oven at 350 degrees F (175 degrees C) for about 45-60 minutes, or until heated through.
Nutritional Information
| Nutrient | Amount per Serving | % Daily Value |
|---|---|---|
| Calories | 46.2 kcal | N/A |
| Calories from Fat | 11 g | 24% |
| Total Fat | 1.2 g | 1% |
| Saturated Fat | 0.3 g | 1% |
| Cholesterol | 1.6 mg | 0% |
| Sodium | 266.6 mg | 11% |
| Total Carbohydrate | 7.3 g | 2% |
| Dietary Fiber | 0.2 g | 0% |
| Sugars | 0.9 g | 3% |
| Protein | 1.4 g | 2% |
Note: Nutritional information is an estimate and may vary based on specific ingredients and preparation methods.
Variations & Substitutions
- Vegetarian: Substitute the chicken with sautéed mushrooms, spinach, or a mixture of vegetables. Use vegetable broth in the stuffing mix.
- Gluten-Free: Use gluten-free pasta shells and gluten-free stuffing mix.
- Spicy: Add a pinch of red pepper flakes to the chicken mixture for a touch of heat.
- Cheesy: Mix some shredded cheese into the chicken filling or sprinkle it on top before baking.
FAQs (Frequently Asked Questions)
Q: Can I use rotisserie chicken for this recipe?
A: Absolutely! Rotisserie chicken is a great shortcut. Just shred or dice it before adding it to the filling.
Q: Can I use a different type of soup instead of cream of chicken?
A: Yes, cream of mushroom or cream of celery would also work well. The cream of chicken soup adds a classic flavor, but feel free to experiment.
Q: How do I prevent the shells from drying out while baking?
A: Covering the pan with aluminum foil helps to trap moisture. Be sure to remove the foil during the last 5-10 minutes to allow the top to brown slightly.
Q: Can I freeze the stuffed shells before baking?
A: Yes, you can! Assemble the shells as directed, then freeze them in a single layer on a baking sheet. Once frozen, transfer them to a freezer-safe bag or container. Bake from frozen, adding about 20-30 minutes to the baking time.
Q: Can I add cheese to the filling?
A: Definitely! Shredded mozzarella, ricotta, or Parmesan cheese would all be delicious additions to the chicken mixture.
Final Thoughts
These Amazing Chicken Stuffed Shells are a comforting and satisfying meal that’s perfect for any occasion. Whether you’re feeding a crowd or simply looking for a delicious weeknight dinner, this recipe is sure to please. Don’t be afraid to get creative and add your own personal touches to make it your own. I highly encourage you to try it out, and I’d love to hear about your experiences and any variations you come up with! Enjoy this simple yet delicious dish, and let it bring a bit of joy to your table!