
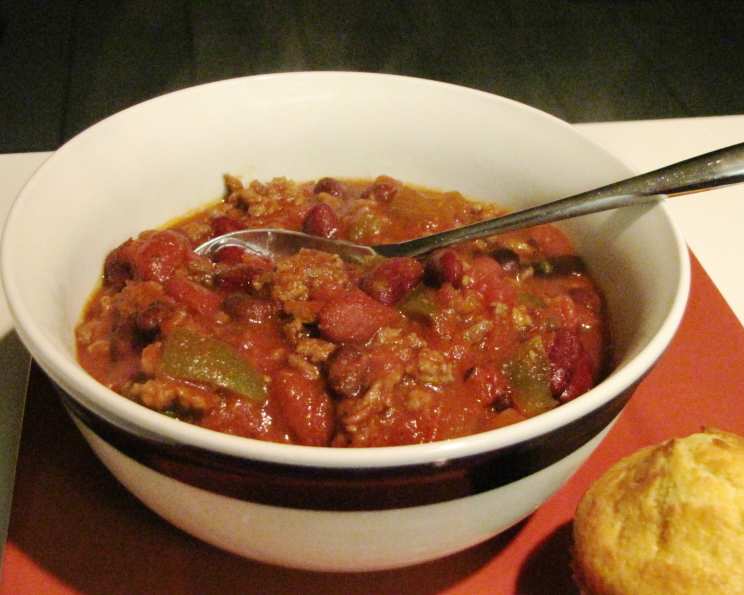
Amazing Chili: A Hearty Classic
I remember the first time I made chili. It was a blustery autumn evening, and the aroma of simmering tomatoes, spices, and beef filled my tiny apartment. The windows were fogged, the air was cozy, and as I ladled the steaming chili into bowls, I felt an immense sense of satisfaction – the kind only a comforting, home-cooked meal can bring. That first batch wasn’t perfect, but it ignited a lifelong love affair with this versatile and endlessly customizable dish.
Recipe Overview
- Prep Time: 20 minutes
- Cook Time: 8-12 hours
- Total Time: 8 hours 20 minutes
- Servings: 6-8
- Yield: About 8 cups
- Dietary Type: Varies (can be gluten-free and dairy-free)
Ingredients
- 2 medium onions, chopped
- 1 1/2 lbs lean ground beef
- 3 cloves garlic, chopped
- 2 celery stalks, roughly chopped
- 1 green pepper, roughly chopped
- 2 tablespoons chili powder (add more as desired)
- 1 (10.75 ounce) can Campbell’s tomato soup (roasted red pepper or basil flavor recommended)
- 1/2 teaspoon fresh ground black pepper
- 1 1/2 teaspoons oregano
- 1 1/2 teaspoons ground cumin
- 1 teaspoon salt
- 1 (28 ounce) can stewed tomatoes
- 2 (28 ounce) cans kidney beans, drained and rinsed
- 1/4 cup chopped fresh parsley (optional) or 1/4 cup chopped fresh cilantro, added just before serving (optional)
Equipment Needed
- Large skillet or pot
- Crock-Pot or large stock pot
- Knife
- Cutting board
- Can opener
- Measuring spoons and cups
Instructions
- In a large skillet or pot over medium-high heat, brown the ground beef with the chopped onions and chopped garlic. Cook until the meat is no longer pink, breaking it up with a spoon as it cooks. This step is essential for developing a rich, savory base for your chili. Make sure to drain off any excess fat after browning to prevent a greasy final product.
- Add the roughly chopped celery, and roughly chopped green pepper to the browned beef mixture. Sauté until the vegetables are slightly softened and heated through, about 5-7 minutes. This allows the vegetables to release their flavors and integrate with the meat.
- Combine all the ingredients – the browned beef and vegetable mixture, chili powder (start with 2 tablespoons and adjust to taste later), tomato soup, black pepper, oregano, ground cumin, salt, canned stewed tomatoes, and drained and rinsed kidney beans – in a crock pot or large stock pot. Stir well to ensure all ingredients are evenly distributed.
- If using a crock pot, simmer on very low heat for 8-12 hours. If using a stock pot on the stovetop, bring the chili to a gentle simmer over medium heat, then reduce the heat to low, cover, and simmer for the same duration, 8-12 hours. Be sure to stir the chili every 1-2 hours to prevent sticking and ensure even cooking. This long simmering time allows the flavors to meld together beautifully, creating a truly exceptional chili.
- Just before serving, stir in the chopped fresh parsley or chopped fresh cilantro, if desired. This adds a bright, fresh element to the chili.
- Serve hot with your favorite toppings and sides.
Expert Tips & Tricks
- Spice it up: Don’t be afraid to experiment with different types of chili powder or add a pinch of cayenne pepper for extra heat. You can also add a chopped jalapeño pepper to the vegetable sauté for a spicier kick.
- Deepen the flavor: For an even richer, deeper flavor, add a tablespoon of cocoa powder or a splash of balsamic vinegar during the last hour of simmering.
- Thicken it up: If your chili is too thin, you can thicken it by mashing some of the kidney beans against the side of the pot or crock pot. Alternatively, you can mix a tablespoon of cornstarch with a tablespoon of cold water and stir it into the chili during the last 30 minutes of cooking.
- Make it ahead: Chili is a fantastic make-ahead dish. In fact, it often tastes even better the next day as the flavors have more time to meld. Prepare the chili according to the recipe, let it cool completely, and then store it in an airtight container in the refrigerator for up to 3 days.
- Bean Choice: Feel free to use a mix of beans such as pinto beans, black beans, or cannellini beans, for varied flavor and texture.
Serving & Storage Suggestions
Serve your amazing chili hot, garnished with your favorite toppings. Some popular choices include shredded cheddar cheese, sour cream or Greek yogurt, chopped green onions, avocado slices, tortilla chips, and a dollop of hot sauce. Serve with a crisp salad and cornbread or crusty rolls for a complete and satisfying meal.
Leftover chili can be stored in an airtight container in the refrigerator for up to 3 days. It can also be frozen for up to 3 months. To reheat, simply microwave the chili until heated through, or heat it in a pot on the stovetop over medium heat, stirring occasionally. Be sure that the internal temperature reaches 165°F (74°C) when reheating.
Nutritional Information
| Nutrient | Amount per Serving | % Daily Value |
|---|---|---|
| Calories | 522.5 kcal | N/A |
| Calories from Fat | 126 g | 24% |
| Total Fat | 14.1 g | 21% |
| Saturated Fat | 5.2 g | 26% |
| Cholesterol | 73.7 mg | 24% |
| Sodium | 1814.4 mg | 75% |
| Total Carbohydrate | 61 g | 20% |
| Dietary Fiber | 18.3 g | 73% |
| Sugars | 16.5 g | N/A |
| Protein | 39.9 g | 79% |
Note: Nutritional information is an estimate and may vary based on specific ingredients and portion sizes.
Variations & Substitutions
- Vegetarian Chili: Substitute the ground beef with plant-based ground meat alternative or add more beans and vegetables like corn, zucchini, or sweet potatoes.
- Spicy Chili: Add a chopped jalapeño or serrano pepper to the pot, or increase the amount of chili powder and cumin. A dash of cayenne pepper will also add a kick.
- White Chicken Chili: Replace the ground beef with shredded cooked chicken and use white beans (cannellini or Great Northern) instead of kidney beans. Omit the tomato soup and use chicken broth instead.
- Beef and Beer Chili: Substitute one cup of the stewed tomatoes with a dark beer for a deeper, richer flavor. Add the beer when you add the stewed tomatoes, and allow it to simmer for a few minutes to cook off the alcohol.
FAQs (Frequently Asked Questions)
Q: Can I use dried beans instead of canned?
A: Yes, you can use dried beans. You’ll need to soak them overnight and cook them until tender before adding them to the chili.
Q: Can I make this chili in an Instant Pot?
A: Absolutely! Brown the beef and sauté the vegetables as directed, then add all the ingredients to the Instant Pot. Cook on high pressure for 25 minutes, followed by a natural pressure release for 15 minutes.
Q: What if my chili is too acidic?
A: Add a pinch of sugar or baking soda to neutralize the acidity. Start with a small amount and taste, adding more as needed.
Q: Can I freeze this chili?
A: Yes! Let the chili cool completely, then transfer it to freezer-safe containers or bags. It can be frozen for up to 3 months.
Q: What’s the best way to reheat frozen chili?
A: Thaw the chili in the refrigerator overnight or use the defrost setting on your microwave. Reheat on the stovetop over medium heat or in the microwave until heated through.
Final Thoughts
This amazing chili is more than just a recipe; it’s an invitation to gather around the table, share stories, and create lasting memories. Don’t hesitate to make it your own by experimenting with different ingredients and flavor combinations. Whether you’re serving it to family, friends, or simply enjoying a cozy night in, this chili is sure to be a crowd-pleaser. So go ahead, give it a try, and let the comforting flavors of this classic dish warm your heart and soul. Don’t forget to share your culinary creations and feedback! Perhaps serve it alongside a toasted panini or a refreshing, crisp glass of amber ale. Happy cooking!