
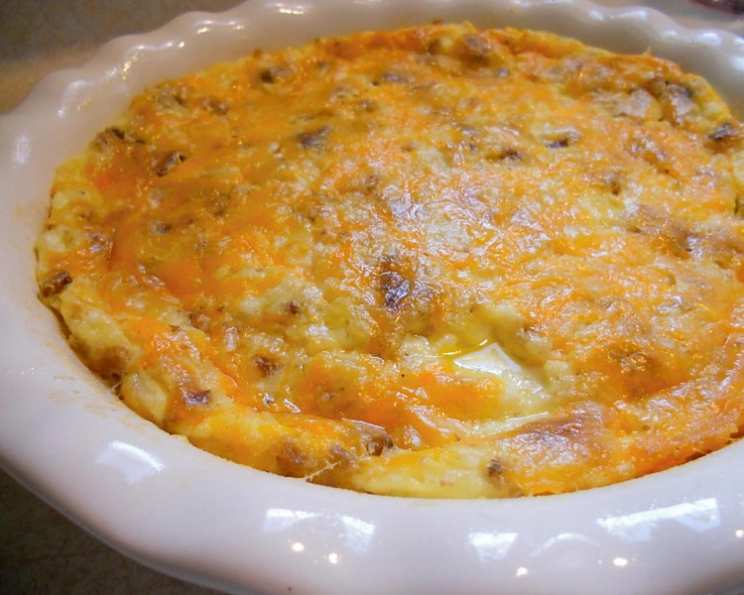
Amazing Quiche: A Recipe from the Heart
The aroma of a freshly baked quiche takes me straight back to my childhood kitchen. My grandmother, a whirlwind of aprons and flour, would always have a quiche cooling on the counter – sometimes for breakfast, sometimes for lunch, always a comforting sight. It wasn’t just the taste; it was the feeling of home, of warmth, and of someone who cared enough to spend time creating something delicious. This recipe, while adapted over the years, still carries that same magic for me.
Recipe Overview
- Prep Time: 15 minutes
- Cook Time: 40 minutes
- Total Time: 55 minutes
- Servings: 6-8
- Yield: 1 pie
- Dietary Type: Not specified
Ingredients
- 3 slices bacon
- 2 cups milk
- 75 g butter, softened
- ½ cup flour
- 4 eggs
- 1 small onion, chopped
- Salt and pepper to taste
- ½ cup cheese, grated
Equipment Needed
- Large bowl
- Whisk
- 25cm pie dish
- Grill
- Oven
Instructions
- First, grill the bacon until crispy. Once cooked, cool it completely, then chop it into small pieces. Set aside.
- In a large bowl, combine the softened butter, flour, and eggs. Mix well with a whisk until the mixture is thick and smooth. It is important not to overmix at this stage. Overmixing can develop the gluten in the flour too much, resulting in a tough crust.
- Stir in the milk, chopped onion, salt, pepper, and the cooked bacon. Make sure all the ingredients are well incorporated.
- Grease a 25cm pie dish thoroughly. This will prevent the quiche from sticking and ensure easy removal after baking.
- Pour the quiche mixture into the prepared pie dish, spreading it evenly.
- Sprinkle the grated cheese evenly over the top of the quiche. This will create a delicious golden-brown crust as it bakes.
- Bake in a preheated oven at 180°C (350°F) for 40 minutes, or until the quiche is puffy and golden brown. To check for doneness, gently shake the pie dish; the center should be mostly set with a slight jiggle. If the crust is browning too quickly, you can loosely tent the quiche with foil during the last 10-15 minutes of baking.
- Once baked, remove the quiche from the oven and let it cool slightly before serving. This allows the quiche to set further and makes it easier to slice.
Expert Tips & Tricks
- For a flakier crust, make sure your butter is very cold when you start. You can even chill the bowl and utensils you’ll be using.
- To prevent the crust from becoming soggy, you can blind bake it before adding the filling. Line the pie dish with parchment paper, fill it with pie weights or dried beans, and bake for 15 minutes before removing the weights and baking for another 5-10 minutes.
- If you’re short on time, you can use a pre-made pie crust. Just be sure to adjust the baking time accordingly.
- Don’t be afraid to experiment with different types of cheese. Gruyere, cheddar, and parmesan are all excellent choices.
- To enhance the flavor, sauté the chopped onion in a little butter before adding it to the quiche mixture. This will bring out its sweetness and add depth of flavor.
Serving & Storage Suggestions
This quiche is delicious served warm or at room temperature. It makes a fantastic brunch dish, light lunch, or even a simple supper. Serve it with a fresh green salad and a crusty baguette for a complete meal.
Leftovers can be stored in the refrigerator for up to 3 days. To reheat, simply warm it in the oven at 180°C (350°F) until heated through. You can also microwave individual slices, but the crust may lose some of its crispness.
For longer storage, you can freeze the quiche after it has cooled completely. Wrap it tightly in plastic wrap and then in aluminum foil. Frozen quiche can be stored for up to 2 months. To reheat, thaw it overnight in the refrigerator and then bake it in the oven at 180°C (350°F) until heated through.
Nutritional Information
| Nutrient | Amount per Serving | % Daily Value |
|---|---|---|
| Calories | 316 kcal | N/A |
| Calories from Fat | 215 kcal | N/A |
| Total Fat | 23.9 g | 36% |
| Saturated Fat | 12.4 g | 62% |
| Cholesterol | 192.8 mg | 64% |
| Sodium | 344 mg | 14% |
| Total Carbohydrate | 14 g | 4% |
| Dietary Fiber | 0.4 g | 1% |
| Sugars | 0.8 g | 3% |
| Protein | 11.3 g | 22% |
Note: Nutritional information is an estimate and may vary based on specific ingredients and portion sizes.
Variations & Substitutions
- Vegetarian Quiche: Omit the bacon and add your favorite vegetables, such as mushrooms, spinach, or bell peppers.
- Gluten-Free Quiche: Use a gluten-free flour blend for the crust or make a crustless quiche.
- Dairy-Free Quiche: Substitute the milk with almond milk, soy milk, or coconut milk. Use a dairy-free cheese alternative.
- Spicy Quiche: Add a pinch of cayenne pepper or a dash of hot sauce to the quiche mixture.
- Seasonal Quiche: Adapt the filling to the seasons by using ingredients like asparagus in the spring, tomatoes and zucchini in the summer, and butternut squash in the fall.
FAQs (Frequently Asked Questions)
Q: Can I make this quiche ahead of time?
A: Absolutely! Quiche is a great make-ahead dish. You can prepare it a day or two in advance and store it in the refrigerator until ready to bake.
Q: Can I freeze this quiche after baking?
A: Yes, you can freeze the baked quiche. Allow it to cool completely, wrap it tightly, and freeze for up to 2 months.
Q: How do I prevent the crust from getting soggy?
A: Blind baking the crust and ensuring the filling isn’t too wet can help prevent a soggy crust.
Q: Can I use different types of cheese in this quiche?
A: Definitely! Experiment with your favorite cheeses, such as Gruyere, cheddar, or Swiss.
Q: What can I serve with this quiche?
A: Quiche pairs well with a fresh green salad, a cup of soup, or a side of roasted vegetables.
Final Thoughts
This simple yet incredibly satisfying quiche is a testament to the fact that the best recipes are often the ones that come from the heart. It’s a dish that’s perfect for any occasion, from a casual brunch with friends to a cozy family dinner. So, gather your ingredients, preheat your oven, and prepare to create a quiche that will bring warmth and joy to your table. Don’t hesitate to add your own personal touch to the recipe and make it your own. And most importantly, enjoy the process of creating something delicious! Bon appétit!