
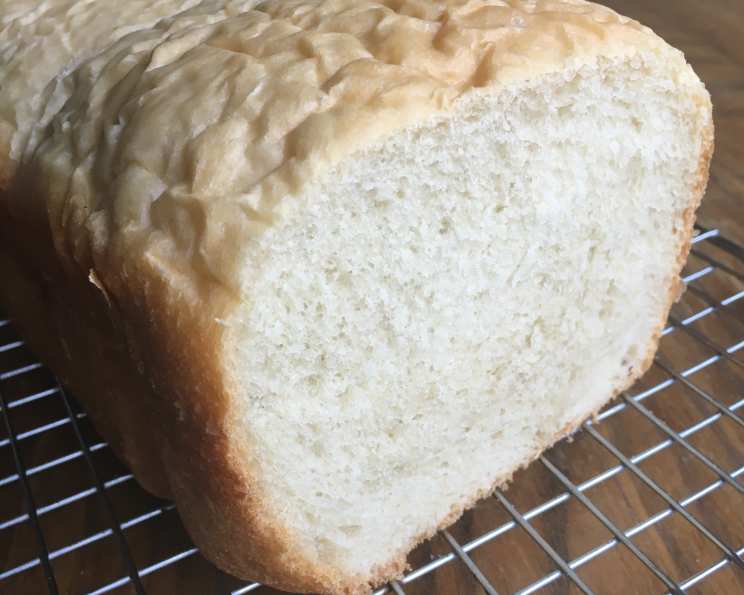
Amish Bread: A Bread Machine Revelation
There’s something deeply comforting about the smell of freshly baked bread wafting through the house. It’s a scent that instantly transports me back to my grandmother’s kitchen, a place of warmth, love, and simple, honest food. While her signature loaves were always hand-kneaded, I’ve discovered a way to capture that same rustic charm and airy texture with the help of a modern marvel – the bread machine. This Amish bread recipe, with its double-rising technique, is a testament to the fact that tradition and convenience can beautifully coexist.
Recipe Overview
- Prep Time: 10 minutes
- Cook Time: 2 hours 55 minutes (approximate, varies by bread machine)
- Total Time: 4 hours 5 minutes
- Servings: Approximately 12 slices
- Yield: 1 1/2 pound loaf
- Dietary Type: Not specified, but adaptable to vegetarian
Ingredients
- 18 tablespoons water (1 1/8 cup)
- ½ teaspoon salt
- ¼ cup oil (vegetable or canola recommended)
- ¼ cup sugar
- 2 ¾ cups bread flour
- 1 teaspoon yeast (active dry or instant)
Equipment Needed
- Bread machine
Instructions
-
Begin by adding the water to the bread machine pan. It’s crucial to add the ingredients in the order specified to ensure proper mixing and yeast activation.
-
Next, add the salt. Make sure the salt doesn’t directly touch the yeast as it can inhibit its activity.
-
Pour in the oil. This adds moisture and richness to the bread, contributing to a softer crumb.
-
Add the sugar. The sugar not only provides sweetness but also acts as food for the yeast, helping it to rise properly.
-
Measure and add the bread flour. Using bread flour, which has a higher protein content than all-purpose flour, is vital for developing the gluten structure necessary for a light and airy loaf.
-
Finally, add the yeast. Make sure it is fresh and within its expiration date for optimal results.
-
Select the basic bread cycle on your bread machine. This cycle typically includes kneading, rising, and baking.
-
Allow the bread machine to run through the initial kneading and rising cycles. This is where the magic begins – the gluten develops, and the dough begins to expand.
-
Important Step: Once the bread machine completes the first rising cycle and enters the baking phase (or after the second rising), carefully turn off the machine.
-
Immediately restart the bread machine on the basic cycle again. This second rising is the key to the light and airy texture that characterizes Amish bread. The dough will rise significantly during this second proofing.
-
Let the bread machine run through the entire basic cycle, including the baking phase, until the bread is fully cooked. The total time for this entire process will be around 2 hours and 55 minutes.
-
Once the baking cycle is complete, carefully remove the bread from the machine. Use oven mitts as the pan and bread will be hot.
-
Place the loaf on a wire rack to cool completely before slicing. This prevents the bottom crust from becoming soggy.
Expert Tips & Tricks
- Water Temperature: Ensure the water is lukewarm (around 105-115°F or 40-46°C) for optimal yeast activation. If it’s too hot, it can kill the yeast; if it’s too cold, it won’t activate properly.
- Yeast Quality: Always use fresh yeast. Store it in the refrigerator or freezer to prolong its shelf life.
- Ingredient Order: Adding ingredients in the specified order is crucial, especially in a bread machine. This prevents the yeast from coming into direct contact with salt or sugar, which can inhibit its activity.
- Dough Consistency: Keep an eye on the dough during the kneading cycle. If it appears too dry, add a tablespoon of water at a time until it forms a smooth, elastic ball. If it’s too wet, add a tablespoon of flour at a time.
- Machine Variations: Bread machines can vary in cycle times and temperature. Refer to your bread machine’s manual for specific instructions and adjustments.
- Browning Control: If your bread machine has a crust color setting, adjust it to your preference. A lighter setting will result in a softer crust, while a darker setting will produce a crisper, more golden crust.
- Preventing a Collapsed Loaf: Avoid opening the bread machine during the baking cycle, as this can cause the loaf to collapse.
Serving & Storage Suggestions
This Amish bread is delicious served warm with butter, jam, or honey. It’s also excellent for making sandwiches, toast, or French toast.
- Storage: Store the cooled bread in an airtight container at room temperature for up to 3 days. For longer storage, wrap the loaf tightly in plastic wrap and freeze for up to 2 months.
- Reheating: To reheat frozen bread, thaw it completely at room temperature. You can then warm it in a preheated oven at 350°F (175°C) for about 10-15 minutes, or until heated through. Slices can also be toasted.
Nutritional Information
Note: Nutritional information is an estimate and may vary based on specific ingredients and serving size.
| Nutrient | Amount per Serving (approx. 1 slice) | % Daily Value* |
|---|---|---|
| Calories | 108 kcal | 5% |
| Total Fat | 3.2 g | 4% |
| Saturated Fat | 0.4 g | 2% |
| Cholesterol | 0 mg | 0% |
| Sodium | 65 mg | 3% |
| Total Carbohydrate | 17.4 g | 6% |
| Dietary Fiber | 0.6 g | 2% |
| Sugars | 2.8 g | – |
| Protein | 2.1 g | 4% |
- Percent Daily Values are based on a 2000 calorie diet.
Variations & Substitutions
- Whole Wheat Amish Bread: Substitute up to half of the bread flour with whole wheat flour for a nuttier flavor and increased fiber.
- Sweet Amish Bread: Add a tablespoon of honey or maple syrup to the recipe for a sweeter loaf. You can also add a teaspoon of cinnamon for extra flavor.
- Herb Amish Bread: Add a teaspoon of dried herbs, such as rosemary, thyme, or oregano, to the dough for a savory twist.
- Dairy-Free Amish Bread: Use a plant-based oil, like olive oil or avocado oil, and ensure your sugar is processed without bone char to make this recipe dairy-free.
- Gluten-Free Option: While adapting this recipe for a bread machine with gluten-free flour can be tricky, experiment with a gluten-free bread flour blend. Follow the bread machine’s specific instructions for gluten-free baking. You may need to adjust the liquid content.
FAQs (Frequently Asked Questions)
Q: Why does this recipe call for running the bread machine through the basic cycle twice?
A: The double rising process is key to achieving the light and airy texture characteristic of Amish bread. It allows the yeast to fully develop, resulting in a taller, softer loaf.
Q: Can I use all-purpose flour instead of bread flour?
A: While you can, bread flour is highly recommended. Its higher protein content creates more gluten, which gives the bread its structure and chewy texture. All-purpose flour will result in a denser loaf.
Q: What if my bread machine doesn’t have a basic cycle?
A: Most bread machines have a cycle suitable for white bread, which will work similarly to the basic cycle. Check your machine’s manual for the appropriate setting.
Q: How do I know if the bread is fully cooked?
A: The bread should be golden brown on top and sound hollow when tapped. You can also use a thermometer to check the internal temperature, which should be around 200-210°F (93-99°C).
Q: Can I add nuts or seeds to this bread?
A: Yes, you can add up to 1/2 cup of chopped nuts or seeds to the dough during the kneading cycle. Add them after the dough has already formed a ball to ensure they are evenly distributed.
Final Thoughts
This Amish bread recipe, adapted for the convenience of a bread machine, offers a delightful taste of tradition with minimal effort. The double rising technique truly transforms the texture, creating a loaf that is both light and satisfying. I encourage you to try this recipe and experience the simple pleasure of homemade bread. Don’t be afraid to experiment with variations and find your perfect loaf. Share your creations and feedback – I’d love to hear about your baking adventures! Enjoy it fresh from the machine with a generous slather of butter, or perhaps alongside a hearty soup for a complete and comforting meal. Happy baking!