
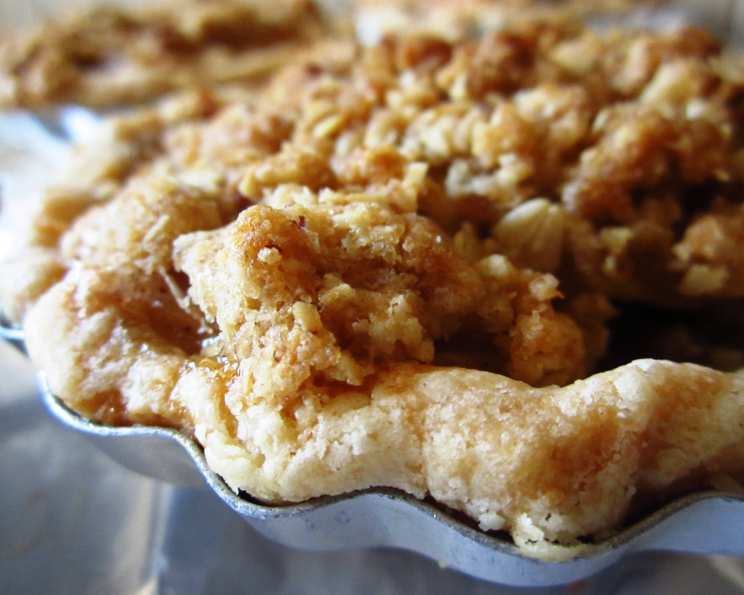
Amish Never Fail Pie Crust: The Secret to Perfect Pies
The aroma of freshly baked pie crust always transports me back to my grandmother’s kitchen. She was a master pie maker, and her secret, she always told me with a wink, was her “never fail” crust. I remember standing on a stool, barely tall enough to reach the counter, watching her expertly cut the shortening into the flour, her hands moving with practiced ease. The buttery scent filled the air, promising a delicious treat to come. Now, decades later, I still use a version of that same “never fail” recipe, a testament to its simplicity and guaranteed success. This recipe is incredibly versatile, holding up beautifully for everything from savory pot pies to sweet fruit fillings.
Recipe Overview
- Prep Time: 15 minutes
- Cook Time: Varies depending on filling
- Total Time: 1 hour 15 minutes (including chilling)
- Servings: 8-12
- Yield: 2 pie crusts
- Dietary Type: Vegetarian
Ingredients
- 4 cups all-purpose flour
- 1 1/2 teaspoons salt
- 1 egg, beaten
- 1 tablespoon granulated sugar
- 1 1/2 cups Crisco (vegetable shortening)
- 1 tablespoon vinegar
- 1/2 cup water
Equipment Needed
- Large mixing bowl
- Pastry blender or fork
- Measuring cups and spoons
- Plastic wrap
- Rolling pin
- Pie dish(es) (9-inch)
Instructions
- In a large mixing bowl, combine the flour, sugar, and salt. Whisk to ensure the ingredients are well combined.
- Using a pastry blender or a fork, cut in the Crisco until the mixture resembles coarse crumbs with pea-sized pieces. This is a crucial step for creating a flaky crust. You want to avoid overmixing, which can lead to a tough crust. The cold Crisco creates pockets of fat that melt during baking, resulting in those desirable layers.
- In a separate small bowl, whisk together the beaten egg, water, and vinegar. The vinegar helps to tenderize the gluten in the flour, resulting in a more delicate crust.
- Gradually add the wet ingredients to the flour mixture. Mix until just moistened and a soft dough forms. Be careful not to overmix. A little bit of flour remaining unincorporated is fine.
- Divide the dough in half, if making two separate pie crusts. Wrap each half in plastic wrap and refrigerate for at least 1 hour before rolling. This allows the gluten to relax, making the dough easier to handle. You can refrigerate it for much longer; even overnight is fine.
- When ready to bake, preheat your oven according to your pie filling recipe. On a lightly floured surface, roll out one portion of the dough to about 1/8 inch thickness.
- Carefully transfer the rolled-out dough to your pie dish. Trim any excess dough from the edges and crimp the edges decoratively.
- Fill the pie crust with your desired filling and bake according to the filling recipe’s instructions. For a blind-baked crust (no filling), prick the bottom of the crust with a fork to prevent it from puffing up and bake at 375°F (190°C) for 15-20 minutes, or until golden brown.
Expert Tips & Tricks
- Keep everything cold: Cold ingredients are essential for a flaky pie crust. Make sure your Crisco and water are thoroughly chilled before you start. You can even chill the flour for 15-20 minutes before beginning for optimal results.
- Don’t overmix: Overmixing develops the gluten in the flour, resulting in a tough crust. Mix the dough until just combined. It’s okay if there are still some streaks of fat visible.
- Rest the dough: Refrigerating the dough is crucial for allowing the gluten to relax. This will make the dough easier to roll out and prevent it from shrinking during baking.
- Blind Baking: For custard or cream pies that require a pre-baked crust, blind bake your crust using pie weights or dried beans to prevent it from puffing up.
- Egg Wash: For a golden-brown crust, brush the top with an egg wash (1 egg beaten with 1 tablespoon of water or milk) before baking.
- Prevent Burning: To prevent the edges of the crust from burning, you can use a pie shield or cover them with foil during the last part of baking.
Serving & Storage Suggestions
Serve your pie warm or at room temperature, depending on the filling. Fruit pies are often best served slightly warm, while custard pies are typically served chilled.
Store leftover pie in the refrigerator for up to 3-4 days. Cover loosely with plastic wrap or store in an airtight container. For longer storage, you can freeze the baked pie for up to 2-3 months. Wrap it tightly in plastic wrap and then foil before freezing.
To reheat frozen pie, thaw it in the refrigerator overnight and then bake in a preheated oven at 350°F (175°C) for 10-15 minutes, or until warmed through.
Nutritional Information
(Estimated, per slice, assuming the crust is used for a standard 8-slice pie):
| Nutrient | Amount per Serving | % Daily Value |
|---|---|---|
| Calories | 450 kcal | 23% |
| Total Fat | 28g | 44% |
| Saturated Fat | 14g | 70% |
| Cholesterol | 20mg | 7% |
| Sodium | 300mg | 13% |
| Total Carbohydrate | 45g | 15% |
| Dietary Fiber | 1g | 4% |
| Sugars | 3g | 6% |
| Protein | 5g | 10% |
Variations & Substitutions
- Whole Wheat Crust: Substitute up to half of the all-purpose flour with whole wheat flour for a nuttier flavor and added fiber.
- Gluten-Free Crust: Use a gluten-free all-purpose flour blend. You may need to add a bit more water to achieve the right consistency. Consider adding 1/4 teaspoon of xanthan gum to help bind the dough.
- Vegan Crust: Replace the egg with 3 tablespoons of aquafaba (chickpea brine) or a flax egg (1 tablespoon ground flaxseed mixed with 3 tablespoons water, let sit for 5 minutes to thicken). Ensure your pie filling is also vegan.
- Lard or Butter: While the recipe calls for Crisco, you can substitute it with lard or cold, unsalted butter. If using butter, make sure it is very cold and cut into small cubes before cutting it into the flour mixture.
- Lemon Juice: Substitute lemon juice for the vinegar for a slightly different flavor profile.
FAQs (Frequently Asked Questions)
Q: Why is it important to keep the ingredients cold?
A: Cold ingredients, especially the Crisco, prevent the fat from melting before baking. This creates pockets of steam that result in a flaky crust.
Q: Can I make this dough ahead of time?
A: Absolutely! The dough can be stored in the refrigerator for up to a week or frozen for up to 3 months. Thaw completely in the refrigerator before rolling out.
Q: My crust always shrinks when I bake it. What am I doing wrong?
A: Overworking the dough develops the gluten, causing it to shrink during baking. Make sure not to overmix and allow the dough to rest in the refrigerator before rolling. Also, avoid stretching the dough too thin when placing it in the pie dish.
Q: Can I use this crust for savory pies?
A: Yes, this crust is very versatile and works well for both sweet and savory pies. You can adjust the sugar content depending on the filling. For a savory crust, you can even add some herbs like rosemary or thyme to the dough.
Q: What is “blind baking” and why is it necessary?
A: Blind baking is pre-baking the pie crust before adding the filling. This is often necessary for pies with fillings that don’t require baking, like custard or cream pies. It prevents the crust from becoming soggy.
Final Thoughts
This Amish Never Fail Pie Crust recipe truly lives up to its name. It’s reliable, easy to make, and consistently produces a flaky, tender crust that will elevate any pie. Don’t be intimidated by the idea of making your own pie crust – this recipe is designed for success, even for beginner bakers. So, gather your ingredients, channel your inner baker, and create something delicious! I encourage you to try this recipe and share your creations with friends and family. Imagine the joy of serving a homemade pie with a perfectly golden-brown crust – it’s a simple pleasure that’s hard to beat. Maybe pair it with a scoop of homemade vanilla ice cream or a steaming mug of spiced cider for the ultimate comfort food experience.