
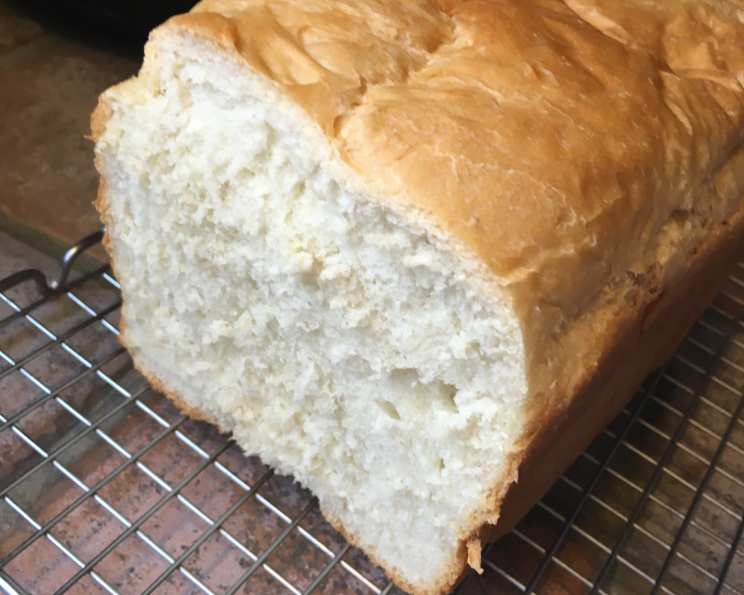
Amish Style White Loaf Bread (Bread Machine)
The aroma of baking bread has always been a siren song for me, drawing me back to my grandmother’s kitchen. She wasn’t Amish herself, but she lived in a community bordering Lancaster County, Pennsylvania, and she learned the secrets of this incredibly soft, slightly sweet white bread from her neighbors. I can still picture her, flour dusting her apron, carefully slicing a warm loaf and slathering it with butter and homemade jam. It was pure comfort, a taste of simple goodness that has stayed with me throughout my culinary journey. While she baked hers by hand, I’ve adapted it for the convenience of a bread machine, allowing anyone to experience that same comforting taste with minimal effort.
Recipe Overview
- Prep Time: 5 minutes
- Cook Time: 3 hours 5 minutes (including rise and bake time within the bread machine cycle)
- Total Time: 3 hours 10 minutes
- Servings: 12 slices
- Yield: 1 loaf
- Dietary Type: Vegetarian
Ingredients
- 1 cup water
- 2 tablespoons vegetable oil
- 3 cups all-purpose flour
- 1/3 cup sugar
- 3/4 teaspoon salt
- 1 tablespoon instant yeast
Equipment Needed
- Bread Machine
Instructions
-
Place all the ingredients in the bread pan in the order according to your bread machine manufacturer’s directions. Generally, this means adding the liquid ingredients (water and vegetable oil) first.
-
Next, add the dry ingredients: all-purpose flour, sugar, and salt. Make sure the salt and sugar are not directly touching the yeast as this can inhibit the yeast’s activity.
-
Finally, add the instant yeast on top of the dry ingredients. Some prefer to make a small well in the flour for the yeast.
-
Put the bread pan in the bread machine. Secure it properly according to the bread machine’s instructions.
-
Select the Basic Cycle on your bread machine.
-
Press Start. The bread machine will automatically knead, proof (rise), and bake the bread. This process typically takes around 3 hours, but it can vary depending on your bread machine model. Refer to your bread machine’s manual for specific cycle times.
-
When the baking cycle ends, immediately remove the bread from the pan. Use oven mitts as the pan will be very hot.
-
Place the loaf on a wire rack to cool completely to room temperature before slicing. Cooling the bread completely prevents a gummy texture and makes it easier to slice.
Expert Tips & Tricks
- Ingredient Temperature: Using slightly warmed water (around 80-90°F) can help activate the yeast more quickly, especially in cooler environments. However, avoid water that is too hot, as it can kill the yeast.
- Flour Measurement: Use the spoon-and-level method to measure your flour for the most accurate results. Spoon the flour into your measuring cup, then level it off with a straight edge (like a knife or the back of a spoon). Avoid scooping directly from the bag, as this can pack the flour and lead to a denser loaf.
- Yeast Quality: Ensure your yeast is fresh and active. Old or improperly stored yeast may not rise properly, resulting in a flat or dense loaf. You can test your yeast by mixing it with a little warm water and sugar. If it foams up within 5-10 minutes, it’s good to go.
- Kneading Adjustment: If your bread machine allows you to adjust the kneading time, experiment with slightly longer kneading (5-10 minutes) for a more developed gluten structure, which will result in a lighter and airier loaf.
- Browning Control: If your bread machine has a crust color setting, adjust it to your preference. For a darker crust, select the “Dark” setting. For a lighter crust, choose the “Light” setting.
- Troubleshooting a Dense Loaf: Several factors can contribute to a dense loaf, including using too much flour, not enough yeast, or using old yeast. Double-check your measurements and ensure your yeast is fresh.
- Adding Flavor: Feel free to add a touch of vanilla extract (1/2 teaspoon) or a pinch of nutmeg for a subtle flavor boost.
Serving & Storage Suggestions
This Amish style white loaf is best enjoyed fresh, sliced, and spread with butter, jam, or honey. It’s also excellent for making sandwiches, toast, or grilled cheese.
To store, wrap the cooled loaf tightly in plastic wrap or place it in a resealable plastic bag. It will stay fresh at room temperature for 2-3 days.
For longer storage, you can freeze the loaf. Wrap it tightly in plastic wrap, then place it in a freezer-safe bag. It can be frozen for up to 2-3 months. Thaw completely at room temperature before slicing and serving. To refresh the bread, you can lightly toast it or warm it in the oven for a few minutes.
Nutritional Information
| Nutrient | Amount per Serving | % Daily Value |
|---|---|---|
| Calories | 158.5 kcal | N/A |
| Calories from Fat | 23 kcal | N/A |
| Total Fat | 2.6 g | 4% |
| Saturated Fat | 0.3 g | 1% |
| Cholesterol | 0 mg | 0% |
| Sodium | 147.1 mg | 6% |
| Total Carbohydrate | 29.8 g | 9% |
| Dietary Fiber | 1.1 g | 4% |
| Sugars | 5.6 g | N/A |
| Protein | 3.6 g | 7% |
Note: Nutritional information is an estimate and may vary based on specific ingredients and bread machine settings.
Variations & Substitutions
- Whole Wheat Version: Substitute 1 cup of the all-purpose flour with whole wheat flour for a nuttier flavor and added fiber. You may need to adjust the amount of water slightly, adding a tablespoon at a time until the dough forms a smooth ball.
- Dairy-Free: While this recipe is already fairly simple, ensure your vegetable oil is plant-based to keep the loaf dairy-free.
- Sweeter Loaf: Increase the amount of sugar to ½ cup for a sweeter bread, perfect for French toast or dessert.
- Herb Infused: Add 1-2 tablespoons of dried herbs like rosemary, thyme, or oregano to the dry ingredients for a savory twist.
- Garlic Bread: After baking, slice the loaf and brush with a mixture of melted butter, minced garlic, and parsley for homemade garlic bread.
FAQs (Frequently Asked Questions)
Q: Can I use active dry yeast instead of instant yeast?
A: Yes, you can. Use the same amount (1 tablespoon) but dissolve it in the warm water with a teaspoon of sugar for about 5-10 minutes before adding it to the bread machine. This will ensure the yeast is active.
Q: My bread machine doesn’t have a “Basic” cycle. What cycle should I use?
A: Look for a cycle that is similar, such as “White Bread” or “Regular” cycle. These cycles typically have a similar kneading, rising, and baking time.
Q: The crust of my bread is too dark. How can I prevent this?
A: Try selecting a lighter crust setting on your bread machine. You can also cover the top of the bread with foil during the last 15-20 minutes of baking to prevent it from browning too much.
Q: My bread is sinking in the middle after baking. What could be the cause?
A: This could be due to too much moisture or too much yeast. Try reducing the amount of water by a tablespoon or two, and make sure your yeast is not expired.
Q: Can I add nuts or seeds to this bread?
A: Yes, you can add about 1/2 cup of chopped nuts or seeds to the dough during the last few minutes of the kneading cycle. This will ensure they are evenly distributed throughout the loaf.
Final Thoughts
I truly hope you give this Amish Style White Loaf a try. It’s a testament to the power of simple ingredients and time-honored techniques. The result is a loaf of bread that’s not only delicious but also evokes feelings of comfort and nostalgia. Don’t hesitate to experiment with the variations and substitutions to create a loaf that perfectly suits your taste. And please, share your creations and feedback with me! There’s nothing I enjoy more than hearing how others have made this recipe their own. This bread pairs wonderfully with a hearty soup or a simple salad for a complete and satisfying meal.