
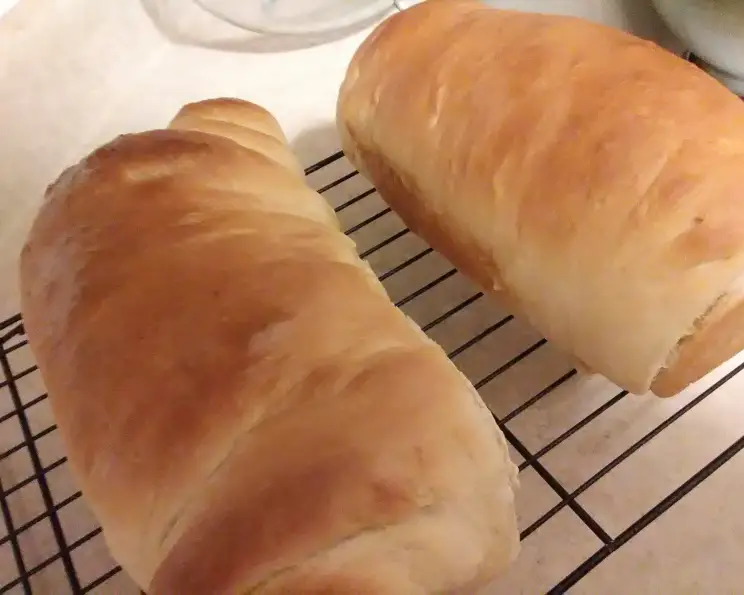
Amish White Bread: A Taste of Simple Comfort
There’s something magical about the smell of freshly baked bread wafting through the house. It evokes memories of Sunday mornings spent at my grandmother’s farmhouse, where the aroma of her legendary white bread was a constant, comforting presence. She never shared her “secret” recipe, but this Amish white bread comes incredibly close to capturing that same comforting simplicity and flavor that filled her kitchen. It’s more than just bread; it’s a taste of home.
Recipe Overview
- Prep Time: 2 hours
- Cook Time: 30 minutes
- Total Time: 2 hours 30 minutes
- Yield: 2 loaves
- Dietary Type: Vegetarian
Ingredients
- 2 cups warm water (110-120 degrees Fahrenheit)
- 2/3 cup white sugar
- 1 1/2 tablespoons yeast
- 1 1/2 teaspoons salt
- 1/4 cup vegetable oil
- 6 cups flour
- 4 tablespoons butter, melted
Equipment Needed
- Large mixing bowl
- Measuring cups and spoons
- Dough hook (optional, for stand mixer)
- Lightly floured surface
- Greased bowl
- Warm, damp towel
- Two loaf pans
- Cooling rack
Instructions
-
In a large mixing bowl, combine the warm water and sugar. Mix well until the sugar is completely dissolved. The water temperature is crucial; it should be warm enough to activate the yeast but not so hot that it kills it.
-
Add the yeast to the sugar water. Allow the yeast to dissolve, letting it stand for 5-15 minutes until it becomes foamy and “bloomed”. This indicates that the yeast is active and ready to use.
-
Add the salt, vegetable oil, and half of the flour to the bowl. Mix until just combined.
-
Gradually add the remaining flour, mixing until a dough forms. If using a stand mixer, use the dough hook attachment. Continue mixing until the dough pulls away from the sides of the bowl. If mixing by hand, turn the dough out onto a lightly floured surface as it becomes difficult to manage in the bowl.
-
Turn the dough out onto a lightly floured surface and knead for a few minutes until smooth and elastic. This develops the gluten, which gives the bread its structure.
-
Place the dough in a greased bowl, turning it to coat all sides. This prevents the dough from drying out as it rises.
-
Cover the bowl with a warm, damp towel. This creates a humid environment that encourages the dough to rise.
-
Set the bowl in a warm place and let the dough rise until it has doubled in size, about an hour. The time may vary depending on the temperature of your kitchen.
-
Remove the towel and punch down the dough to release the trapped air.
-
Turn the dough out onto a lightly floured surface and divide it in half.
-
Flatten each half into a rectangle and “jelly roll” it up tightly into a loaf shape. Pinch the ends to seal.
-
Place each loaf into a greased loaf pan.
-
Cover the loaves and let them rise again for 30-50 minutes, or until they have doubled in size.
-
Preheat oven to 350 degrees Fahrenheit (175 degrees Celsius).
-
Bake the loaves for 25-30 minutes, or until they are golden brown. To ensure the bread is fully baked, insert a toothpick into the center; it should come out clean.
-
Remove the loaves from the oven and brush the tops with melted butter. This adds flavor and gives the crust a beautiful sheen.
-
Let the loaves rest in the pans for 10 minutes before transferring them to a cooling rack.
-
Let the bread cool for at least 10 minutes on a cooling rack before slicing and serving. This allows the bread to set properly.
Expert Tips & Tricks
- For an extra soft crust, brush the loaves with melted butter immediately after baking and cover them with a clean kitchen towel while they cool. The steam will soften the crust.
- If your kitchen is cold, you can create a warm environment for rising dough by placing the bowl in a slightly warmed oven (turned off!). Alternatively, place the bowl on top of the refrigerator or near a warm appliance.
- If the top of the bread is browning too quickly during baking, tent it loosely with foil.
- To ensure even rising, use a kitchen scale to weigh the dough halves before shaping the loaves.
- A stand mixer makes kneading much easier, but kneading by hand is perfectly fine and can be quite therapeutic!
Serving & Storage Suggestions
Amish white bread is delicious served warm with butter, jam, or as a base for sandwiches. It’s also fantastic toasted.
To store, keep the bread in an airtight container at room temperature for up to 3 days. For longer storage, wrap the loaves tightly in plastic wrap and freeze for up to 2 months. Thaw completely at room temperature before slicing and serving. You can also reheat slices in a toaster or oven for a warm, fresh-baked taste.
Nutritional Information
| Nutrient | Amount per Serving | % Daily Value |
|---|---|---|
| Calories | 2096.9 kcal | N/A |
| Calories from Fat | N/A | 23% |
| Total Fat | 54.6 g | 84% |
| Saturated Fat | 18.8 g | 93% |
| Cholesterol | 61.1 mg | 20% |
| Sodium | 1966.8 mg | 81% |
| Total Carbohydrate | 356.6 g | 118% |
| Dietary Fiber | 12.6 g | 50% |
| Sugars | 67.6 g | 270% |
| Protein | 42.6 g | 85% |
Note: Nutritional information is an estimate and may vary based on specific ingredients and portion sizes.
Variations & Substitutions
- Whole Wheat Amish Bread: Substitute 2-3 cups of the all-purpose flour with whole wheat flour for a nuttier flavor and added fiber.
- Sweet Amish Bread: Add 1/4 cup of honey or maple syrup to the dough for a sweeter taste. You can also add a teaspoon of cinnamon for a warm, comforting spice.
- Herb Amish Bread: Incorporate 1-2 tablespoons of dried herbs, such as rosemary, thyme, or oregano, into the dough for a savory twist.
- Dairy-Free Amish Bread: Replace the melted butter with a dairy-free alternative like vegan butter or olive oil.
FAQs (Frequently Asked Questions)
Q: Why is the water temperature so important?
A: The warm water activates the yeast. If the water is too cold, the yeast won’t activate. If it’s too hot, it will kill the yeast.
Q: Can I use instant yeast instead of active dry yeast?
A: Yes, you can. If using instant yeast, you can skip the blooming step and add it directly to the dry ingredients.
Q: How do I know if my bread is done baking?
A: The bread should be golden brown and sound hollow when tapped on the bottom. A toothpick inserted into the center should come out clean.
Q: What if my dough doesn’t rise?
A: Make sure your yeast is fresh and your water is the correct temperature. Also, ensure the rising environment is warm enough.
Q: Can I make this dough in a bread machine?
A: Yes, you can. Follow your bread machine’s instructions for white bread.
Final Thoughts
This Amish white bread recipe is a testament to the beauty of simple, wholesome ingredients. It’s a bread that speaks of tradition, comfort, and the joy of sharing a homemade loaf with loved ones. I encourage you to try this recipe and experience the satisfaction of baking your own delicious bread. Don’t be afraid to experiment with variations and make it your own. And if you do, please share your creations and feedback – I’d love to hear how it turns out! Enjoy it with a cup of hot soup on a chilly evening, or simply spread with butter and savor the simple pleasure of a perfect slice.