
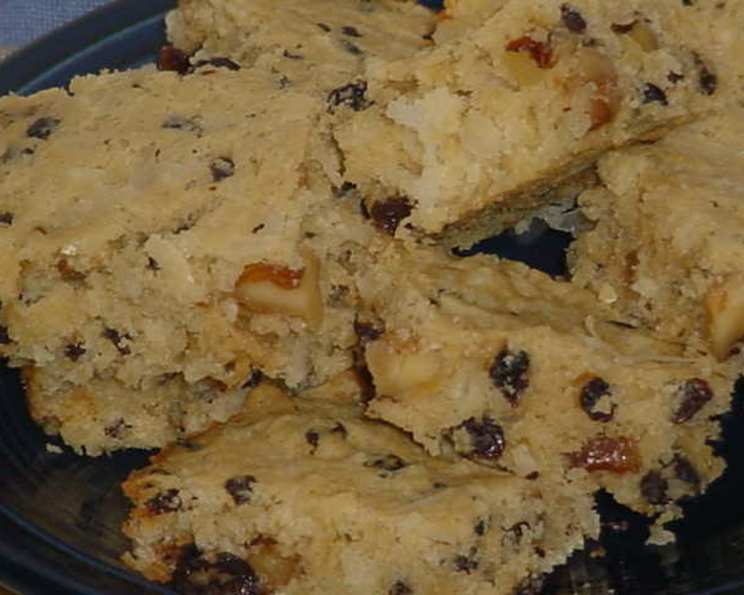
Amy’s Chewy Coconut Bars (Diabetic)
The scent of coconut always takes me back to my grandmother’s kitchen. She wasn’t a fancy baker, but her coconut macaroons were legendary. They were simple, chewy clouds of tropical sweetness. This recipe for Amy’s Chewy Coconut Bars evokes a similar feeling of comfort and nostalgia, but with the added benefit of being suitable for those watching their sugar intake. These bars are a delightful tribute to simple pleasures and thoughtful baking, perfect for sharing with loved ones.
Recipe Overview
- Prep Time: 15 minutes
- Cook Time: 20 minutes
- Total Time: 35 minutes
- Servings: 16
- Yield: 16 bars
- Dietary Type: Diabetic
Ingredients
- 2 eggs
- 5 1/4 teaspoons Splenda Sugar Blend for Baking
- 1/4 teaspoon maple flavoring
- 1/2 cup margarine, melted
- 1 teaspoon vanilla
- 1/2 cup all-purpose flour
- 1 teaspoon baking powder
- 1/4 teaspoon salt
- 1 cup coconut, finely chopped
- 1/2 cup chopped walnuts (optional)
- 1/2 cup raisins
Equipment Needed
- Mixer (handheld or stand)
- Medium bowl
- Small bowl
- 8-inch square baking pan
- Grease-proof paper or baking spray
- Wire rack
- Measuring cups and spoons
Instructions
- Preheat your oven to 350 degrees F (175 degrees C). Ensure your oven rack is positioned in the center for even baking.
- In a medium bowl, using a mixer, beat the eggs, Splenda Sugar Blend, and maple flavoring until well combined and slightly frothy. This usually takes about 2-3 minutes on medium speed.
- Blend in the melted margarine and vanilla extract until the mixture is smooth and homogenous. It’s important the margarine isn’t too hot, or it might start cooking the eggs.
- In a separate small bowl, combine the all-purpose flour, baking powder, and salt. Stir with a whisk or fork to ensure there are no lumps. This ensures even distribution of the baking powder, which is crucial for the bars to rise properly.
- Gradually stir the dry ingredients into the wet ingredients. Mix until just combined. Avoid overmixing, as this can develop the gluten in the flour, resulting in tougher bars.
- Fold in the finely chopped coconut, walnuts (if using), and raisins. Distribute them evenly throughout the batter.
- Grease an 8-inch square baking pan thoroughly. Alternatively, line the pan with parchment paper, leaving an overhang on two sides to easily lift the bars out later.
- Spread the batter evenly into the prepared baking pan. Use a spatula to ensure the batter reaches all corners.
- Bake in the preheated oven for approximately 20 minutes, or until the bars are browned and a toothpick inserted into the center comes out clean. Be careful not to overbake, as this will make the bars dry. Start checking for doneness around 18 minutes.
- Once baked, cool the bars completely in the pan on a wire rack before cutting them into squares. Cooling them completely will allow them to firm up, making them easier to cut.
Expert Tips & Tricks
- For extra chewy bars: Don’t overbake! Slightly underbaked bars will have a chewier texture.
- Spice it up: Add a pinch of cinnamon or nutmeg to the dry ingredients for a warmer flavor profile.
- Nutty Variations: Feel free to experiment with different types of nuts, such as pecans, almonds, or macadamia nuts. Toasting the nuts beforehand will enhance their flavor.
- Fruit Swaps: Dried cranberries, chopped dates, or sugar-free chocolate chips can be used instead of or in addition to the raisins.
- Maple Enhancement: For a stronger maple flavor, add an additional 1/4 teaspoon of maple flavoring.
- Vegan Modification: Substitute the eggs with flax eggs (1 tablespoon ground flaxseed mixed with 3 tablespoons water, let sit for 5 minutes to thicken) for a vegan version. Ensure the margarine is also vegan.
Serving & Storage Suggestions
These Chewy Coconut Bars are best served at room temperature. They make a wonderful addition to a dessert platter, a sweet treat with afternoon tea or coffee, or a satisfying snack any time of day.
Storage: Store the cooled bars in an airtight container at room temperature for up to 3 days, in the refrigerator for up to a week, or in the freezer for up to 2 months. If freezing, wrap the bars individually in plastic wrap to prevent freezer burn.
Reheating: If frozen, thaw the bars in the refrigerator or at room temperature before serving.
Nutritional Information
| Nutrient | Amount per Serving | % Daily Value |
|---|---|---|
| Calories | 126 kcal | N/A |
| Protein | 2 g | N/A |
| Carbohydrates | 10 g | N/A |
| Fat | 9 g | N/A |
| Cholesterol | 27 mg | N/A |
| Sodium | 141 mg | N/A |
Please note that this is an estimate and may vary depending on the specific ingredients used.
Variations & Substitutions
- Gluten-Free: Substitute the all-purpose flour with a gluten-free all-purpose baking flour blend. Make sure it contains xanthan gum or add 1/4 teaspoon of xanthan gum to the dry ingredients.
- Coconut Flour Option: Experiment with using coconut flour (start with 1/4 cup) but note you may need to adjust the wet ingredients as coconut flour is very absorbent.
- Extract Alternatives: Instead of maple extract, consider using almond extract or a citrus zest for a different flavor profile.
- Sugar-Free Chocolate Chunks: For chocolate lovers, fold in sugar-free chocolate chunks for an extra indulgence.
FAQs (Frequently Asked Questions)
Q: Can I use unsweetened shredded coconut instead of finely chopped coconut?
A: Yes, but be sure to use unsweetened coconut to maintain the diabetic-friendly nature of the recipe. You might want to pulse the shredded coconut in a food processor to achieve a finer texture.
Q: What if I don’t have maple flavoring? Can I omit it?
A: You can omit the maple flavoring. The bars will still be delicious, but the maple note will be absent. Consider substituting with a tiny pinch of nutmeg for added flavor.
Q: Can I double the recipe?
A: Absolutely! Simply double all the ingredients and bake in a 9×13 inch pan. You might need to increase the baking time by a few minutes.
Q: How can I prevent the bars from sticking to the pan?
A: Thoroughly grease your baking pan or line it with parchment paper with an overhang. This will ensure the bars release easily after baking.
Q: Are these bars suitable for people with severe nut allergies?
A: If you have a severe nut allergy, omit the walnuts entirely and ensure all other ingredients are processed in a nut-free facility.
Final Thoughts
These Chewy Coconut Bars are more than just a diabetic-friendly treat; they’re a testament to the idea that deliciousness and health can coexist. Whether you’re baking for someone with dietary restrictions or simply seeking a slightly lighter dessert option, I encourage you to try this recipe. Share these bars with friends and family, and let me know how they turn out. Perhaps a cup of herbal tea on the side? Enjoy!