
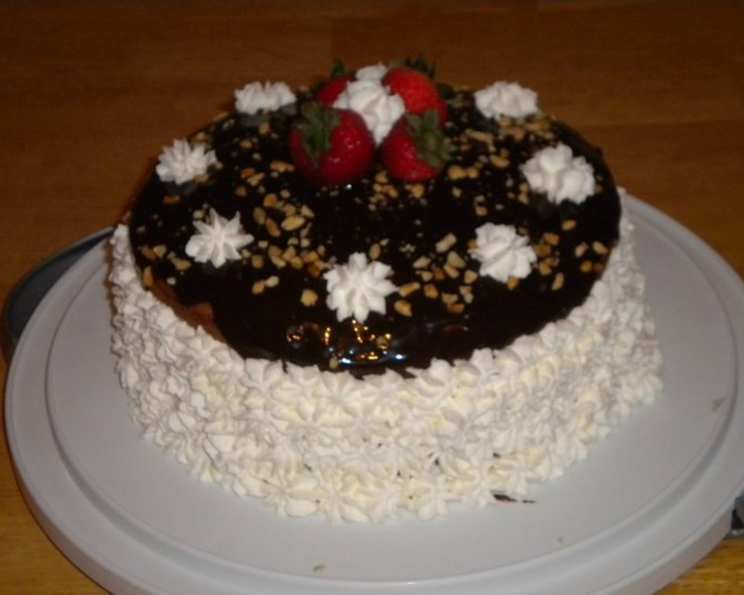
An Actual Banana Split Cake: A Slice of Nostalgia
My grandmother, bless her heart, was the queen of potlucks. But amidst the sea of ambrosia salads and seven-layer dips, her banana split cake always reigned supreme. I remember being a kid, eyes wide with anticipation, as she carefully layered the cake, the aroma of ripe bananas and warm fudge filling the air. It wasn’t just dessert; it was pure, unadulterated happiness on a plate. To this day, that first bite of banana split cake transports me back to her sunny kitchen, surrounded by laughter and love.
Recipe Overview
- Prep Time: 45 minutes
- Cook Time: 30 minutes
- Total Time: 1 hour 15 minutes
- Servings: 12
- Yield: 1 four-layer cake
- Dietary Type: Not suitable for vegan or gluten-free diets
Ingredients
- 2 cups all-purpose flour
- 1 1/2 cups sugar
- 1 1/2 teaspoons baking powder
- 3/4 teaspoon baking soda
- 1/2 teaspoon salt
- 1 cup mashed ripe banana (3 medium, plus 1 more for garnish)
- 1/2 cup buttermilk
- 1/2 cup shortening
- 2 eggs
- 1 teaspoon vanilla extract
- 1 cup whipping cream
- 1 tablespoon sugar
- 1 cup sliced fresh strawberries
- 1 (8 ounce) can crushed pineapple, in juice- drain well
- 1 (11 ounce) jar chocolate fudge topping
- 1/2 cup chopped peanuts
Equipment Needed
- Two 9-inch cake pans
- Mixing bowls
- Electric mixer
- Serrated knife
- Rubber spatula
- Measuring cups and spoons
- Serving platter
Instructions
-
Preheat your oven to 350°F (175°C). Grease and flour two 9-inch cake pans. This prevents the cake from sticking and ensures easy removal.
-
In a large bowl, mix together the all-purpose flour, sugar, baking powder, baking soda, and salt. Ensure all dry ingredients are well combined to avoid any pockets of baking powder or soda that could affect the cake’s texture.
-
Add the mashed ripe banana, buttermilk, shortening, eggs, and vanilla to the flour mixture. The ripeness of the bananas is key – they should be soft and speckled for maximum flavor and moisture.
-
Beat the mixture on medium speed for 3 minutes. This step is crucial for developing the gluten in the flour and creating a light and airy cake. Don’t skimp on the beating time!
-
Pour the batter evenly into the prepared cake pans. Use a kitchen scale to ensure each pan receives an equal amount of batter for even baking.
-
Bake at 350°F (175°C) for 30 minutes. To check for doneness, insert a toothpick into the center of each cake. If it comes out clean or with just a few moist crumbs, the cakes are done.
-
Cool the cakes in the pans for 10 minutes before inverting them onto a wire rack to finish cooling completely. This prevents the cakes from sticking and breaking.
-
Once the cakes are completely cool, use a long serrated knife to carefully cut each layer of cake in half horizontally, creating four thinner layers. A serrated knife provides the cleanest and most even cut.
-
In a chilled mixing bowl (clean and free of any grease), combine the whipping cream and sugar. Chilling the bowl and beaters ensures the cream whips up properly.
-
Beat with chilled beaters of an electric mixer on low to medium speed until soft peaks form (the tips will curl). Be vigilant! Over-beating will result in butter.
-
Divide the whipped cream in half. Fold the sliced strawberries into one half of the whipped cream and the drained crushed pineapple into the other half. Gently fold to avoid deflating the whipped cream.
-
Gently heat and stir the fudge topping over low heat until just warm. Be careful not to overheat the fudge, as it can become thick and difficult to spread.
-
Place the first layer of cake on a serving platter and top with the strawberry cream, spreading it evenly to the edge.
-
Place the second layer of cake on top of the first and spread half of the warmed fudge topping, letting some of it drizzle down the sides. Sprinkle with half of the chopped peanuts.
-
Place the third layer of cake on top of the second and top with the pineapple cream, spreading it evenly to the edge.
-
Place the fourth layer of cake on top of the third and spread the remaining warm fudge topping, again letting some of it drizzle down the sides. Sprinkle with the remaining chopped peanuts.
-
Garnish with the remaining banana, sliced.
-
Serve immediately or refrigerate until ready to serve.
Expert Tips & Tricks
- For an extra burst of banana flavor, brush the cake layers with a simple syrup infused with banana extract before assembling.
- If you’re short on time, you can use store-bought pound cake as a substitute for the homemade cake layers. Just slice them thinly and proceed with the assembly.
- To prevent the cake from becoming soggy, assemble it shortly before serving. The longer it sits, the more the whipped cream and fruit will soak into the cake.
- If your fudge topping is too thick, add a tablespoon of milk or cream to thin it out.
- Toast the peanuts before chopping them for a richer, nuttier flavor.
Serving & Storage Suggestions
This banana split cake is best served chilled. Garnish each slice with an extra dollop of whipped cream and a maraschino cherry for a classic presentation.
Leftovers can be stored in an airtight container in the refrigerator for up to 3 days. However, the cake may become slightly softer over time. It is not recommended to freeze this cake, as the whipped cream will not hold its texture well after thawing.
Nutritional Information
| Nutrient | Amount per Serving | % Daily Value |
|---|---|---|
| Calories | 734.8 kcal | N/A |
| Calories from Fat | 302 g | 41% |
| Total Fat | 33.6 g | 51% |
| Saturated Fat | 12.8 g | 63% |
| Cholesterol | 95 mg | 31% |
| Sodium | 514.1 mg | 21% |
| Total Carbohydrate | 101 g | 33% |
| Dietary Fiber | 3.8 g | 15% |
| Sugars | 60.6 g | N/A |
| Protein | 10.5 g | 21% |
Note: Nutritional information is an estimate and may vary based on specific ingredients and portion sizes.
Variations & Substitutions
- Tropical Twist: Substitute mango and kiwi for the strawberries, and use coconut whipped cream for a tropical flavor profile.
- Nut-Free Option: Omit the peanuts and use shaved chocolate or colorful sprinkles instead.
- Chocolate Lover’s Dream: Add chocolate chips to the cake batter and use chocolate whipped cream.
- Seasonal Fruit: Adapt the fruit to the season. Try using blueberries and raspberries in the summer, or sliced pears and cranberries in the fall.
FAQs (Frequently Asked Questions)
Q: Can I make this cake ahead of time?
A: It’s best to assemble the cake shortly before serving to prevent it from becoming soggy. You can bake the cake layers and prepare the toppings in advance, storing them separately until ready to assemble.
Q: Can I use frozen fruit?
A: Fresh fruit is recommended for the best flavor and texture. If using frozen fruit, be sure to thaw it completely and drain off any excess liquid before using it.
Q: My whipped cream isn’t thickening. What am I doing wrong?
A: Make sure your bowl and beaters are chilled, and that you’re using cold whipping cream. Also, avoid over-beating the cream, as it can turn into butter.
Q: Can I use a different type of topping?
A: Absolutely! Feel free to experiment with different toppings, such as caramel sauce, butterscotch sauce, or even marshmallow fluff.
Q: How can I prevent the banana slices from browning?
A: Brush the banana slices with lemon juice to prevent them from oxidizing and turning brown.
Final Thoughts
This banana split cake is more than just a dessert; it’s a celebration of flavors and textures, a slice of pure joy that’s perfect for any occasion. Whether you’re looking for a crowd-pleasing treat to bring to a potluck or simply want to indulge in a nostalgic classic, this recipe is sure to hit the spot. So, gather your ingredients, preheat your oven, and get ready to create a masterpiece that will transport you back to your fondest childhood memories. I encourage you to try this recipe and share your own twist on this timeless classic. Don’t hesitate to pair it with a scoop of vanilla ice cream for that ultimate banana split experience. Happy baking!