
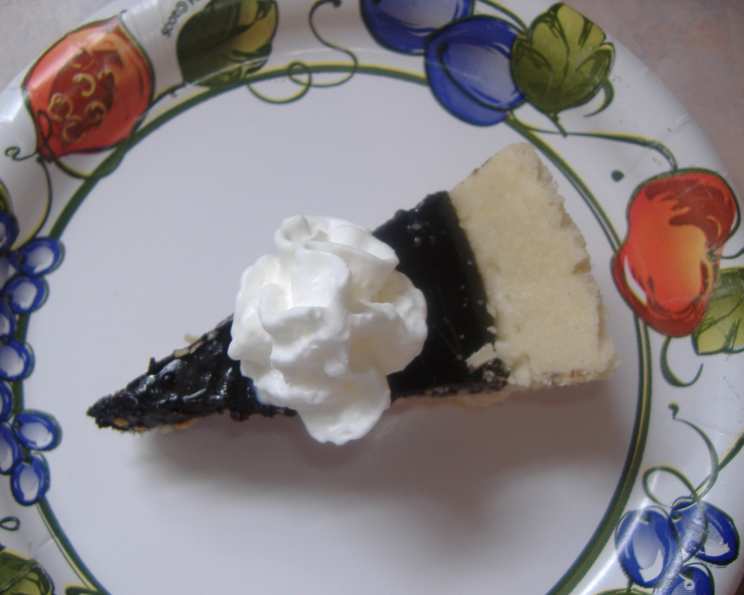
Angela’s Chocolate Cream Pie: A Slice of Comfort
I can still remember the aroma filling my grandmother’s kitchen – a rich, deep chocolate that promised pure indulgence. Angela, a family friend known for her incredible baking, always brought this chocolate cream pie to our summer picnics. Each bite was a cool, silky escape from the heat, and the memory of sharing laughter and pie under the warm sun is a flavor all its own. It’s a pie that speaks of simple joys and the love shared around a table, and I’m thrilled to share this treasured recipe with you.
Recipe Overview
- Prep Time: 30 minutes
- Cook Time: 10 minutes
- Total Time: 3 hours 30 minutes (includes chilling)
- Servings: 6
- Yield: 1 pie
- Dietary Type: Not Gluten-Free
Ingredients
- 1 cup sugar, divided
- 2 tablespoons cornstarch
- 1 tablespoon self-rising flour
- 1/4 cup cocoa
- 1/4 teaspoon salt
- 2 1/4 cups milk, divided
- 3 egg yolks, lightly beaten
- 1 tablespoon butter
- 1 teaspoon vanilla extract
- 1 (9 inch) pie crust, baked
Equipment Needed
- Small bowl
- Whisk
- Saucepan
- Measuring cups and spoons
- 9-inch pie plate
Instructions
-
In a small bowl, combine 1/4 cup of the sugar, the cornstarch, flour, cocoa, and salt. Be sure to whisk these dry ingredients together thoroughly to ensure even distribution and prevent lumps in your filling.
-
Add 1/4 cup of the milk and the lightly beaten egg yolks to the bowl. Stir until well blended, creating a smooth slurry. This mixture will thicken the chocolate cream as it cooks.
-
In a saucepan, combine the remaining 3/4 cup sugar and the remaining 2 cups milk. Place the saucepan over medium heat and gradually bring the mixture to a boil, stirring occasionally to prevent scorching.
-
Once the milk mixture reaches a boil, remove it from the heat. This step is crucial to prevent the filling from becoming too thick too quickly.
-
Temper the egg yolk mixture by slowly stirring about 1 cup of the hot milk mixture into the bowl with the cocoa mixture. This prevents the egg yolks from scrambling when added to the hot saucepan. The goal is to gradually raise their temperature.
-
Pour the tempered cocoa mixture back into the saucepan with the remaining hot milk.
-
Return the saucepan to medium-high heat and bring the mixture to a boil, stirring constantly. Continuous stirring is essential to prevent the filling from sticking to the bottom of the pan and burning.
-
Let the mixture boil for 5 minutes, continuing to stir vigorously. The filling should thicken considerably during this time. If it doesn’t thicken enough, you can continue to boil for another minute or two, but be careful not to overcook it.
-
Remove the saucepan from the heat and stir in the butter and vanilla extract until they are fully incorporated. The butter adds richness and the vanilla enhances the chocolate flavor.
-
Pour the hot chocolate cream filling into the baked pie crust. Spread it evenly to ensure a smooth surface.
-
Let the pie chill in the refrigerator for at least 2-3 hours before serving. This allows the filling to set completely and develop its cool, creamy texture. I often find overnight is best, if you can wait that long!
-
Before serving, top each slice with a dollop of whipped cream or Cool Whip. This adds a light and airy contrast to the rich chocolate filling.
Expert Tips & Tricks
-
Preventing a Skin: To prevent a skin from forming on the surface of the filling while it cools, press a piece of plastic wrap directly onto the surface of the warm filling before refrigerating.
-
Baking the Crust: If your pie crust tends to shrink during baking, try blind baking it with pie weights or dried beans. This will help maintain its shape.
-
Chocolate Intensity: For a richer, more intense chocolate flavor, use dark cocoa powder instead of regular cocoa powder.
-
Lump-Free Filling: Make sure to whisk the dry ingredients very well initially. This is crucial to preventing lumps from forming as the filling thickens. Sifting the dry ingredients can also help.
Serving & Storage Suggestions
This Chocolate Cream Pie is best served chilled, straight from the refrigerator. A dollop of whipped cream or a sprinkle of chocolate shavings adds a touch of elegance. Leftovers can be stored in the refrigerator for up to 3 days. Keep the pie covered tightly to prevent it from drying out or absorbing odors. While you can freeze this pie, the texture of the filling might change slightly upon thawing. It’s generally best enjoyed fresh.
Nutritional Information
| Nutrient | Amount per Serving | % Daily Value |
|---|---|---|
| Calories | 362 kcal | N/A |
| Total Fat | 14.7 g | 22% |
| Saturated Fat | 6.5 g | 32% |
| Cholesterol | 112.3 mg | 37% |
| Sodium | 311.8 mg | 12% |
| Total Carbohydrate | 53.7 g | 17% |
| Dietary Fiber | 1.5 g | 5% |
| Sugars | 34.4 g | N/A |
| Protein | 6 g | 11% |
Note: Nutritional information is an estimate and may vary based on specific ingredients and portion sizes.
Variations & Substitutions
- Gluten-Free: Use a gluten-free pie crust to make this pie suitable for those with gluten sensitivities. Many pre-made gluten-free crusts are available, or you can make your own from scratch.
- Dairy-Free: Substitute the milk with almond milk, soy milk, or oat milk. Use a dairy-free butter alternative for a completely dairy-free version.
- Chocolate Chips: Stir in 1/2 cup of chocolate chips into the filling after it’s removed from the heat for added flavor and texture.
- Espresso Boost: Add 1 teaspoon of instant espresso powder to the dry ingredients for a mocha-flavored pie.
- Peanut Butter Twist: Swirl in a few tablespoons of peanut butter into the filling after it’s cooked for a delicious peanut butter chocolate combination.
FAQs (Frequently Asked Questions)
Q: Can I use a store-bought pie crust?
A: Absolutely! A store-bought pie crust is a great shortcut for saving time. Just be sure to blind bake it according to the package directions.
Q: Why do I need to temper the egg yolks?
A: Tempering the egg yolks prevents them from scrambling when added to the hot milk. It’s a gradual warming process that ensures a smooth and creamy filling.
Q: How can I tell if the filling is thick enough?
A: The filling should be thick enough to coat the back of a spoon. When you run your finger through it, the line should hold its shape.
Q: What if my filling is too thin?
A: If the filling is too thin, you can return it to the heat and cook it for a few more minutes, stirring constantly, until it thickens. Be careful not to overcook it.
Q: Can I make this pie ahead of time?
A: Yes, this pie is perfect for making ahead of time. It needs to chill for at least 2-3 hours, so making it the day before serving is ideal.
Final Thoughts
Angela’s Chocolate Cream Pie is more than just a dessert; it’s a memory, a comfort, and a delicious way to connect with loved ones. I encourage you to try this recipe and experience the joy of creating something truly special. Don’t be afraid to experiment with variations and make it your own. And please, share your creations and feedback – I’d love to hear how it turns out! This pie pairs beautifully with a cup of strong coffee or a glass of cold milk, making it the perfect ending to any meal. Happy baking!