
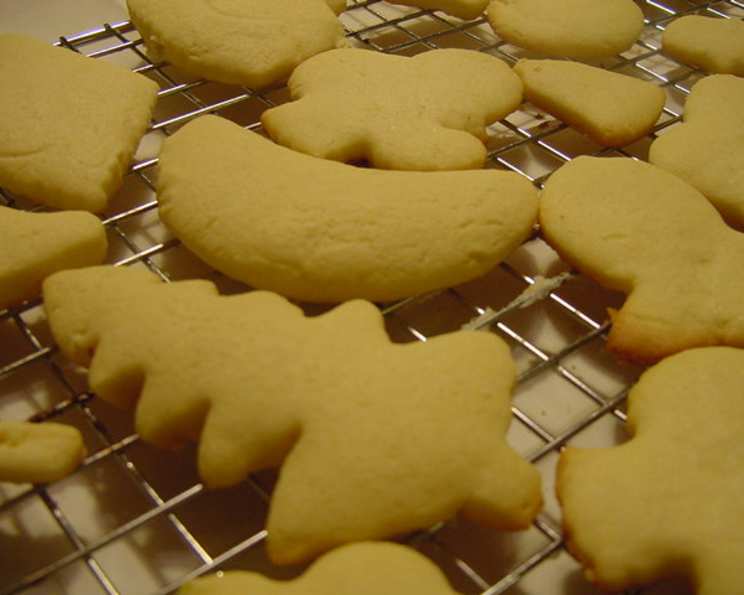
Apies Cookies: A Taste of Childhood Memories
The scent of these cookies alone instantly transports me back to my grandmother’s kitchen. I remember standing on a stool, barely tall enough to reach the counter, watching her roll out the dough with practiced ease. Flour dusted her apron, and a gentle smile played on her lips as she guided my clumsy hands to press cookie cutters into the thinly rolled dough. Those were magical afternoons, filled with laughter, sprinkles, and the irresistible aroma of Apies Cookies baking in the oven – a taste of simple, pure joy that I cherish to this day.
Recipe Overview
- Prep Time: 1 hour (plus 6-8 hours chilling)
- Cook Time: 6-8 minutes
- Total Time: 7-9 hours
- Servings: Varies
- Yield: 48-60 cookies (depending on size)
- Dietary Type: Not specified (contains dairy and eggs)
Ingredients
- 1 1⁄2 cups unsalted butter, softened
- 2 1⁄3 cups white sugar
- 5 eggs
- 1 1⁄2 teaspoons vanilla
- 1 tablespoon milk
- 6 3⁄4 cups all-purpose flour (more if needed)
- 5 teaspoons baking powder
- Colored sugar or sprinkles (optional)
Equipment Needed
- Mixing Bowls
- Measuring Cups and Spoons
- Cookie Cutters
- Rolling Pin
- Cookie Sheets
- Cooling Rack
Instructions
-
Begin by thoroughly creaming together the softened butter and sugar in a large mixing bowl until the mixture is light and fluffy. This step is crucial for achieving the right texture, so don’t rush it.
-
Next, add the eggs, one at a time, to the creamed mixture, ensuring each egg is fully incorporated before adding the next. Add the vanilla and milk and mix well until combined.
-
In a separate bowl, sift together the flour and baking powder. Sifting ensures that the baking powder is evenly distributed throughout the flour, resulting in a lighter cookie.
-
Gradually add the dry mixture to the wet ingredients, mixing well after each addition. Be careful not to overmix, as this can develop the gluten in the flour and lead to a tougher cookie.
-
Continue mixing until a dough forms. The dough should be stiff enough to roll out. If the dough is too sticky, gradually add up to another 3/4 cup of flour, a little at a time, until the desired consistency is achieved. This may vary depending on humidity and the exact measurements of your ingredients.
-
Wrap the dough tightly in plastic wrap and chill in the refrigerator for at least 6-8 hours, or preferably overnight. This chilling period allows the gluten to relax, making the dough easier to roll out and preventing the cookies from spreading too much during baking.
-
When ready to bake, preheat your oven to 350°F (175°C). Lightly grease your cookie sheets to prevent the cookies from sticking. Alternatively, you can line the cookie sheets with parchment paper.
-
On a lightly floured surface, roll out a portion of the chilled dough very thinly. The thinner you roll the dough, the crisper the cookies will be. Aim for a thickness of about 1/8 inch.
-
Use your favorite cookie cutters to cut out shapes from the rolled-out dough.
-
Carefully place the cut-out cookies onto the prepared cookie sheets, leaving a small space between each cookie.
-
If desired, sprinkle the cookies with colored sugar or other sprinkles before baking. This adds a festive touch and extra sweetness.
-
Bake in the preheated oven for 6-8 minutes, or until the edges of the cookies are lightly browned. Keep a close eye on them, as they can burn quickly.
-
Once baked, remove the cookie sheets from the oven and let the cookies cool on the sheets for a few minutes before transferring them to a cooling rack to cool completely.
-
Store the cooled cookies in an airtight container at room temperature.
Expert Tips & Tricks
- Soft Butter is Key: Ensure your butter is properly softened, but not melted. It should be pliable enough to easily cream with the sugar.
- Don’t Overmix: Overmixing the dough after adding the flour will develop the gluten and result in tough cookies. Mix just until the ingredients are combined.
- Chill Time is Crucial: Don’t skip the chilling step! It’s essential for preventing the cookies from spreading and for developing the flavor.
- Roll Thinly: For crispier cookies, roll the dough out as thinly as possible.
- Watch Carefully: Keep a close eye on the cookies while they bake, as they can go from perfectly golden to burnt in a matter of seconds.
- Re-rolling Scraps: Re-rolling dough scraps can make the final cookies tougher. To avoid this, gather the scraps and chill them again before re-rolling.
Serving & Storage Suggestions
Apies Cookies are perfect enjoyed with a glass of cold milk, a cup of hot tea, or a mug of coffee. They make a delightful addition to holiday cookie platters and are also great for gifting.
Store the cooled cookies in an airtight container at room temperature. They will stay fresh for up to a week. For longer storage, you can freeze the cookies in a freezer-safe container for up to 2-3 months. Let them thaw completely before serving.
Nutritional Information
| Nutrient | Amount per Serving (Estimated) | % Daily Value (Estimated) |
|---|---|---|
| Calories | 161 kcal | 8% |
| Total Fat | 6.5g | 9% |
| Saturated Fat | 3.8g | 19% |
| Cholesterol | 37.3mg | 12% |
| Sodium | 46.4mg | 1% |
| Total Carbohydrate | 23.3g | 7% |
| Dietary Fiber | 0.5g | 1% |
| Sugars | 9.8g | 39% |
| Protein | 2.5g | 5% |
Note: Nutritional information is an estimate and may vary based on specific ingredients and portion sizes.
Variations & Substitutions
- Lemon Zest: Add 1-2 teaspoons of lemon zest to the dough for a bright, citrusy flavor.
- Almond Extract: Substitute almond extract for vanilla extract for a nutty flavor.
- Spiced Cookies: Add 1 teaspoon of cinnamon, 1/2 teaspoon of nutmeg, and 1/4 teaspoon of cloves to the dough for a warm, spiced flavor.
- Chocolate Chip Apies: Fold in 1/2 cup of mini chocolate chips to the dough before chilling.
- Gluten-Free: Substitute a gluten-free all-purpose flour blend for the regular all-purpose flour. You may need to adjust the amount of flour to achieve the right consistency.
- Vegan: While difficult to replicate the exact texture, you could attempt this recipe with vegan butter, flax eggs, and plant milk. Be aware that the final result may differ significantly from the original.
FAQs (Frequently Asked Questions)
Q: Why is chilling the dough so important?
A: Chilling the dough allows the gluten to relax, which prevents the cookies from spreading too much during baking. It also makes the dough easier to roll out and enhances the flavor of the cookies.
Q: Can I use salted butter instead of unsalted butter?
A: Yes, you can use salted butter, but you may want to reduce the amount of salt in the recipe by 1/4 teaspoon.
Q: How do I know when the cookies are done?
A: The cookies are done when the edges are lightly browned. Be careful not to overbake them, as they will become dry and hard.
Q: Can I freeze the cookie dough?
A: Yes, you can freeze the cookie dough for up to 2-3 months. Wrap it tightly in plastic wrap and then in a freezer bag. Thaw the dough in the refrigerator overnight before rolling out and baking.
Q: My cookies spread too much while baking. What did I do wrong?
A: This could be due to a few factors: the butter was too soft, the dough wasn’t chilled long enough, or the oven temperature was too low. Make sure your butter is properly softened, chill the dough for at least 6-8 hours, and ensure your oven is preheated to the correct temperature.
Final Thoughts
These Apies Cookies are more than just a recipe; they’re a connection to my family history and a reminder of the simple joys of childhood. I encourage you to try this recipe and experience the magic for yourself. Don’t be afraid to get creative with the cookie cutters and decorations – let your imagination run wild! And most importantly, share these cookies with loved ones and create your own cherished memories. I’d love to hear your feedback and see your creations, so please share your thoughts and photos! Happy baking!