
The Orchard’s Secret: Apple Cider Brine for a Thanksgiving Masterpiece
Thanksgiving mornings in my family were always a flurry of controlled chaos. The aroma of cinnamon and roasting root vegetables battled with the scent of pine from the freshly decorated tree. But the most vivid memory? My grandmother, perched on a stool with her reading glasses, meticulously peeling oranges, her gnarled hands moving with a grace that belied her age. These oranges weren’t for snacking, though. They were destined, along with the sweet tang of apple cider, to transform our holiday turkey into something truly extraordinary, a family tradition passed down through generations. This Apple Cider Brine is that very tradition, and I’m thrilled to share it with you.
Recipe Overview:
- Prep Time: 20 minutes
- Cook Time: 4 minutes
- Total Time: 24 hours 24 minutes
- Yields: 3 1/2 quarts
- Dietary Type: Gluten-Free, Dairy-Free
Ingredients:
- 2/3 cup kosher salt
- 2/3 cup sugar
- 6 slices fresh ginger, thick
- 2 bay leaves
- 6 whole cloves
- 1 teaspoon black peppercorns, crushed (in mortar or spice mill)
- 2 teaspoons allspice berries, crushed (in mortar or spice mill)
- 8 cups unsweetened apple cider (or juice)
- 1 fresh or thawed turkey (10-25 pounds)
- 2 oranges, quartered
- 2 turkey size oven cooking bags (Reynold’s preferred)
Equipment Needed:
- 3-4 quart saucepan
- Mortar and pestle or spice mill
- Heavy roasting pan
- Turkey-sized oven cooking bags
- Twist-ties
- Refrigerator
Instructions:
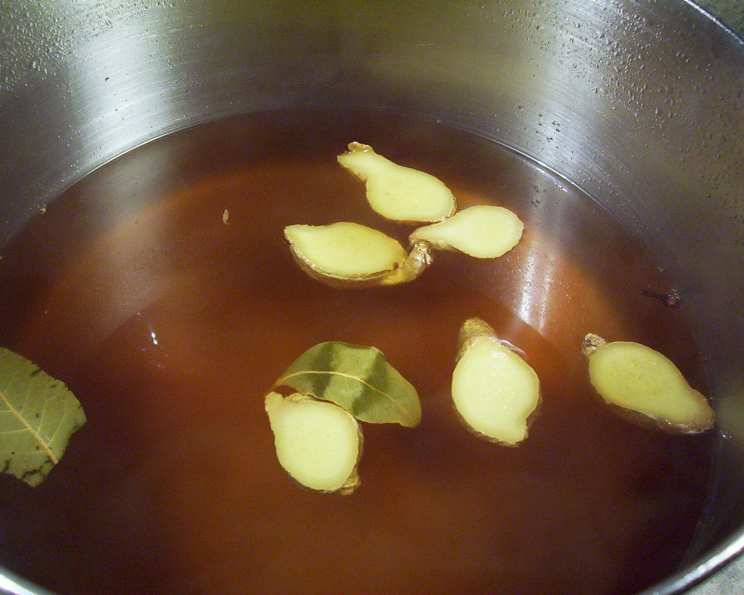
- In a 3-4 quart saucepan, combine the apple cider with the kosher salt, sugar, fresh ginger, bay leaves, whole cloves, crushed black peppercorns, and crushed allspice berries.
- Stir the mixture until the salt and sugar are completely dissolved.
- Bring the mixture to a boil over medium heat.
- Cook for 3-4 minutes. This allows the spices to infuse deeply into the cider.
- Remove the saucepan from the heat.
- Add 4 cups of ice water to the saucepan to cool the brine down quickly.
- Set the brine aside to cool completely. It must be thoroughly chilled before you use it. This is crucial for food safety and prevents partially cooking the turkey.
- Line a heavy roasting pan with two turkey-sized oven cooking bags. Double-bagging is important to prevent leaks and ensure the turkey is fully submerged in the brine.
- Remove the turkey from its wrapping.
- Remove the neck and giblets from the turkey cavity. Store these separately; they can be used for making gravy.
- Rinse the turkey inside and out under cold water.
- Prepare the bird by removing any pin feathers or excess fat.
- Stuff the turkey cavity with the quartered oranges. The oranges will add a subtle citrus aroma and flavor to the turkey from the inside out.
- Make a collar by folding over the tops of the cooking bags to keep them open. This makes it easier to slip the bird inside.
- Slip the turkey inside the double-layered cooking bags, standing it upright with the legs pointing up. This makes it easier to pour the brine over the bird.
- Unfold the tops of the cooking bags.
- Pour the cooled brine over the turkey, ensuring it is completely submerged.
- Add an additional 2 cups of water to ensure the turkey is fully covered by liquid.
- Draw up the first (inner) bag, squeezing out as much air as possible, and secure tightly with a twist-tie.
- Repeat this process for the outer bag, ensuring as little air remains as possible. This helps the brine make full contact with the turkey.
- Place the turkey, breast side down, in the roasting pan.
- Refrigerate for 12-24 hours, turning the turkey 3-4 times while brining to ensure even flavor distribution. This is the most crucial step – don’t rush it!
- Just prior to roasting, remove the turkey from the brine.
- Discard the bags, brine, oranges, and all the cured herbs and spices. Do not reuse the brine!
- Rinse the turkey thoroughly under cold water.
- Pat the turkey completely dry with paper toweling, inside and out. Thorough drying is essential for achieving crispy skin.
- Air-dry the turkey in the refrigerator, uncovered, for 4-6 hours before cooking. This will help to dry out the skin further, resulting in an even crispier crust when roasting. The longer you air-dry, the better the skin will be.
- The turkey is now ready to be roasted according to your favorite roasting recipe.
Expert Tips & Tricks:
- Spice it Up: For a spicier brine, add a pinch of red pepper flakes or a sliced jalapeño to the brine mixture while simmering.
- Citrus Boost: Include grapefruit or lemon quarters along with the oranges for a brighter, more complex flavor.
- Herb Infusion: Add fresh rosemary, thyme, or sage sprigs to the brine during the simmering process to infuse the turkey with herbaceous notes. Remove them before adding the ice water.
- Don’t Over-Brine: Brining for too long can result in an overly salty bird. Stick to the recommended 12-24 hour timeframe.
- Check for Doneness: Use a meat thermometer to ensure the turkey is cooked to a safe internal temperature of 165°F (74°C) in the thickest part of the thigh.
- Perfectly Crispy Skin: Baste the turkey with melted butter or olive oil every 30-45 minutes during roasting for extra crispy skin.
Serving & Storage Suggestions:
Once roasted, let the turkey rest for at least 20-30 minutes before carving. This allows the juices to redistribute, resulting in a more tender and flavorful bird. Serve alongside your favorite Thanksgiving side dishes, such as stuffing, mashed potatoes, cranberry sauce, and green bean casserole.
Leftover turkey should be stored in an airtight container in the refrigerator. It will keep for 3-4 days. You can also freeze leftover turkey for up to 2-3 months. To reheat, slice the turkey and warm it in the oven or microwave until heated through. Add a little broth or gravy to prevent it from drying out.
Nutritional Information:
| Nutrient | Amount per Serving | % Daily Value |
|---|---|---|
| Calories | 188.6 kcal | N/A |
| Calories from Fat | 1 g | 1% |
| Total Fat | 0.1 g | 0% |
| Saturated Fat | 0 g | 0% |
| Cholesterol | 0 mg | 0% |
| Sodium | 21665.7 mg | 902% |
| Total Carbohydrate | 48.3 g | 16% |
| Dietary Fiber | 2.1 g | 8% |
| Sugars | 45.3 g | 181% |
| Protein | 0.9 g | 1% |
Note: Nutritional information is an estimate and will vary based on the size of the turkey and the exact ingredients used.
Variations & Substitutions:
- Apple Juice Alternative: If you can’t find unsweetened apple cider, you can substitute it with apple juice, but be mindful of the added sugar content and adjust the amount of sugar in the brine accordingly.
- Brown Sugar Twist: Replace half of the granulated sugar with brown sugar for a richer, molasses-like flavor.
- Maple Syrup Option: Use maple syrup instead of sugar, keeping in mind that it has a more pronounced flavor.
- Bourbon Infusion: Add a splash of bourbon to the brine for a warm, smoky flavor.
- Smaller Bird Brine: You can easily halve this recipe for smaller chickens or Cornish hens. Just adjust the brining time accordingly.
FAQs (Frequently Asked Questions):
Q: Can I brine a frozen turkey?
A: No, you must thaw the turkey completely before brining. A partially frozen turkey will not brine evenly, and this can lead to uneven cooking and potential food safety issues.
Q: What kind of salt should I use for the brine?
A: Kosher salt is recommended because it dissolves easily and doesn’t contain iodine, which can impart a metallic taste to the turkey. Do not use table salt, as it is too fine and will make the brine too salty.
Q: Can I reuse the brine?
A: Absolutely not. The brine has been in contact with raw turkey and can harbor harmful bacteria. Always discard the brine after use.
Q: Can I brine the turkey for longer than 24 hours?
A: It’s not recommended. Brining for too long can make the turkey too salty and mushy. Stick to the recommended 12-24 hour timeframe.
Q: Do I need to rinse the turkey after brining?
A: Yes, rinsing the turkey is important to remove excess salt from the surface. Make sure to dry it thoroughly afterward to promote crispy skin.
Final Thoughts:
This Apple Cider Brine is more than just a recipe; it’s a gateway to a Thanksgiving turkey bursting with flavor and moisture, a guaranteed crowd-pleaser. Don’t be intimidated by the process – the reward is well worth the effort. Gather your ingredients, follow the steps, and prepare to experience a Thanksgiving turkey unlike any you’ve had before. Share your culinary triumphs and adaptations with friends and family; I’d love to hear about your experience! Pair this magnificent bird with a crisp, dry Riesling or a robust Pinot Noir for a truly unforgettable holiday feast.