
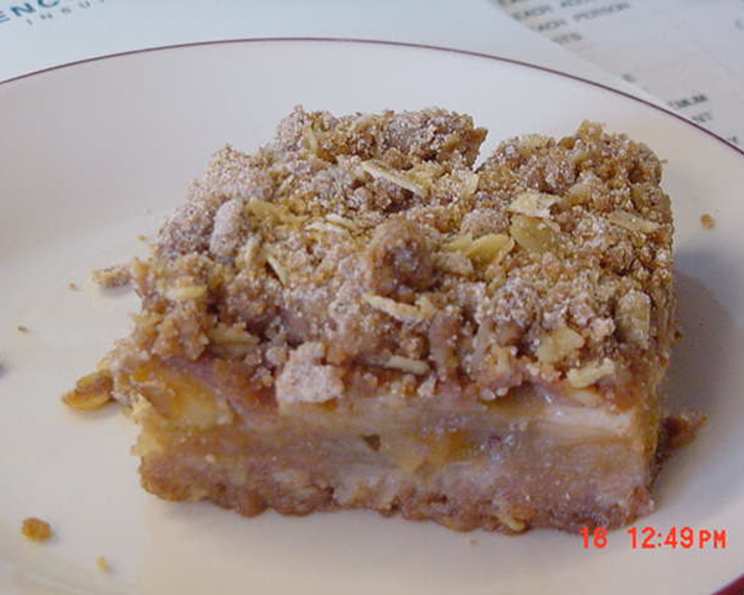
Apple Crisp and More Apple Crisp – Kid’s All Time Fave
The scent of cinnamon and baked apples still takes me back. Back to Mrs. Nelson’s cozy kitchen, filled with sunlight and the comforting aroma of after-school treats. It wasn’t just the taste of her apple crisp; it was the warmth of her smile and the feeling of belonging that made it so special. Her apple crisp was a symbol of comfort, friendship, and simple joys – a memory I cherish with every bite.
Recipe Overview
- Prep Time: 20 minutes
- Cook Time: 45 minutes
- Total Time: 1 hour 5 minutes
- Servings: 12-16
- Yield: 1 9×13 inch pan
- Dietary Type: Vegetarian
Ingredients
-
For the Crumble Topping:
- 2 cups flour
- 1 ½ cups rolled oats
- 2 cups brown sugar
- 2 teaspoons ground cinnamon
- 1 cup melted butter
-
For the Apple Filling:
- 4 cups peeled, cored, and sliced apples (Granny Smith, Honeycrisp, or a mix work well)
- 1 cup white sugar
- 2 tablespoons cornstarch
- 1 cup water
- 1 teaspoon vanilla extract
Equipment Needed
- 9×13 inch baking dish
- Medium bowl
- Medium saucepan
- Measuring cups and spoons
- Apple peeler, corer, and slicer (optional, but helpful)
Instructions
-
Preheat your oven to 350°F (175°C). This ensures even baking and prevents a soggy crust.
-
Prepare the crumble topping. In a medium bowl, combine the flour, rolled oats, brown sugar, cinnamon, and melted butter.
-
Stir the mixture until it forms a crumbly texture. The butter should be evenly distributed throughout the dry ingredients. Use your hands to break up any large clumps if necessary.
-
Press half of the crumble mixture into the bottom of a 9×13 inch baking dish. Use your fingers or the back of a spoon to create a firm, even layer. This will form the base of your apple crisp.
-
Cover the pressed crumble base with the peeled, cored, and sliced apples. Arrange the apple slices in a single layer, slightly overlapping them for even distribution.
-
Prepare the sauce. In a medium saucepan, combine the white sugar, cornstarch, water, and vanilla extract.
-
Cook the sauce over medium heat, stirring constantly, until the liquid becomes clear and thickens, about 10 minutes. Continuous stirring is crucial to prevent the cornstarch from clumping and ensuring a smooth sauce. Look for a glossy, translucent appearance.
-
Pour the thickened sauce evenly over the apples in the baking dish. Make sure all the apples are coated with the sauce.
-
Cover the apple filling with the remaining crumble mixture. Spread it evenly over the apples and sauce.
-
Bake in the preheated oven for 45 minutes, or until the topping is bubbly and golden brown. The apples should be tender when pierced with a fork. If the topping starts to brown too quickly, you can loosely tent the baking dish with aluminum foil for the last 15 minutes of baking.
-
Remove the apple crisp from the oven and let it cool slightly before serving. This allows the filling to set a bit and prevents it from being too runny.
Expert Tips & Tricks
-
Apple Variety Matters: Experiment with different apple varieties for unique flavor profiles. Granny Smith apples provide a tartness that balances the sweetness of the crisp, while Honeycrisp apples offer a sweeter, crisper texture. A mix of both is a great option.
-
Spice It Up: Add a pinch of nutmeg or ground cloves to the crumble topping for an extra layer of warmth.
-
Nutty Crunch: Incorporate chopped nuts like pecans or walnuts into the crumble topping for added texture and flavor.
-
Make-Ahead Magic: Assemble the apple crisp ahead of time and store it, unbaked, in the refrigerator for up to 24 hours. Add about 10 minutes to the baking time.
-
Prevent a Soggy Bottom: Pressing the first half of the crumble mixture firmly into the baking dish helps create a barrier against the apple juices, preventing a soggy bottom crust.
-
Butter Consistency: Use cold butter cut into small pieces when making the crumble for a flakier, more tender topping.
-
Doneness Check: The apple crisp is done when the topping is golden brown, the filling is bubbly, and the apples are tender when pierced with a fork. If the topping is browning too quickly, cover the dish loosely with foil.
Serving & Storage Suggestions
Serve the apple crisp warm, either on its own or with a scoop of vanilla ice cream, a dollop of whipped cream, or a drizzle of caramel sauce. For an extra touch, sprinkle the top with a dusting of cinnamon.
Leftover apple crisp can be stored at room temperature for up to 2 days, or in the refrigerator for up to 5 days. To reheat, warm it in a preheated oven at 350°F (175°C) for about 15-20 minutes, or until heated through. You can also microwave individual portions for a quicker reheat. For longer storage, freeze the apple crisp in an airtight container for up to 2 months. Thaw overnight in the refrigerator before reheating.
Nutritional Information
| Nutrient | Amount per Serving | % Daily Value |
|---|---|---|
| Calories | 441 kcal | 22% |
| Total Fat | 19.9g | 31% |
| Saturated Fat | 12.9g | 65% |
| Cholesterol | 40.7mg | 14% |
| Sodium | 147.1mg | 6% |
| Total Carbohydrate | 75.2g | 25% |
| Dietary Fiber | 1.7g | 7% |
| Sugars | 56.1g | N/A |
| Protein | 2.5g | 5% |
Nutritional information is an estimate and may vary based on specific ingredients and portion sizes.
Variations & Substitutions
-
Gluten-Free Apple Crisp: Substitute the all-purpose flour with a gluten-free all-purpose blend. Ensure the oats are certified gluten-free as well.
-
Vegan Apple Crisp: Use a vegan butter substitute in the crumble topping.
-
Different Fruits: Experiment with other fruits like peaches, berries, or pears.
-
Spice Variations: Try adding a pinch of cardamom, ginger, or allspice to the apple filling or crumble topping.
-
Citrus Zest: Add the zest of an orange or lemon to the apple filling for a bright, citrusy note.
-
Maple Syrup: Substitute some of the white sugar in the apple filling with maple syrup for a richer, more complex sweetness.
FAQs (Frequently Asked Questions)
Q: Can I use different types of apples?
A: Absolutely! A mix of tart and sweet apples like Granny Smith and Honeycrisp works wonderfully, creating a balanced flavor.
Q: Can I make this apple crisp ahead of time?
A: Yes, you can assemble the crisp ahead of time and store it, unbaked, in the refrigerator for up to 24 hours. Add about 10 minutes to the baking time.
Q: How do I prevent the topping from burning?
A: If the topping starts to brown too quickly, loosely tent the baking dish with aluminum foil for the last 15 minutes of baking.
Q: Can I freeze leftover apple crisp?
A: Yes, you can freeze the apple crisp in an airtight container for up to 2 months. Thaw overnight in the refrigerator before reheating.
Q: My sauce is too runny. What did I do wrong?
A: Make sure you are stirring the sauce constantly while cooking it. This helps to activate the cornstarch and thicken the sauce properly.
Final Thoughts
Apple crisp is more than just a dessert; it’s a comforting classic that brings people together. From its warm, cinnamon-spiced aroma to its satisfyingly sweet and crumbly texture, it’s a dish that evokes feelings of nostalgia and happiness. So, gather your ingredients, preheat your oven, and get ready to create a batch of pure comfort. Don’t be afraid to experiment with different variations and make it your own. And most importantly, share it with the people you love and savor every delicious bite!