
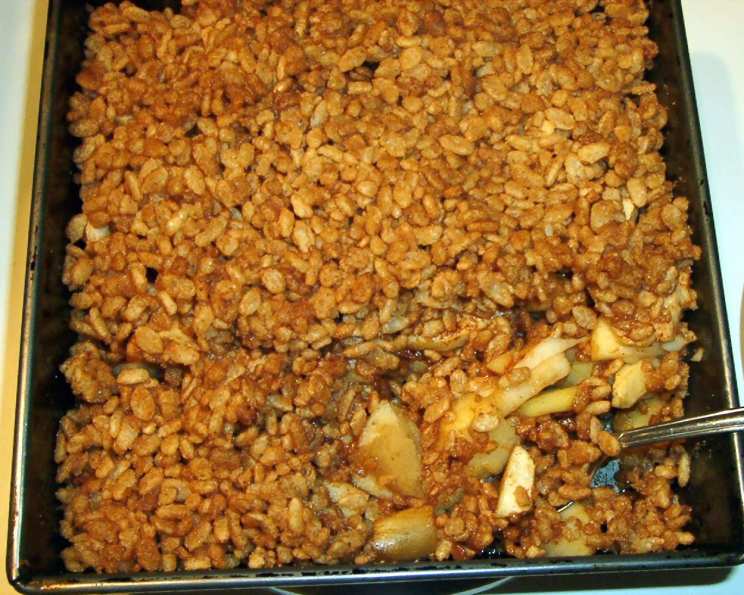
Apple Krispies: A Simple Slice of Nostalgia
The scent of cinnamon and baked apples… it’s a time machine straight back to my grandmother’s kitchen. I remember standing on a rickety stool, “helping” her peel apples for what felt like hours, my little hands sticky with juice. While she made her famous apple pie, I’d often get a special little treat – a simplified, quicker version with crispy cereal on top. This Apple Krispies recipe isn’t exactly her pie, but it captures that same warm, comforting feeling with every bite. It’s a simple dessert that proves you don’t need fancy ingredients to create something truly special.
Recipe Overview
- Prep Time: 15 minutes
- Cook Time: 20 minutes
- Total Time: 35 minutes
- Servings: 8
- Yield: 1 8-inch square pan
- Dietary Type: Vegetarian (can be easily made vegan)
Ingredients
- Vegetable oil cooking spray
- 6 cups peeled, thinly sliced apples
- 1/2 cup packed brown sugar
- 1/4 cup butter (or 1/4 cup margarine or vegan butter alternative)
- 2 cups Rice Krispies cereal
- 1/4 teaspoon ground cinnamon
Equipment Needed
- 8-inch square baking pan
- Mixing bowl
- Pastry blender or fork
- Wooden spoon
- Measuring cups and spoons
Instructions
-
Preheat your oven to 350°F (175°C). Ensuring the oven is fully preheated is crucial for even cooking and that perfectly golden topping.
-
Lightly spray an 8-inch square baking pan with non-stick vegetable oil cooking spray. This prevents the apples from sticking and makes cleanup a breeze. Make sure to get the corners!
-
Spread the peeled and thinly sliced apples evenly in the prepared pan. Arrange them in a neat layer, as this will help them cook uniformly. If your apples are particularly tart, consider adding a squeeze of lemon juice to prevent browning.
-
In a mixing bowl, combine the brown sugar and butter (or margarine) with a pastry blender or a fork. Work the mixture until it forms coarse crumbs. The butter should be cold for the best crumbly texture.
-
Using a wooden spoon, gently stir the Rice Krispies cereal into the brown sugar and butter mixture. Mix until the cereal is evenly coated with the sweet, buttery crumbs.
-
Sprinkle the Rice Krispies topping evenly over the apples in the baking pan. Make sure to distribute the topping so that it covers the entire surface, giving you that satisfying crunch in every bite.
-
Bake for 20 minutes, or until the apples are tender and the topping is light brown. Keep a close eye on it towards the end – ovens vary, and you want the topping golden, not burnt. A toothpick inserted into an apple slice should meet little resistance when done.
Expert Tips & Tricks
-
Apple Variety Matters: Use apples that hold their shape well when baked, such as Granny Smith, Honeycrisp, or Braeburn. Softer apples like McIntosh can become mushy.
-
Spice it Up: Experiment with other spices like nutmeg, ginger, or even a pinch of cloves for added warmth and complexity. A dash of allspice can also work wonders!
-
Vegan Variation: Easily make this recipe vegan by using a plant-based butter alternative and ensuring your vegetable oil spray is vegan-friendly.
-
Nutty Addition: For extra crunch and flavor, add a handful of chopped nuts like pecans or walnuts to the cereal topping. Toast them lightly before adding for an even richer flavor.
-
Make-Ahead Magic: You can assemble the Apple Krispies a few hours in advance. Just cover the pan with plastic wrap and store it in the refrigerator until you’re ready to bake. Add about 5 minutes to the baking time if baking from cold.
-
Fixing a Burnt Topping: If your topping starts to brown too quickly, tent the pan with aluminum foil for the remaining baking time.
Serving & Storage Suggestions
Serve the Apple Krispies warm, either on its own or with a scoop of vanilla ice cream or a dollop of whipped cream (or non-dairy whipped topping). A drizzle of caramel sauce would also be a delightful addition. Leftovers can be stored in an airtight container at room temperature for up to 2 days, or in the refrigerator for up to 4 days. Reheat gently in the oven or microwave before serving. While freezing is possible, it can affect the texture of the topping, so it’s best enjoyed fresh.
Nutritional Information
| Nutrient | Amount per Serving | % Daily Value |
|---|---|---|
| Calories | 210 kcal | 11% |
| Total Fat | 7g | 9% |
| Saturated Fat | 4g | 20% |
| Cholesterol | 15mg | 5% |
| Sodium | 120mg | 5% |
| Total Carbohydrate | 38g | 14% |
| Dietary Fiber | 2g | 7% |
| Sugars | 25g | |
| Protein | 1g | 2% |
Note: Nutritional information is an estimate and may vary based on specific ingredients and portion sizes.
Variations & Substitutions
-
Gluten-Free: Use a gluten-free crispy rice cereal to make this dessert gluten-free.
-
Different Fruits: While this recipe is designed for apples, you can experiment with other fruits like pears, peaches, or even berries. Adjust the baking time as needed.
-
Oatmeal Topping: Substitute some of the Rice Krispies with rolled oats for a heartier, more textured topping.
-
Maple Syrup: Replace the brown sugar with maple syrup for a richer, more nuanced flavor.
-
Citrus Zest: Add a tablespoon of orange or lemon zest to the apple mixture for a brighter, more vibrant flavor.
FAQs (Frequently Asked Questions)
Q: Can I use a different size pan?
A: While an 8-inch square pan is ideal, you can use a slightly larger pan, but the Apple Krispies will be thinner. Adjust the baking time accordingly.
Q: Can I reduce the amount of sugar?
A: Yes, you can reduce the brown sugar slightly, but it will affect the sweetness and the crispness of the topping. Start with reducing it by 2 tablespoons and see if you like the result.
Q: How do I know when the apples are done?
A: The apples are done when they are tender and easily pierced with a fork or toothpick.
Q: Can I use unsalted butter?
A: Yes, you can use unsalted butter. Just add a pinch of salt to the brown sugar and butter mixture to balance the flavors.
Q: My topping is getting too dark. What should I do?
A: If the topping is browning too quickly, tent the pan with aluminum foil for the remaining baking time to prevent it from burning.
Final Thoughts
This Apple Krispies recipe is more than just a dessert; it’s a warm hug in a pan, a nostalgic trip down memory lane, and a testament to the magic of simple ingredients. I encourage you to give it a try and experience the comforting flavors for yourself. Feel free to experiment with variations and substitutions to make it your own. And most importantly, share it with loved ones and spread the joy of homemade goodness. Don’t forget to let me know how it turns out! Perhaps serve it with a steaming mug of spiced apple cider on a chilly evening. Happy baking!