
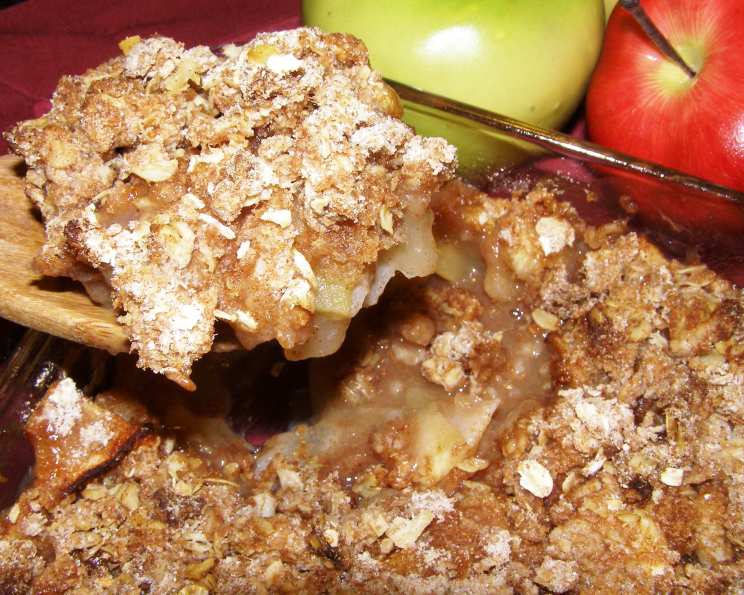
Apple Pear Crisp (3 WW Points)
The scent of apples and pears baking in the oven always transports me back to my grandmother’s kitchen. She had an ancient, cast-iron skillet that she used exclusively for fruit crisps, and the way the spices mingled with the warm fruit was pure magic. I remember standing on a stool, eagerly awaiting my turn to sprinkle the crumbly topping, feeling like I was participating in something truly special. This recipe evokes that same sense of comfort and delicious simplicity, updated with a lighter touch so everyone can enjoy a guilt-free indulgence.
Recipe Overview
- Prep Time: 20 minutes
- Cook Time: 45 minutes
- Total Time: 1 hour 5 minutes
- Servings: 8
- Yield: 1 11×7 inch crisp
- Dietary Type: Vegetarian
Ingredients
Fruit Base:
- Juice of 1/2 lemon
- 2 Bartlett pears
- 3 Granny Smith apples
- 1 Golden Delicious apple
- 2 tablespoons whole wheat flour
- 3 tablespoons sugar
- 1/2 teaspoon cinnamon
- 1/4 teaspoon ginger
- 1 dash nutmeg
Crisp Topping:
- 1/2 cup whole wheat flour
- 6 tablespoons sugar
- 1/2 cup old fashioned oats (not instant)
- 1/4 teaspoon ginger
- 3/4 teaspoon cinnamon
- 3 tablespoons unsalted butter, cold
- 2 tablespoons pureed pear baby food
Equipment Needed
- 11×7 inch baking dish or casserole dish
- Large bowl
- Small bowl
- Medium bowl
- Fork or pastry blender
- Measuring cups and spoons
- Peeler
- Corer
- Cutting board
- Knife
Instructions
- Preheat your oven to 375 degrees Fahrenheit (190 degrees Celsius).
- Prepare an 11 by 7 inch baking dish or casserole dish with a light coating of cooking spray. This will prevent the crisp from sticking and make serving easier.
- Squeeze the juice of 1/2 a lemon into a large bowl and add water. The acidity of the lemon juice prevents the peeled fruit from browning prematurely while you’re preparing the rest.
- Peel and core the pears and apples. Slice the fruit into relatively thin slices; aim to cut the pears into eighths and the apples into tenths. As you slice, place the fruit immediately into the bowl of water and lemon juice.
- In a small bowl, whisk together the remaining dry ingredients for the fruit layer: 2 tablespoons of whole wheat flour, 3 tablespoons of sugar, 1/2 teaspoon of cinnamon, 1/4 teaspoon of ginger, and a dash of nutmeg.
- Drain the apples and pears thoroughly and pour them into the prepared baking pan. Toss the fruit gently with the sugar and spice mixture until evenly coated. This ensures every bite is packed with flavor.
- In a medium bowl, combine the dry ingredients for the crisp topping: 1/2 cup whole wheat flour, 6 tablespoons sugar, 1/2 cup old fashioned oats, 1/4 teaspoon ginger, and 3/4 teaspoon cinnamon. Mix well.
- Cut the 3 tablespoons of cold butter into small cubes or thin slices and add them to the bowl. Use a fork or your fingers to cut the butter into the dry ingredients, breaking it up until you have a mixture of small, pea-sized bits. If using your hands, work quickly to prevent the butter from melting. The goal is to create a very fine crumb.
- Add 2 tablespoons of pear puree (baby food) to the crumb mixture and mix until just combined. The crumbs will clump together slightly with the added moisture, creating larger, more satisfying clusters.
- Sprinkle the crumb topping evenly across the top of the apple and pear mixture in the baking dish. Ensure the fruit is well-covered for a beautifully textured crisp.
- Bake for 45 minutes, or until the fruit is bubbly and tender and the topping is crisped and browned. The actual cooking time may vary depending on the thickness of your fruit slices and your oven. Check for doneness about 5 minutes before the stated cooking time. If the topping is browning too quickly, loosely tent the baking dish with foil for the remainder of the baking time.
- Let the crisp cool slightly before serving. This allows the fruit juices to thicken and the flavors to meld.
- Serve warm or cold.
Expert Tips & Tricks
- For a richer flavor, toast the oats lightly before adding them to the topping. Spread them on a baking sheet and toast in a 350°F (175°C) oven for about 5-7 minutes, or until lightly golden.
- If you don’t have pear puree, you can substitute applesauce or mashed banana.
- The crisp topping can be made ahead of time and stored in the refrigerator for up to 2 days.
- To prevent the bottom of the crisp from becoming soggy, you can pre-bake the topping for about 10 minutes before adding it to the fruit.
- If your fruit is very tart, you may need to add a bit more sugar to the filling. Taste the fruit mixture before baking and adjust the sweetness as needed.
Serving & Storage Suggestions
Serve the Apple Pear Crisp warm with a scoop of vanilla yogurt or a dollop of whipped cream (if you’re not concerned about the WW points!). A sprinkle of cinnamon or a drizzle of honey adds a nice finishing touch.
Leftovers can be stored in an airtight container in the refrigerator for up to 3 days. To reheat, bake in a preheated oven at 350°F (175°C) for about 10-15 minutes, or until warmed through. You can also reheat individual portions in the microwave. The crisp can be frozen for longer storage; thaw overnight in the refrigerator before reheating.
Nutritional Information
| Nutrient | Amount per Serving |
|---|---|
| Calories | 228.5 kcal |
| Calories from Fat | 46 g |
| Total Fat | 5.1 g |
| Saturated Fat | 2.9 g |
| Cholesterol | 11.4 mg |
| Sodium | 2.9 mg |
| Total Carbohydrate | 46.9 g |
| Dietary Fiber | 5.9 g |
| Sugars | 29.7 g |
| Protein | 2.5 g |
Please note that this nutritional information is an estimate and may vary based on specific ingredients and preparation methods.
Variations & Substitutions
- Gluten-Free: Use a gluten-free all-purpose flour blend in both the fruit base and the crisp topping. Make sure your oats are certified gluten-free as well.
- Vegan: Replace the butter in the topping with a vegan butter substitute or coconut oil.
- Spice It Up: Add a pinch of cardamom or allspice to the fruit filling for a more complex flavor profile.
- Nutty Topping: Add chopped pecans or walnuts to the crisp topping for added crunch and flavor.
- Berry Twist: Incorporate a cup of fresh or frozen berries (such as blueberries or raspberries) into the fruit filling.
FAQs (Frequently Asked Questions)
Q: Can I use other types of apples or pears in this crisp?
A: Absolutely! Feel free to use your favorite varieties of apples and pears, such as Honeycrisp apples, Bosc pears, or Anjou pears. Just be sure to use a total of about 3 pounds of fruit.
Q: Why do I need to soak the apples and pears in lemon juice?
A: Soaking the fruit in lemon juice helps prevent it from browning prematurely while you prepare the rest of the ingredients. The acidity of the lemon juice slows down the oxidation process.
Q: Can I make this crisp ahead of time?
A: Yes, you can assemble the crisp ahead of time and store it in the refrigerator for up to 24 hours before baking. However, the topping may become slightly soggy, so it’s best to bake it as close to serving time as possible.
Q: My crisp topping is browning too quickly. What can I do?
A: If the topping is browning too quickly, loosely tent the baking dish with foil for the remainder of the baking time. This will prevent the topping from burning while allowing the fruit to continue cooking.
Q: Can I freeze this apple pear crisp?
A: Yes, you can freeze the baked crisp for up to 3 months. Wrap it tightly in plastic wrap and then foil to prevent freezer burn. Thaw overnight in the refrigerator before reheating.
Final Thoughts
This Apple Pear Crisp is a simple, comforting dessert that’s perfect for any occasion. With its warm, soft fruit and crispy, crunchy topping, it’s sure to be a crowd-pleaser. Don’t be afraid to experiment with different fruit combinations and spices to create your own signature version. I hope you enjoy this recipe as much as I do! Happy baking!