
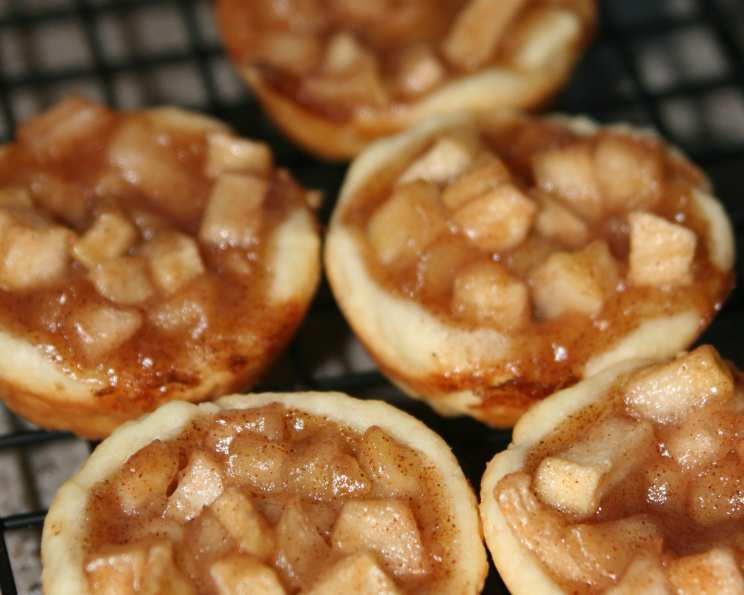
Apple Tassies: Tiny Bites of Autumn Bliss
My grandmother, bless her heart, was famous for two things: her sharp wit and her even sharper ability to whip up the most incredible desserts. While her pecan pie was legendary, it was her Apple Tassies that truly captured my childhood imagination. I remember standing on a stool, watching her nimble fingers shape the delicate cream cheese crusts, the air thick with the aroma of cinnamon and simmering apples. Each bite was a tiny explosion of autumnal flavors, a sweet reminder of crisp fall days and the warmth of her kitchen. To this day, the scent of baking apples instantly transports me back to those cherished moments, and I’m thrilled to share her recipe with you.
Recipe Overview
- Prep Time: 25 minutes
- Cook Time: 22 minutes
- Total Time: 47 minutes
- Servings: 24
- Yield: 48 tassies
- Dietary Type: Vegetarian
Ingredients
For the Crust:
- 1 cup butter, softened
- 8 ounces cream cheese
- 2 1/2 cups flour
For the Apple Filling:
- 4 large green apples, finely chopped
- 1 cup sugar
- 2 teaspoons cinnamon or 2 teaspoons apple pie spice
- 1/4 cup flour
Equipment Needed
- Mini muffin tin (preferably non-stick)
- Medium saucepan
- Mixing bowl
- Spoon
- Teaspoon (for releasing tassies)
Instructions
- Prepare the Crust: In a mixing bowl, cream together the softened butter and cream cheese until light and fluffy. This is best done with an electric mixer, but you can also use a sturdy spoon. Be patient, and ensure the butter and cream cheese are fully incorporated for a smooth, even crust.
- Incorporate the Flour: Gradually add the flour to the creamed mixture, mixing until just combined. Be careful not to overmix, as this can result in a tough crust. The dough should form a moist, but not sticky, ball.
- Portion the Dough: Portion the dough into approximately teaspoon-sized balls. This recipe yields about 48 tassies, so divide accordingly.
- Shape the Crusts: Press each ball of dough into the mini muffin tin. Flatten the dough to fit the tin, forming a small cup. The sides of the crust should be even in thickness to ensure uniform baking. A mini tart shaper can be particularly helpful for this step, especially if you’re using a non-stick pan.
- Prepare the Apple Filling: In a medium saucepan, combine the finely chopped green apples, sugar, and cinnamon (or apple pie spice).
- Cook the Filling: Cook the apple mixture over medium heat for 5-7 minutes, or until the apples begin to soften. Stir frequently to prevent sticking and ensure even cooking.
- Thicken the Filling: Add the flour to the apple mixture and stir well. The mixture will thicken slightly as the flour cooks and absorbs the excess liquid.
- Fill the Tassies: Spoon the apple filling into each tart shell, being careful not to overfill. Avoid getting the apple mixture on the sides of the pan, as this can cause the tassies to stick and make them difficult to remove.
- Bake the Tassies: Bake in a preheated oven at 400 degrees Fahrenheit (200 degrees Celsius) for 20-22 minutes, or until the crusts are golden brown and the filling is bubbly.
- Cool and Release: Let the tassies rest in the muffin tin for a couple of minutes after removing them from the oven. This allows the filling to set slightly and makes them easier to release. Use a teaspoon to gently loosen and remove each tart from the tin.
Expert Tips & Tricks
- Soften the Butter and Cream Cheese: Ensure that your butter and cream cheese are properly softened before starting. This will make it much easier to cream them together and result in a smoother crust.
- Don’t Overmix the Dough: Overmixing the dough will develop the gluten in the flour, leading to a tough crust. Mix only until the ingredients are just combined.
- Use Cold Butter for a Flakier Crust: For an even flakier crust, you can use cold, grated butter instead of softened butter. Pulse the grated butter and cream cheese in a food processor until just combined, then add the flour as directed.
- Pre-Bake the Crusts: For a crisper crust, you can pre-bake the tart shells for 5-7 minutes before adding the filling. This will help prevent them from becoming soggy.
- Adjust Sweetness: Taste the apple filling before adding it to the crusts. If your apples are particularly tart, you may want to add a little extra sugar.
- Spice it Up: Experiment with different spices in the apple filling. A pinch of nutmeg, ginger, or cloves can add a warm and complex flavor.
- Prevent Sticking: If you’re concerned about the tassies sticking to the pan, you can lightly grease the muffin tin with cooking spray or line it with mini muffin liners.
Serving & Storage Suggestions
Apple Tassies are best served warm or at room temperature. You can drizzle them with a caramel sauce, dust them with powdered sugar, or even top them with a crumb topping before baking for an extra layer of texture and flavor.
Storage:
- Room Temperature: Store cooled tassies in an airtight container at room temperature for up to 2 days.
- Refrigerator: Store in an airtight container in the refrigerator for up to 5 days.
- Freezer: For longer storage, freeze the baked tassies in a single layer on a baking sheet until solid, then transfer them to a freezer-safe bag or container. They can be stored in the freezer for up to 2 months.
Reheating:
- Oven: Reheat frozen or refrigerated tassies in a preheated oven at 350 degrees Fahrenheit (175 degrees Celsius) for 5-10 minutes, or until warmed through.
- Microwave: Reheat in the microwave in 15-second intervals until warmed through, but be aware that the crust may become slightly soggy.
Nutritional Information
| Nutrient | Amount per Serving | % Daily Value |
|---|---|---|
| Calories | 204.4 kcal | N/A |
| Calories from Fat | N/A | 49% |
| Total Fat | 11.1 g | 17% |
| Saturated Fat | 6.7 g | 33% |
| Cholesterol | 30.8 mg | 10% |
| Sodium | 98.7 mg | 4% |
| Total Carbohydrate | 25 g | 8% |
| Dietary Fiber | 1.4 g | 5% |
| Sugars | 12.5 g | 50% |
| Protein | 2.2 g | 4% |
Note: Nutritional information is an estimate and may vary based on specific ingredients and preparation methods.
Variations & Substitutions
- Gluten-Free Crust: Substitute the all-purpose flour with a gluten-free flour blend. You may need to add a little xanthan gum to help bind the dough.
- Different Fruits: Experiment with other fruits in the filling, such as pears, blueberries, or cranberries. Adjust the sugar and spices accordingly.
- Nutty Crust: Add 1/2 cup of finely ground nuts (such as pecans or walnuts) to the crust dough for a nutty flavor and texture.
- Vegan Option: Use a vegan butter substitute and vegan cream cheese alternative to make this recipe vegan-friendly.
- Caramel Apple Tassies: Mix a tablespoon of caramel sauce into the apple filling for a richer, sweeter flavor.
- Crumble Topping: Top the filled tassies with a crumble topping made from flour, butter, sugar, and oats before baking for added texture and sweetness.
FAQs (Frequently Asked Questions)
Q: Can I make the dough ahead of time?
A: Yes, you can make the dough ahead of time and store it in the refrigerator for up to 2 days. Wrap it tightly in plastic wrap to prevent it from drying out. Let it soften slightly before rolling and shaping.
Q: How do I prevent the crust from getting soggy?
A: To prevent a soggy crust, avoid overfilling the tassies and pre-bake the crusts for a few minutes before adding the filling. You can also brush the inside of the crusts with a thin layer of melted chocolate or egg white to create a moisture barrier.
Q: Can I use a different type of apple?
A: While green apples provide a nice tartness, you can use other types of apples, such as Honeycrisp, Gala, or Fuji. Adjust the amount of sugar in the filling based on the sweetness of the apples.
Q: How do I know when the tassies are done baking?
A: The tassies are done baking when the crusts are golden brown and the filling is bubbly. A toothpick inserted into the center of the filling should come out clean or with a few moist crumbs.
Q: Can I freeze unbaked tassies?
A: Yes, you can freeze unbaked tassies. Assemble the tassies as directed, then freeze them on a baking sheet until solid. Transfer them to a freezer-safe bag or container and bake from frozen, adding a few extra minutes to the baking time.
Final Thoughts
Apple Tassies are more than just a dessert; they’re a tiny bite of nostalgia, a warm hug on a cool day, and a testament to the enduring power of simple, homemade treats. I encourage you to try this recipe and create your own memories with these delightful little pies. Don’t be afraid to experiment with different variations and flavors to make them your own. And most importantly, share them with loved ones and savor the joy of baking and eating together. I hope you enjoy these Apple Tassies as much as my family and I do. They are perfect with a scoop of vanilla ice cream or a warm cup of tea!