
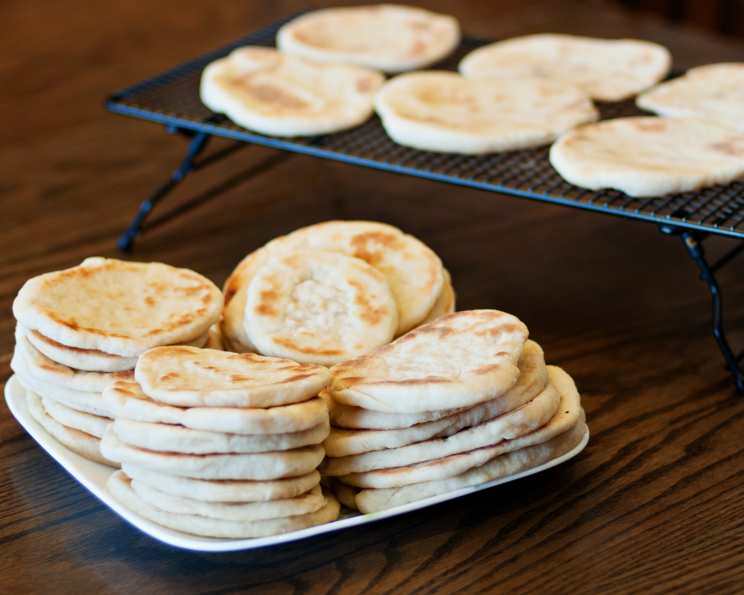
The Simple Joy of Arabian Pita Bread: A Homemade Delight
The scent of freshly baked bread has always transported me back to my childhood. I remember visiting my grandmother, whose small kitchen was perpetually warm from the oven’s gentle hum. While she baked many things, her homemade pita bread was a standout. The aroma alone was enough to make my mouth water, and the soft, slightly chewy texture was simply irresistible. I can still picture her patiently rolling out each circle of dough, a light dusting of flour swirling around her hands like magic. This recipe, though not exactly like hers, evokes those beautiful memories and offers a taste of home.
Recipe Overview
- Prep Time: 30 minutes
- Cook Time: 20 minutes
- Rest Time: 30 minutes
- Total Time: 1 hour 20 minutes
- Servings: 6
- Yield: 18 pitas
- Dietary Type: Vegan
Ingredients
- 1 tablespoon instant yeast
- 1 1/2 cups water
- 1-2 teaspoons sugar
- 3 cups flour
- 1 tablespoon nonfat dry milk powder
- 1/2 teaspoon salt
- 6 tablespoons oil
Equipment Needed
- Large mixing bowl
- Skillet or frying pan
- Rolling pin
- Clean kitchen towel
- Ziploc bag (optional, for keeping pitas warm)
Instructions
-
Begin by activating the yeast. In a small bowl, mix the instant yeast, water, and sugar. Set aside for a few minutes, allowing the yeast to bloom. You’ll know it’s ready when it becomes foamy.
-
In a large mixing bowl, combine the flour, nonfat dry milk powder, and salt. Make sure these dry ingredients are well-mixed for even distribution.
-
Pour the oil and the yeast/water mixture into the bowl with the dry ingredients. Stir everything together until a dough begins to form.
-
Now comes the kneading. Depending on the absorbency of your flour, you might need to add a little more flour if the dough is too sticky, or a bit more water if it’s too dry. Aim for a smooth, elastic dough that is slightly tacky but not overly sticky.
-
Knead the dough briefly on a lightly floured surface for a few minutes. This helps develop the gluten, which gives the pita bread its characteristic texture.
-
Divide the dough into 18 equal-sized balls. Think egg-sized portions for perfectly portioned pitas.
-
Place the dough balls on a floured surface. Cover them with a clean kitchen towel and let rest for 15-30 minutes. This resting period allows the gluten to relax, making the dough easier to roll out.
-
Now, it’s time to shape the pitas. Using a rolling pin, roll out one ball of dough into a thin circle, about 6-7 inches in diameter.
-
Heat a skillet or frying pan over medium heat. There’s no need to add any oil to the pan.
-
Cook the rolled-out pita in the hot skillet. As it cooks, you’ll notice large “bubbles” forming on the surface. This is exactly what you want! It’s the beginning of that signature pita pocket.
-
Once the bubbles form, flip the pita over and cook the other side for a few more minutes, until it’s lightly golden brown and cooked through.
-
For a more even cook and to encourage puffing, you can gently flatten the pita with a spatula as it cooks.
-
As each pita is cooked, keep it warm by wrapping it in a clean towel or placing it in a Ziploc bag. This prevents them from drying out and keeps them soft and pliable.
-
Repeat steps 8-13 with the remaining dough balls until all the pita bread is cooked.
-
Allow to cool slightly before serving.
Expert Tips & Tricks
- Yeast Activation: Ensuring your yeast is active is crucial for a good rise. If the yeast doesn’t foam when mixed with water and sugar, it might be old or inactive. Start with fresh yeast for the best results.
- Dough Consistency: The right dough consistency is key. It should be soft and slightly tacky, but not sticky. Adjust the amount of flour or water accordingly.
- Resting Time: Don’t skip the resting time! It allows the gluten to relax, making the dough easier to roll out and preventing it from snapping back.
- Heat Control: Maintaining the correct heat level in the skillet is essential. If the heat is too low, the pitas won’t puff up properly. If it’s too high, they’ll burn before they cook through.
- Freezing for Later: These pitas freeze beautifully. To freeze, let them cool completely, then stack them with a piece of parchment paper between each pita to prevent them from sticking. Place them in a freezer-safe bag and freeze for up to 2 months.
Serving & Storage Suggestions
Serve these Arabian pitas warm, alongside your favorite Middle Eastern dishes like hummus, falafel, shawarma, or foul mudammas. They’re also delicious with grilled vegetables, salads, or used as a wrap for sandwiches.
- Room Temperature: Store leftover pitas in an airtight container at room temperature for up to 2 days.
- Refrigerator: For longer storage, keep them in the refrigerator for up to 5 days.
- Freezer: Frozen pitas can last up to 2 months. Thaw them at room temperature or in the microwave before reheating.
To reheat, simply warm the pitas in a dry skillet, microwave, or oven until heated through. A quick pass over a hot skillet can restore their soft texture.
Nutritional Information
| Nutrient | Amount per Serving | % Daily Value |
|---|---|---|
| Calories | 120.5 kcal | N/A |
| Calories from Fat | 43 g | 36% |
| Total Fat | 4.8 g | 7% |
| Saturated Fat | 0.6 g | 3% |
| Cholesterol | 0.1 mg | 0% |
| Sodium | 68.2 mg | 2% |
| Total Carbohydrate | 16.6 g | 5% |
| Dietary Fiber | 0.7 g | 2% |
| Sugars | 0.5 g | N/A |
| Protein | 2.6 g | 5% |
Variations & Substitutions
- Whole Wheat Pita: Substitute up to half of the all-purpose flour with whole wheat flour for a nuttier flavor and added fiber.
- Gluten-Free Pita: Use a gluten-free flour blend specifically designed for bread making. You may need to adjust the amount of liquid to achieve the correct dough consistency.
- Flavored Pita: Add herbs or spices to the dough for extra flavor. Try adding a teaspoon of dried oregano, thyme, or rosemary.
- Garlic Pita: Brush the cooked pitas with garlic-infused oil for a savory treat.
- Sweet Pita: For a sweeter version, add a tablespoon of honey or maple syrup to the dough and sprinkle the cooked pitas with cinnamon sugar.
FAQs (Frequently Asked Questions)
Q: Why aren’t my pitas puffing up?
A: Several factors can prevent pitas from puffing. Make sure your yeast is fresh and active, the skillet is hot enough, and the dough is properly rested. Flattening it with a spatula can also help.
Q: Can I make the dough ahead of time?
A: Yes, you can prepare the dough ahead of time. After kneading, place it in a lightly oiled bowl, cover it, and refrigerate it for up to 24 hours. Let it come to room temperature before rolling out the pitas.
Q: How do I prevent the pitas from drying out?
A: To keep the pitas soft and pliable, wrap them in a clean kitchen towel or place them in a Ziploc bag as they come off the skillet.
Q: Can I bake these in the oven instead of cooking them in a skillet?
A: Yes, you can bake them in the oven. Preheat your oven to 450°F (232°C). Place the rolled-out pitas on a baking sheet and bake for 5-7 minutes, or until they puff up and are lightly golden brown.
Q: Why is my pita dough too sticky?
A: If your dough is too sticky, gradually add a little more flour until it reaches the desired consistency. Remember that the dough should be slightly tacky but not overly sticky.
Final Thoughts
I hope this recipe inspires you to try making your own Arabian pita bread at home. It’s a simple yet satisfying process, and the results are well worth the effort. Nothing beats the taste and aroma of freshly baked bread, especially when it’s made with love. So gather your ingredients, roll up your sleeves, and enjoy the process of creating this versatile and delicious bread. Don’t hesitate to share your feedback or ask any questions. Bon appétit!