
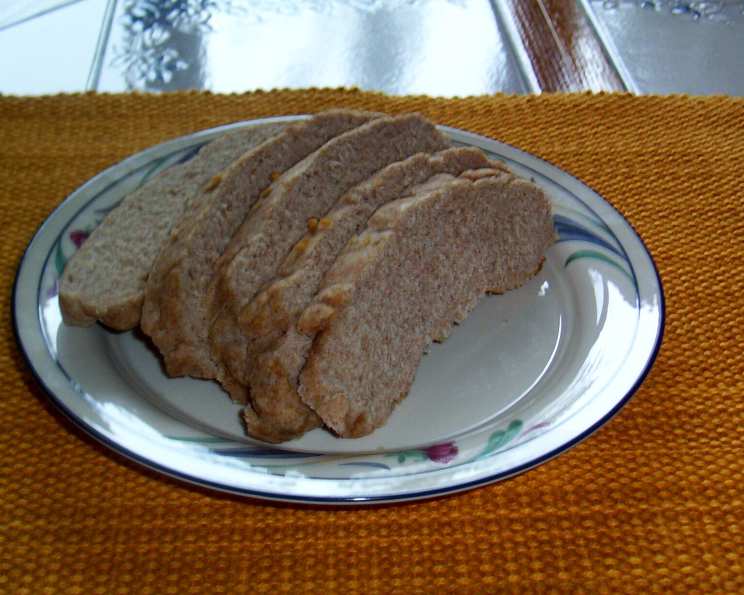
Armenian Bread Rounds – Bread Machine
The aroma of freshly baked bread always transports me back to my grandmother’s kitchen. She wasn’t Armenian, but she had a knack for adapting recipes from all over the world, and she loved experimenting. One day, she presented us with these fragrant, golden-brown rounds, brushed with garlic-infused oil. The crispy edges, soft interior, and intense garlic flavor were an instant hit. While her recipe wasn’t made in a bread machine, this adaptation captures the same essence of simple, rustic goodness that I remember so fondly.
Recipe Overview
- Prep Time: 20 minutes
- Cook Time: 15 minutes
- Total Time: 2 hours 35 minutes (includes rising time)
- Servings: Varies depending on size of rounds
- Yield: 2 loaves
- Dietary Type: Vegetarian
Ingredients
- 1/2 cup milk
- 1 1/2 cups whole wheat flour
- 1 1/2 cups bread flour
- 1 1/2 tablespoons salt
- 3/4 cup water
- 1 tablespoon honey
- 4 teaspoons yeast
- 3 garlic cloves, crushed
- 1/4 cup olive oil
Equipment Needed
- Bread machine (1 1/2 pound capacity)
- Small saucepan
- Measuring cups and spoons
- Lightly floured surface
- Rolling pin
- Small bowl
- Large baking sheet
- Pastry brush
Instructions
-
Begin by scaling the milk. In a small saucepan, heat the milk until it just reaches boiling point. Watch carefully to prevent it from boiling over. Remove from heat and set aside to cool to lukewarm. This step is crucial for activating the yeast properly without scalding it.
-
Add all the ingredients except the garlic and olive oil to your bread machine in the order recommended by the manufacturer. This order is important to ensure proper mixing and yeast activation.
-
Program your bread machine for the dough setting. This setting typically includes a kneading and a rising cycle.
-
Once the rising cycle is complete, gently turn the dough out onto a lightly floured surface. The dough should be soft and elastic.
-
Cover the dough with a clean kitchen towel and let it rest for 10 minutes. This resting period allows the gluten to relax, making the dough easier to roll out.
-
While the dough is resting, prepare the garlic oil. In a small bowl, combine the 1/4 cup olive oil with the crushed garlic. Set aside to allow the flavors to meld. The longer it sits, the more intense the garlic flavor will become.
-
Divide the dough into 2 equal pieces.
-
Using a floured rolling pin, roll each piece of dough into a 1-inch-thick round. Aim for even thickness to ensure consistent baking.
-
Lightly oil a large baking sheet. This will prevent the bread rounds from sticking.
-
Arrange the rolled dough rounds on the prepared baking sheet, leaving some space between them to allow for expansion during baking.
-
Brush the tops of the dough rounds liberally with the garlic oil. Be generous with the oil, as it will contribute to the flavor and golden-brown color.
-
Preheat your oven to 375ºF (190ºC). Ensure your oven is fully preheated before baking for even cooking.
-
Bake the rounds in the lower third of the preheated oven for 15 minutes, or until they are golden brown. Keep a close eye on them, as baking times may vary depending on your oven. The bottom should also be golden brown.
-
Remove the baked bread rounds from the oven and let them cool slightly on the baking sheet before serving.
-
Serve warm and enjoy!
Expert Tips & Tricks
- Garlic Intensity: Adjust the amount of garlic to your liking. For a milder flavor, use fewer cloves or briefly sauté the garlic in the olive oil before combining. For a stronger flavor, let the garlic and oil infuse for several hours.
- Flour Variations: The combination of whole wheat and bread flour gives the bread a rustic texture and flavor. If you prefer a softer texture, you can substitute all bread flour for the whole wheat flour.
- Herb Infusion: Enhance the flavor by adding fresh herbs such as rosemary, thyme, or oregano to the garlic oil.
- Shiny Crust: For a shinier crust, brush the bread rounds with a mixture of milk and honey before baking.
- Doneness Check: To ensure the bread is fully baked, insert a toothpick into the center. If it comes out clean, the bread is done.
Serving & Storage Suggestions
These Armenian bread rounds are best served warm, straight from the oven. They make a delicious accompaniment to soups, salads, or dips. You can also enjoy them on their own as a snack or appetizer.
- Serving: Serve warm, sliced or torn into pieces. The garlic-infused oil makes them delicious on their own, but they also pair well with hummus, baba ghanoush, or other Mediterranean dips.
- Storage: Store leftover bread rounds in an airtight container at room temperature for up to 2 days. For longer storage, wrap them tightly in plastic wrap and freeze for up to 1 month.
- Reheating: To reheat, wrap the bread rounds in foil and bake in a preheated oven at 350ºF (175ºC) for 5-10 minutes, or until warmed through. You can also reheat them in a microwave for a shorter period, but be careful not to overcook them.
Nutritional Information
Note: Nutritional information is an estimate and may vary based on specific ingredients and portion sizes.
| Nutrient | Amount per Serving | % Daily Value |
|---|---|---|
| Calories | 493 kcal | 25% |
| Total Fat | 16g | 25% |
| Saturated Fat | 2.8g | 14% |
| Cholesterol | 4.3mg | 1% |
| Sodium | 2638mg | 110% |
| Carbohydrate | 76g | 25% |
| Dietary Fiber | 7.6g | 30% |
| Sugars | 4.6g | 5% |
| Protein | 13.7g | 27% |
Variations & Substitutions
- Dairy-Free: Substitute the milk with a non-dairy alternative such as almond milk, soy milk, or oat milk. Be sure to use unsweetened varieties.
- Gluten-Free: Use a gluten-free flour blend designed for bread making. You may need to add a binder such as xanthan gum or guar gum to improve the texture.
- Spicy Kick: Add a pinch of red pepper flakes to the garlic oil for a touch of heat.
- Sesame Seeds: Sprinkle sesame seeds on top of the bread rounds before baking for added flavor and texture.
- Cheese Topping: Add shredded Parmesan or feta cheese to the bread rounds during the last few minutes of baking for a cheesy twist.
FAQs (Frequently Asked Questions)
Q: Can I use active dry yeast instead of instant yeast?
A: Yes, you can. However, you’ll need to proof the active dry yeast in warm water with a pinch of sugar for about 5-10 minutes before adding it to the bread machine.
Q: My bread rounds are not rising properly. What could be the reason?
A: Possible causes include using expired yeast, water that is too hot or too cold, or not enough gluten development during kneading. Make sure your yeast is fresh, the water is lukewarm, and the dough has a smooth and elastic texture after kneading.
Q: Can I make the dough ahead of time and bake it later?
A: Yes, you can. After the dough cycle is complete, punch down the dough, wrap it tightly in plastic wrap, and refrigerate it for up to 24 hours. Before baking, let the dough come to room temperature for about 30 minutes.
Q: What if I don’t have a bread machine?
A: You can mix the dough by hand or with a stand mixer. Knead the dough for 8-10 minutes until it is smooth and elastic. Then, place it in a greased bowl, cover it, and let it rise in a warm place for 1-1.5 hours, or until doubled in size.
Q: The garlic is burning in the oven. How can I prevent this?
A: To prevent the garlic from burning, add the garlic oil halfway through the baking process instead of at the beginning.
Final Thoughts
There’s nothing quite like the simple pleasure of warm, homemade bread. These Armenian bread rounds, brought to life effortlessly with a bread machine, offer a delightful experience. The aroma of garlic and the satisfying chew of the crust are sure to please. Don’t hesitate to experiment with herbs and toppings to create your own signature version. I encourage you to give this recipe a try and share your culinary creations with friends and family! Perhaps pair these rounds with a hearty lentil soup or a refreshing cucumber salad for a complete and satisfying meal. Enjoy!