
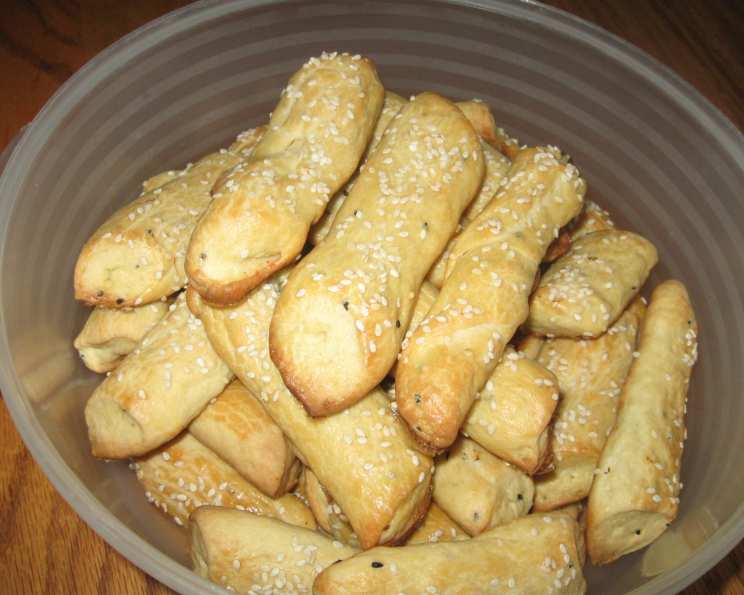
Armenian Choereg Breadsticks: A Taste of Nostalgia
The aroma alone transports me back to my grandmother’s kitchen. The scent of warm milk mingling with yeast, the ever-so-slight sweetness hanging in the air – it was the unmistakable prelude to Choereg. As a child, I’d watch, mesmerized, as her hands, weathered with time and experience, coaxed the dough into long, graceful ropes, dotted with those intriguing black seeds. This wasn’t just baking; it was an act of love, a tangible connection to our Armenian heritage. To this day, the taste of Choereg evokes warmth, family, and a comforting sense of belonging.
Recipe Overview
- Prep Time: 30 minutes
- Cook Time: 30 minutes
- Rise Time: 2 hours
- Total Time: 3 hours
- Yields: 60 breadsticks
- Serves: 60
- Dietary Type: Vegetarian
Ingredients
- 2 1/2 lbs (approximately 8-9 cups) flour
- 1 tablespoon salt
- 1/4 cup sugar
- 1 cup scalded milk
- 1 (1/4 ounce) package yeast
- 1/2 cup warm water (about 105 degrees Fahrenheit)
- 1/2 cup Crisco (vegetable shortening)
- 1/2 lb (butter)
- 1/2 tablespoon nigella seeds (black seeds)
- 2 eggs
- 1 beaten egg (for egg wash)
- Sesame seeds (for topping)
Equipment Needed
- Large mixing bowl or stand mixer
- Measuring cups and spoons
- Cookie sheets
- Pastry brush
Instructions
-
Begin by dissolving the yeast in the warm water. Set aside for about 5-10 minutes until it becomes foamy. This indicates that the yeast is active and ready to use.
-
In a separate saucepan, heat the milk until it is scalded. This means heating it until small bubbles form around the edges, but not boiling. Turn off the heat immediately after scalding.
-
Add the Crisco and butter to the hot milk and stir until both are completely melted. Allow the mixture to cool to lukewarm. This is crucial; if the mixture is too hot, it will kill the yeast.
-
If using a large Kitchen Aid Mixer, add the flour, salt, and sugar to the bowl. Pour in the cooled milk mixture and the dissolved yeast. Add the eggs and nigella seeds. If you do not have a stand mixer, combine these ingredients in a large bowl.
-
Mix the ingredients until a soft dough forms. Gradually add more flour, if needed, to achieve a slightly sticky dough. The amount of flour may vary depending on humidity levels.
-
Knead the dough for about 10 minutes using a stand mixer or with oiled hands. If kneading by hand, work the dough on a lightly floured surface until it becomes smooth and elastic.
-
Place the dough in a lightly oiled bowl, turning to coat. Cover the bowl with plastic wrap or a clean kitchen towel and let it rise in a warm place until doubled in bulk, approximately 2 hours. The rising time can vary depending on the temperature of your kitchen.
-
After the dough has doubled, oil your hands to prevent sticking and punch down the dough to release the air.
-
Pull off a piece of dough and roll it with your hands on a lightly oiled surface to form a long rope, about 1/2 inch in diameter.
-
Slice the rope on the diagonal into 5-inch pieces. You can leave them as sticks, form them into circles, or braid three pieces together for a more decorative look.
-
Place the formed Choereg pieces on a cookie sheet, leaving about an inch of space between each one.
-
Brush the tops of the Choereg with the beaten egg to create a golden-brown crust.
-
Sprinkle the tops with sesame seeds.
-
Bake in a preheated oven at 350 degrees Fahrenheit (175 degrees Celsius) for about 30 minutes, or until they are light brown and cooked through. Keep a close eye on them as baking times can vary depending on your oven.
-
Remove the Choereg from the oven and let them cool on a wire rack before serving.
Expert Tips & Tricks
- Bloom the Yeast: Always test your yeast by dissolving it in warm water and waiting for it to foam. This ensures that your yeast is active and will properly leaven the dough.
- Don’t Overheat the Milk Mixture: Make sure the milk mixture is cooled to lukewarm before adding it to the yeast. High heat will kill the yeast and prevent the dough from rising.
- Proper Kneading: Kneading is crucial for developing the gluten in the dough, which gives the Choereg its structure. If kneading by hand, use oiled hands to prevent sticking and ensure a smooth dough.
- Consistent Size: For even baking, try to make the Choereg pieces as uniform in size as possible.
- Golden Brown Color: Keep a close eye on the Choereg while baking and adjust the baking time if needed to achieve a light brown, golden color.
- Freezing: Choereg can be frozen for longer storage. After baking, let them cool completely and then wrap them tightly in plastic wrap or place them in a freezer bag.
Serving & Storage Suggestions
Armenian Choereg breadsticks are delicious served warm or at room temperature. They are traditionally enjoyed with coffee or tea for breakfast or as a snack. They also pair well with cheese, olives, and other Mediterranean appetizers.
To store, place cooled Choereg in a large plastic container or airtight bag at room temperature. They will stay fresh for several days. For longer storage, freeze them. To reheat, wrap them in foil and warm them in a low oven (around 300 degrees Fahrenheit) for about 10 minutes, or until heated through.
Nutritional Information
Please note that these values are estimates and may vary based on specific ingredients and portion sizes.
| Nutrient | Amount per Serving | % Daily Value |
|---|---|---|
| Calories | 121 kcal | 6% |
| Total Fat | 5.4g | 8% |
| Saturated Fat | 2.7g | 13% |
| Cholesterol | 18mg | 6% |
| Sodium | 149mg | 6% |
| Total Carbohydrate | 15.5g | 5% |
| Dietary Fiber | 0.5g | 2% |
| Sugars | 0.9g | 3% |
| Protein | 2.5g | 5% |
Variations & Substitutions
- Whole Wheat Choereg: Substitute up to half of the all-purpose flour with whole wheat flour for a nuttier flavor and added fiber.
- Sweet Choereg: Increase the amount of sugar in the dough for a sweeter breadstick. You can also add a touch of vanilla extract or orange zest for extra flavor.
- Savory Choereg: Omit the sugar and add grated cheese, herbs, or spices to the dough for a savory twist.
- Gluten-Free Choereg: Use a gluten-free flour blend formulated for bread making. You may need to adjust the amount of liquid depending on the blend you use.
- Vegan Choereg: Replace the butter with vegan butter and the eggs with flax eggs. To make a flax egg, mix 1 tablespoon of ground flaxseed with 3 tablespoons of water and let it sit for 5 minutes to thicken.
FAQs (Frequently Asked Questions)
Q: What are nigella seeds and where can I find them?
A: Nigella seeds, also known as black seeds or black cumin, are small black seeds with a nutty, slightly peppery flavor. They can be found in Middle Eastern grocery stores, health food stores, or online.
Q: Why is it important to scald the milk?
A: Scalding the milk helps to denature the proteins, which can interfere with gluten development. It also helps to dissolve the butter and Crisco evenly.
Q: Can I make the dough ahead of time?
A: Yes, you can make the dough ahead of time and store it in the refrigerator for up to 24 hours. Punch down the dough before shaping and baking.
Q: How do I prevent the Choereg from becoming too hard?
A: Avoid overbaking the Choereg. Bake until they are light brown and cooked through. Storing them in an airtight container will also help to keep them soft.
Q: Can I freeze the baked Choereg?
A: Yes, you can freeze the baked Choereg for longer storage. Let them cool completely and then wrap them tightly in plastic wrap or place them in a freezer bag.
Final Thoughts
Baking Armenian Choereg breadsticks is more than just following a recipe; it’s about connecting to a rich cultural heritage and sharing a piece of our history with others. I encourage you to try this recipe, experiment with your own variations, and experience the joy of creating something delicious and meaningful. Share your creations with friends and family and let the warmth of Choereg fill your home. And don’t hesitate to reach out and share your experiences – I’d love to hear how it goes!