
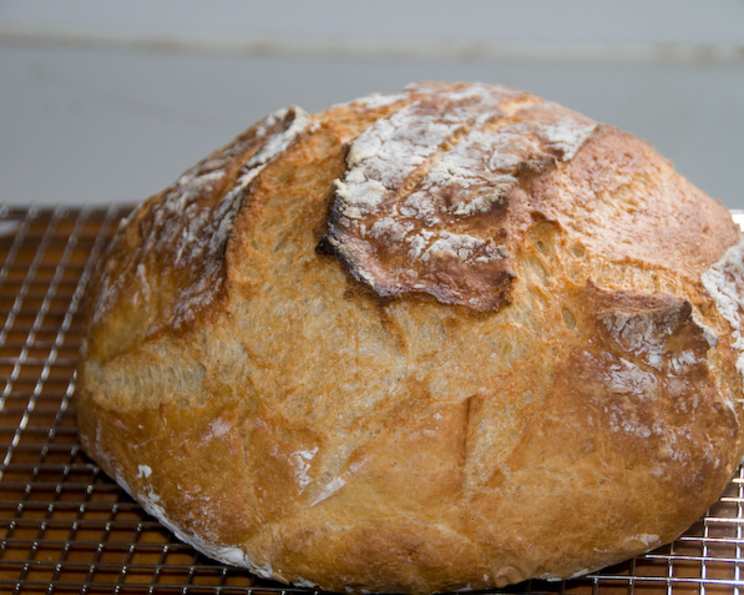
The Magic of the Boule: A Baker’s Journey
I remember the first time I saw a perfectly round boule, sitting proudly on a baker’s shelf. Its deeply golden crust, scored expertly with a simple cross, seemed to whisper promises of warmth and comfort. I was intimidated, sure, but also deeply drawn in. It was then I realized bread-making wasn’t just a task; it was an art, a conversation between the baker, the ingredients, and time itself. The simple boule became my challenge and my passion.
Recipe Overview
- Prep Time: 20 minutes (plus pre-fermentation)
- Cook Time: 30-35 minutes
- Total Time: 50-55 minutes (plus pre-fermentation time of 3 hours to 10 days)
- Yields: 4 1-pound loaves
- Dietary Type: Vegetarian
Ingredients
- 1 1/2 cups lager beer, 12 oz. bottle, room temperature lager such as Budweiser (Note: Water can be substituted; however, it will somewhat affect the flavor)
- 1 1/2 cups water, warm (approximately 100 degrees Fahrenheit)
- 1 tablespoon white vinegar
- 1 1/2 tablespoons instant yeast
- 1 tablespoon salt (adjust to taste)
- 6 1/2 cups unsifted unbleached all-purpose flour (29.25 ounces)
Equipment Needed
- Large (5 – 6 qt.) plastic container with lid (not airtight)
- Baking stone or a 5 qt. Dutch oven
- Pizza peel or parchment paper
- Serrated knife or razor blade
- Wire rack
Instructions
-
Mixing the Dough: If measuring flour by volume rather than weight, gently scoop the flour into your dry-ingredient measuring cups, then sweep the top level with a knife or spatula. Avoid pressing down into the flour to ensure accurate measurement. In a large plastic storage container (with a lid), mix together the flour, yeast, and salt.
-
Adding Liquids: Add all the liquid (the beer, water and vinegar) at once to the dry ingredients. Mix with a wooden spoon.
-
Combining the Dough: If mixing becomes too difficult to incorporate all the flour with the spoon, reach into the mixing bowl with very wet hands and press the mixture together. Kneading is not necessary for this recipe.
-
Achieving the Right Consistency: The goal is to ensure everything is uniformly moist without any dry patches. The mixing process should only take a few minutes. The dough will be wet and loose enough to conform to the shape of its container.
-
First Rise (Bulk Fermentation): Cover the container with a lid (not airtight) that fits well. Allow the mixture to rise at room temperature until it begins to collapse, or at least flattens on the top. This usually takes about 2 hours, but depends on the room’s temperature and the initial water temperature. Longer rising times, up to about 5 hours, will not harm the result.
-
Refrigeration and Flavor Development: You can use a portion of the dough anytime after the initial rise. Fully refrigerated wet dough is less sticky and easier to work with than dough at room temperature. It’s best to refrigerate the dough overnight, or at least 3 hours, before shaping a loaf. The bread’s flavor improves with the retardation (cold fermentation), so I suggest waiting at least 24 hours before baking the first loaf! Dough may be stored in the refrigerator for up to 10 days.
-
Preparing to Bake: First, prepare a pizza peel by sprinkling it liberally with cornmeal to prevent the loaf from sticking (or use parchment paper).
-
Shaping the Boule: With wet hands, pull up one end of the refrigerated dough. Using a serrated knife, cut off a 1-pound, or grapefruit-size, piece of dough. Hold the mass of dough in your hands; if it sticks, add a little flour until the dough no longer sticks to your hand. Gently stretch the surface of the dough on all four sides, rotating the ball a quarter-turn as you go. Most of the dusting flour will fall off. The bottom of the loaf may appear to be a collection of bunched ends, but they will flatten out during resting and baking. The dough ball should be smooth and cohesive and take no more than 30 to 60 seconds to shape.
-
Second Rise (Proofing): Cover loosely with plastic wrap and let rise at room temperature until the dough has doubled in size and does not readily spring back when poked with a finger, about 60 – 90 minutes.
-
Choosing Your Baking Method: Now it’s decision time: Dutch Oven or Baking Stone? The instructions diverge here.
Dutch Oven Method:
- About 30 minutes before baking, adjust oven rack to the lowest position, place a 6- to 8-quart heavy-bottomed Dutch oven (with lid) on the rack, and heat oven to 450 degrees Fahrenheit.
- Lightly flour the top of the dough and, using a razor blade or sharp knife, make one 6-inch-long, 1/2-inch-deep slit along the top of the dough.
- Carefully remove the pot from the oven and remove the lid.
- Pick up the dough by lifting the parchment overhang and lower it into the pot (let any excess parchment hang over the pot edge).
- Cover the pot and place it in the oven.
- Reduce oven temperature to 425 degrees Fahrenheit and bake covered for 20 minutes.
- Remove the lid and continue to bake until the loaf is deep brown and an instant-read thermometer inserted into the center registers 200 degrees Fahrenheit, 10 to 15 minutes longer.
- Carefully remove the bread from the pot; transfer it to a wire rack and cool to room temperature, about 2 hours.
Alternatively, to prevent burning on the bottom: First make a ‘pillow’ of aluminum foil and place it in the bottom of the pot. To assure that the bottom does not burn, I also place the pot on a heat diffuser. Preheat the grill and pan to 450 degrees; from here, follow the oven directions above.
Baking Stone Method: - Place a baking stone on the lowest rack of the oven.
- Place an empty broiler tray (I use my cast-iron skillet) on an oven shelf, making sure it will not interfere with the rising bread as it bakes.
- Preheat oven to 450 degrees Fahrenheit 20 minutes before baking.
- Spray the top of the dough with cold water (which allows a knife to slash through the dough without sticking). Use a serrated bread knife to slash a 1/4-inch-deep cross or tic-tac-toe pattern onto the top.
- Slide the loaf off the pizza peel onto the preheated baking stone using a quick, forward jerking motion. If using parchment, just lift it off the peel and place it on the stone.
- Pour 1 cup hot water into the broiler tray and close oven door to trap steam.
- Bake about 30-35 minutes, or until the crust is nicely browned and sounds hollow when tapped.
-
Cooling: Allow the boule to cool completely on a wire rack for the best flavor, texture, and easy slicing. The loaf will crackle, or “sing,” when initially exposed to room-temperature air.
-
Storage: Store remaining dough in the refrigerator in your lidded container and use during the next 10 days.
Expert Tips & Tricks
- Hydration is Key: The wet dough is essential for the open crumb and characteristic texture of this artisan bread. Don’t be tempted to add more flour during the mixing process.
- Scoring Technique: A sharp razor blade or lame is ideal for scoring. Make a confident, swift cut to allow the bread to expand properly in the oven.
- Steam Power: Creating steam in the oven is vital for a crispy crust. If you don’t have a broiler tray for water, you can throw a handful of ice cubes into the bottom of the oven. But, if you use a Dutch Oven you don’t need steam.
- The Poke Test: To determine if the second rise (proof) is adequate, gently poke the dough. If it springs back slowly and leaves a slight indentation, it’s ready to bake.
Serving & Storage Suggestions
Serve your freshly baked boule warm, sliced, with a drizzle of olive oil and a sprinkle of sea salt. It’s also fantastic with soups, stews, or as a base for sandwiches. Store leftover bread in a paper bag at room temperature for up to 2 days, or freeze for longer storage. To reheat, spritz with water and bake in a preheated oven at 350 degrees Fahrenheit for 5-10 minutes.
Nutritional Information
| Nutrient | Amount per Serving | % Daily Value |
|---|---|---|
| Calories | 793.1 kcal | N/A |
| Calories from Fat | 20 g | 3% |
| Total Fat | 2.3 g | 3% |
| Saturated Fat | 0.4 g | 1% |
| Cholesterol | 0 mg | 0% |
| Sodium | 1756.9 mg | 73% |
| Total Carbohydrate | 160.1 g | 53% |
| Dietary Fiber | 6.7 g | 26% |
| Sugars | 0.6 g | 2% |
| Protein | 23.2 g | 46% |
Note: Nutritional information is an estimate and may vary based on specific ingredients and portion sizes.
Variations & Substitutions
- Whole Wheat Boule: Substitute up to 50% of the all-purpose flour with whole wheat flour for a nuttier flavor and added fiber.
- Herb-Infused Boule: Add 2 tablespoons of chopped fresh herbs (such as rosemary, thyme, or oregano) to the dough during the initial mixing.
- Garlic and Parmesan Boule: Incorporate 1/4 cup grated Parmesan cheese and 2 cloves of minced garlic into the dough for a savory twist.
- Spelt Boule: Replace all-purpose flour with spelt flour.
FAQs (Frequently Asked Questions)
Q: Why is my dough so sticky?
A: This dough is meant to be quite wet, which contributes to its characteristic crumb. Resist the urge to add more flour during mixing. Wetting your hands before handling the dough will prevent it from sticking excessively.
Q: Can I use a different type of yeast?
A: While instant yeast is recommended for its convenience, you can substitute active dry yeast. Just bloom it in warm water for 5-10 minutes before adding it to the dry ingredients.
Q: My bread is burning on the bottom. What can I do?
A: Place a ‘pillow’ of aluminum foil in the bottom of the Dutch Oven, or use a heat diffuser to prevent burning.
Q: How do I get a good crust?
A: Creating steam in the oven is key. Ensure your oven is fully preheated, and use the hot water trick for the baking stone method. Removing the lid during the last portion of baking with the Dutch Oven method also helps to brown the crust.
Q: Can I freeze the baked boule?
A: Yes, you can freeze the baked boule. Wrap it tightly in plastic wrap and then in aluminum foil. Freeze for up to 2-3 months. Thaw completely before reheating.
Final Thoughts
Don’t be afraid to embrace the simplicity of this boule recipe. It’s a forgiving dough that rewards experimentation and patience. There’s nothing quite like the aroma of freshly baked bread filling your home. Share your creations with friends and family, and savor the simple pleasure of homemade goodness. Every loaf tells a story, and I hope yours will be a delicious one.