
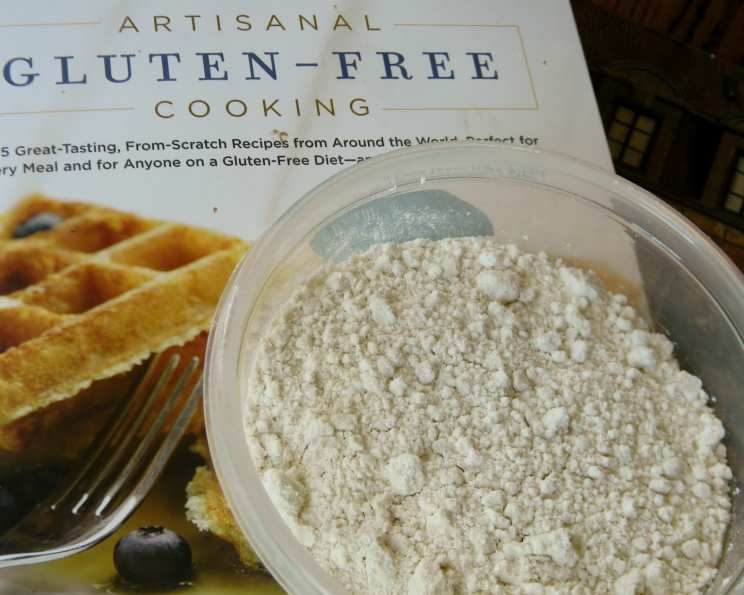
Crafting the Perfect Gluten-Free Artisan Flour Blend
The first time I attempted gluten-free baking, it was a complete disaster. I tried substituting a single gluten-free flour for all-purpose in my grandmother’s cherished chocolate chip cookie recipe, and the results were… well, let’s just say they were more like hockey pucks than cookies. Determined to conquer the world of gluten-free baking, I embarked on a journey to understand the nuances of different gluten-free flours and their unique properties. That’s when I discovered the magic of creating my own artisan flour blend – a blend that unlocks a whole new realm of possibilities in the kitchen.
Recipe Overview
- Prep Time: 5 minutes
- Cook Time: 0 minutes (for the flour blend itself)
- Total Time: 5 minutes
- Yields: Approximately 3 cups
- Serves: Varies depending on usage
- Dietary Type: Gluten-Free, Vegan, Vegetarian, Dairy-Free
Ingredients
- 1 cup brown rice flour
- 1 cup sorghum flour
- 1/3 cup cornstarch
- 1/3 cup tapioca starch
- 1/4 cup potato starch
- 1 tablespoon potato flour
- 1 teaspoon potato flour (Yes, another teaspoon! It’s important!)
- 1 teaspoon guar gum
Equipment Needed
- Measuring cups and spoons
- Large mixing bowl or container
- Whisk or spoon
- Airtight container for storage
Instructions
- In a large mixing bowl, combine the brown rice flour, sorghum flour, cornstarch, tapioca starch, potato starch, potato flour (both the tablespoon and the teaspoon), and guar gum.
- Using a whisk or spoon, thoroughly mix all the ingredients together until they are evenly distributed. Ensure there are no clumps of starch or guar gum.
- Transfer the flour blend to an airtight container.
- Store the blend in a cool, dark, and dry place, such as your pantry.
Expert Tips & Tricks
- Why a Blend? Gluten-free baking relies on a combination of flours to mimic the properties of gluten, which provides structure, elasticity, and chewiness. This blend is designed to offer a balanced texture in a variety of baked goods.
- Sorghum Flour: Sorghum flour adds a slightly sweet and nutty flavor to the blend. It is also a good source of fiber.
- Potato Starch vs. Potato Flour: While both are derived from potatoes, they serve different purposes. Potato starch is a pure starch used for thickening and binding, while potato flour is made from the entire potato and has a more pronounced flavor. The small amount of potato flour in this recipe helps to create a slightly softer texture.
- Guar Gum: Guar gum is a crucial ingredient for gluten-free baking, acting as a binder and adding elasticity to the dough. Don’t skip it!
- Measuring Matters: Precise measurements are essential in gluten-free baking. Use accurate measuring cups and spoons for the best results.
- Whisk Thoroughly: Make sure to whisk the ingredients together very well to prevent pockets of starch or guar gum. These pockets can result in uneven texture in your baked goods.
- Adjusting for Humidity: In humid climates, you may need to reduce the amount of liquid in your recipes slightly, as gluten-free flours tend to absorb more moisture from the air.
- Don’t Overmix: Overmixing can lead to tough baked goods. Mix only until the ingredients are just combined.
- Let Dough Rest: Allowing gluten-free dough to rest for 15-30 minutes before baking can improve its texture and reduce the chance of a gritty result. This allows the flours to fully hydrate.
Serving & Storage Suggestions
This artisan gluten-free flour blend is a versatile base for a wide range of baked goods, from cakes and cookies to muffins and breads. It can also be used as a thickener for sauces and gravies.
- Storage: Store the flour blend in an airtight container in a cool, dark, and dry place for up to 3 months. For longer storage, you can keep it in the refrigerator or freezer.
- Usage: Use this flour blend as a 1:1 substitute for all-purpose flour in many recipes. However, remember that gluten-free baking often requires some adjustments, so you may need to experiment with liquid ratios or baking times.
- Reheating: Baked goods made with this flour blend can be reheated in the oven, microwave, or toaster oven. For best results, wrap them loosely in foil or parchment paper to prevent them from drying out.
Nutritional Information
Note: Nutritional information is an estimate and may vary based on specific brands and preparation methods.
| Nutrient | Amount per 1/4 cup (approximate) | % Daily Value* |
|---|---|---|
| Calories | 120 kcal | 6% |
| Total Fat | 0.5 g | 1% |
| Saturated Fat | 0 g | 0% |
| Trans Fat | 0 g | |
| Cholesterol | 0 mg | 0% |
| Sodium | 1 mg | 0% |
| Total Carbohydrate | 27 g | 9% |
| Dietary Fiber | 1 g | 4% |
| Sugars | 0 g | |
| Protein | 2 g | 4% |
| Vitamin D | 0 mcg | 0% |
| Calcium | 5 mg | 0% |
| Iron | 0.4 mg | 2% |
| Potassium | 30 mg | 1% |
- *% Daily Value is based on a 2,000 calorie diet.
Variations & Substitutions
- Rice Flour Alternatives: If you’re sensitive to rice, you can experiment with using a different gluten-free flour like millet flour or oat flour (ensure it’s certified gluten-free) in place of the brown rice flour. The texture may change slightly.
- Starch Substitutions: While cornstarch, tapioca starch, and potato starch each contribute unique properties, you could try substituting arrowroot powder or sweet rice flour for one of the starches in equal measure.
- Guar Gum Alternative: If you’re allergic to guar gum, you can try using xanthan gum as a substitute. Use about 3/4 teaspoon of xanthan gum for every 1 teaspoon of guar gum. Be mindful that xanthan gum can sometimes produce a slightly gummy texture if used in excess.
- Chocolate Variation: For a chocolate-flavored flour blend (perfect for brownies or chocolate cakes), add 1/4 cup of unsweetened cocoa powder to the blend and reduce one of the other flours (like brown rice flour) by 1/4 cup to compensate.
- Nutty Variation: Add 1/4 cup almond flour or hazelnut flour for a richer, nuttier flavor profile. Reduce another flour by 1/4 cup to keep the ratio correct.
FAQs (Frequently Asked Questions):
Q: Can I use this blend for all my baking needs?
A: This blend is quite versatile, working well in many recipes. However, some recipes may require slight adjustments to liquid ratios or the addition of extra binders depending on their specific needs.
Q: Why are there so many different flours and starches in this blend?
A: Each flour and starch contributes a different property to the overall texture and structure of the baked good. The combination helps to mimic the effects of gluten, creating a more desirable final product.
Q: Can I make a larger batch of this flour blend and store it for later use?
A: Absolutely! This blend can be made in larger batches and stored in an airtight container in a cool, dark place for several months.
Q: What if my baked goods are still gritty after using this blend?
A: Grittiness can sometimes occur in gluten-free baking due to the texture of certain flours. Try letting the batter or dough rest for 20-30 minutes before baking to allow the flours to fully hydrate.
Q: I don’t have guar gum. Can I still make this blend?
A: Guar gum is important for binding and elasticity. While you can try substituting xanthan gum, the results may vary. It’s best to use one or the other if possible.
Final Thoughts
Creating your own artisan gluten-free flour blend might seem a bit daunting at first, but trust me, the results are worth the effort. This blend provides a foundation for countless delicious and successful gluten-free baking adventures. So, gather your ingredients, whisk them together with care, and get ready to experience the joy of baking without limitations. Don’t be afraid to experiment and adjust the blend to suit your own preferences and recipes. And most importantly, have fun! Share your creations with friends and family, and let them taste the magic of homemade gluten-free goodness.