
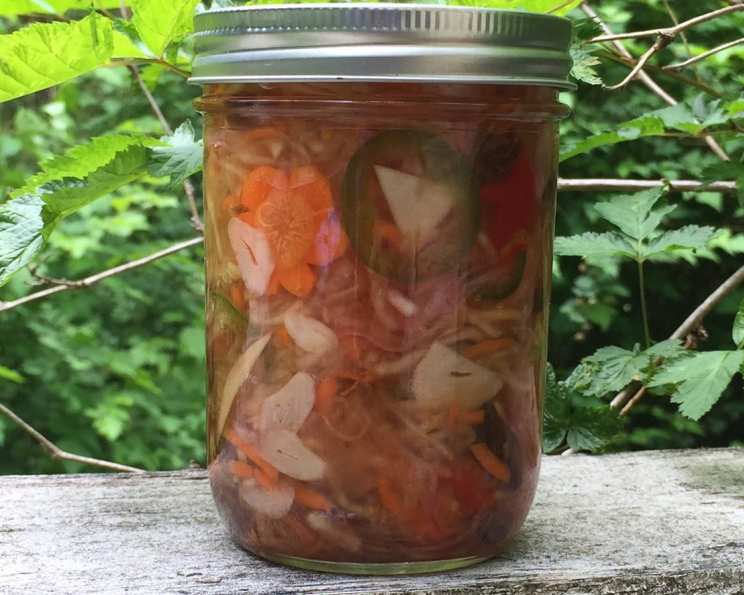
Atchara: A Taste of Philippine Sunshine
The memory still makes my mouth water. My Lola (grandmother) would spend hours in her sun-drenched kitchen, the air thick with the sweet-sour tang of vinegar and the earthy scent of green papaya. The rhythmic thwack-thwack-thwack of her cleaver against the cutting board was the soundtrack to my summer afternoons. Atchara wasn’t just a condiment; it was a labor of love, a vibrant burst of flavor that transformed any meal into a fiesta. Each crunchy bite, a perfect counterpoint to rich, savory dishes, instantly transported me back to her warm embrace and the joyful chaos of family gatherings. That’s the magic of Atchara: it’s sunshine preserved in a jar.
Recipe Overview
- Prep Time: 2 hours (includes salting time)
- Cook Time: 15 minutes
- Total Time: 2 hours 15 minutes
- Servings: 40-48
- Yields: 5-6 pints
- Dietary Type: Vegan
Ingredients
- 4 lbs papayas (about 2 green unripe papayas)
- 1/2 cup kosher salt
- 2 medium carrots
- 2 jalapenos
- 1 large red onion
- 1 large red bell pepper
- 10 large garlic cloves, peeled
- 1 thumb-size piece ginger, peeled
- 4 ounces raisins (4 small boxes)
Brine:
- 4 teaspoons kosher salt
- 3 1/2 cups sugar
- 5 cups white vinegar
Equipment Needed
- Large bowls
- Grater or shredder
- Mandoline (optional, but highly recommended for slicing vegetables)
- Large pot with a rack for sterilizing jars
- Six 1-pint jars (or combination)
- Colander
- Kitchen towels or cheesecloth
- Pot for brine
- Chopstick or skewer
Instructions
-
Prepare Garnishes (Optional): If desired, save small slices of papaya, carrot, and bell pepper to create decorative garnishes like flowers, stars, or crescent moons. These add a touch of visual flair to the finished product.
-
Prepare the Papaya: Begin by peeling the papayas. Cut them open and scrape out all the seeds. Using a grater or shredder, shred or grate the papaya into thin strips. Transfer the shredded papaya to a large bowl.
-
Salt the Papaya: Generously sprinkle the 1/2 cup of kosher salt over the shredded papaya. Mix well to ensure the salt thoroughly coats all the papaya. This process draws out excess moisture and helps to preserve the crispness of the atchara.
-
Let the Papaya Rest: Allow the salted papaya to sit for at least one hour. Longer is even better! Halfway through the resting time, mix well again to redistribute the salt and ensure even moisture extraction.
-
Sterilize the Jars: While the papaya rests, prepare your jars for canning. In a large pot with a rack on the bottom, place clean jars right side up. Fill the pot with water to cover the jars by at least 1 inch. If you have hard water, add a splash of vinegar to prevent spotting on the jars. Bring the water to a boil, then boil for 10 minutes. Turn off the heat and place the clean lids in the hot water to warm. Leave the jars and lids in the hot water until ready to use.
-
Prepare the Vegetables: While the papaya is resting and the jars are sterilizing, prepare the other vegetables. Shred or grate the carrots. Slice the tops of the jalapenos and remove the seeds (for a milder atchara, remove the membranes as well). Thinly slice the red onion, bell pepper, jalapenos, and garlic (a mandoline slicer is extremely helpful for achieving uniform slices). Peel and julienne the ginger.
-
Combine the Vegetables: In a large bowl, combine all the prepared vegetables: shredded carrots, sliced red onion, bell pepper, jalapenos, and garlic, and julienned ginger. Add the raisins to the bowl. Mix well to combine all the vegetables and raisins.
-
Make the Brine: In a pot, combine the kosher salt, sugar, and white vinegar. Cook the mixture over medium heat, stirring constantly, just long enough to dissolve the salt and sugar. Turn off the heat and allow the brine to cool slightly, until it is still warm but you can touch it comfortably. This recipe makes a little extra brine to ensure you have enough to completely cover the vegetables in the jars.
-
Rinse and Squeeze the Papaya: After the papaya has rested for at least an hour, transfer it to a colander. Rinse it thoroughly under running water to remove excess salt.
-
Extract the Moisture: Turn the rinsed papaya onto a clean kitchen towel or several layers of cheesecloth. Squeeze tightly to remove as much water as possible. This step is crucial for preventing a soggy atchara.
-
Combine Papaya and Vegetables: Add the squeezed papaya to the bowl with the vegetable mixture. Use your hands to pick the papaya apart so that it doesn’t clump together. Mix well to ensure the papaya is evenly distributed throughout the other vegetables.
-
Fill the Jars: Place a kitchen towel on the counter. Carefully remove the sterilized jars from the hot water, drain, and place them on the towel, right side up. Carefully fill each jar with the atchara mixture. Pack the vegetables a little tightly, leaving about 1/2 inch of headspace at the top of the jar.
-
Add the Brine: Fill each jar with the warm brine, leaving about 1/4 inch of headspace at the top.
-
Remove Air Bubbles: Gently tap each jar on the counter to release any trapped air bubbles. You can also use a chopstick or skewer to gently stir the mixture and dislodge any remaining air pockets.
-
Add Garnishes (Optional): If you prepared any garnishes, use the chopstick to poke them down the sides of the jars for an attractive presentation.
-
Seal the Jars: Wipe the jar rims clean with a damp cloth. Place the lids on the jars, and tighten the rings until they are fingertip-tight. (If using standard canning lids, follow the manufacturer’s instructions for proper sealing).
-
Cool and Store: Allow the jars to cool completely at room temperature. As they cool, you may hear a “pop” sound, which indicates that the jars have sealed properly. Keep refrigerated.
Expert Tips & Tricks
- Use very green papayas: The less ripe the papaya, the crisper the atchara will be. Look for papayas that are firm to the touch and completely green.
- Salting is key: Don’t skimp on the salting time for the papaya. This step is essential for drawing out moisture and achieving the desired crunchy texture.
- Mandoline magic: A mandoline slicer is a game-changer for preparing the vegetables. It ensures uniform, thin slices, which contribute to a better texture and appearance.
- Adjust the sweetness: The amount of sugar in the brine can be adjusted to your preference. If you prefer a less sweet atchara, reduce the amount of sugar by 1/2 cup.
- Spice it up: For a spicier atchara, leave the seeds and membranes in the jalapenos or add a pinch of red pepper flakes to the brine.
Serving & Storage Suggestions
Atchara is a versatile condiment that pairs well with a variety of dishes. It’s a perfect accompaniment to grilled meats, fried fish, and rich stews. Serve it chilled or at room temperature as a side dish or relish.
- Storage: Properly sealed and refrigerated atchara can last for several months. Once opened, consume within a few weeks.
- Serving: Serve as a side to any fried dish, barbecue or grilled dishes.
- Do not freeze: Freezing will change the texture of the vegetables, making them mushy.
Nutritional Information
Note: Nutritional information is an estimate and may vary based on specific ingredients and preparation methods.
| Nutrient | Amount per Serving | % Daily Value |
|---|---|---|
| Calories | 108 kcal | 5% |
| Total Fat | 0.2 g | 0% |
| Saturated Fat | 0 g | 0% |
| Cholesterol | 0 mg | 0% |
| Sodium | 1655 mg | 69% |
| Total Carbohydrate | 26 g | 9% |
| Dietary Fiber | 1 g | 4% |
| Sugars | 23 g | 46% |
| Protein | 1 g | 2% |
Variations & Substitutions
- Spicy Atchara: Add more jalapenos, bird’s eye chilies (siling labuyo), or red pepper flakes to the brine for a fiery kick.
- Sweet and Sour Atchara: Adjust the sugar and vinegar ratio to achieve your desired level of sweetness and sourness.
- Add Pineapple: Incorporate chunks of fresh pineapple for a tropical twist.
- Use Other Vegetables: Experiment with other vegetables like daikon radish, jicama, or green beans.
- No Raisins: If you don’t like raisins, simply omit them.
FAQs (Frequently Asked Questions)
Q: Can I use unripe mangoes instead of papaya?
A: Yes, unripe mangoes can be used as a substitute for papaya. The taste will be slightly different, but the overall process remains the same.
Q: How do I know if the jars are properly sealed?
A: If using standard canning lids, the center of the lid should be concave and not flex when pressed. If using other types of jars, follow the manufacturer’s instructions for checking the seal.
Q: Can I reduce the amount of salt in the brine?
A: While you can reduce the salt slightly, it’s important to maintain a certain level of salt to ensure proper preservation.
Q: How long does atchara last?
A: Properly sealed and refrigerated atchara can last for several months. Once opened, it’s best to consume it within a few weeks.
Q: My atchara is too sour. What can I do?
A: If your atchara is too sour, you can add a little more sugar to balance the flavors. Allow the mixture to sit for a few hours to allow the flavors to meld.
Final Thoughts
Making Atchara is more than just following a recipe; it’s about preserving a piece of Filipino culinary heritage. Don’t be intimidated by the process – it’s surprisingly simple and incredibly rewarding. The vibrant colors, the tangy flavors, and the satisfying crunch will transport you to a tropical paradise. So, gather your ingredients, channel your inner Lola, and embark on this delicious adventure. And please, let me know how yours turns out! I’d love to hear your variations and serving suggestions. Perhaps pair it with some grilled pork belly (liempo) for the ultimate Filipino feast.