
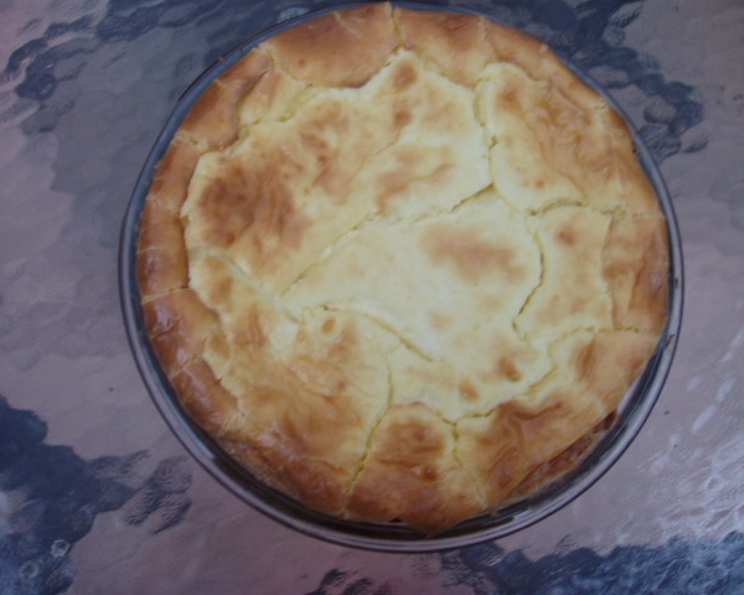
Atkins-Friendly Cheesecake: Guilt-Free Indulgence
I’ll never forget the first time I tasted a truly spectacular cheesecake. It was at my grandmother’s house during the holidays, the air thick with the scent of cinnamon and pine. The creamy, decadent slice was the perfect ending to a joyous meal, and even as a child, I understood that this was something special. It’s a memory I cherish, and it’s what drives me to create desserts that are not only delicious but also mindful of different dietary needs. This Atkins-friendly cheesecake, with its nutty crust and luscious filling, allows anyone to enjoy that same feeling of indulgence, without the guilt.
Recipe Overview
- Prep Time: 25 minutes
- Cook Time: 1 hour 15 minutes
- Total Time: 1 hour 40 minutes (plus chilling)
- Servings: 12
- Yield: 1 cheesecake
- Dietary Type: Low Carb, Keto-Friendly
Ingredients
For the Crust:
- 1 1/2 cups almonds
- 1/3 cup vanilla protein powder
- 4 tablespoons melted butter
- 1 tablespoon cinnamon
- 1 tablespoon nutmeg
- 3 tablespoons Splenda sugar substitute
For the Cheesecake:
- 3 (8 ounce) packages cream cheese, softened
- 1 cup Splenda sugar substitute
- 3/4 cup sour cream
- 1 tablespoon vanilla
- 4 eggs
Equipment Needed
- Blender or food processor
- 9-inch pie dish
- Large mixing bowl
- Electric mixer (handheld or stand)
- Baking pan for water bath
Instructions
-
Preheat your oven to 350°F (175°C).
-
Prepare the crust: Place the almonds in a blender or food processor and grind to a medium/fine texture. You don’t want almond flour, but avoid leaving large chunks.
-
Add the vanilla flavored whey protein powder, melted butter, cinnamon, nutmeg, and Splenda to the blended almonds.
-
Blend all the crust ingredients together until well combined. The mixture should resemble damp sand and hold together when pressed.
-
Spray a pie dish with non-stick spray. This will help the crust release easily after baking.
-
Pour the almond mixture into the prepared pie dish.
-
Use your hands to press the mixture evenly across the bottom and up the sides of the dish, forming a crust. Aim for a consistent thickness to ensure even baking.
-
Bake the crust for 12-15 minutes, or until lightly golden brown and fragrant. Keep a close eye on it to prevent burning.
-
Remove the crust from the oven and let it cool completely while you prepare the filling. This will help prevent the crust from becoming soggy.
-
Lower the oven temperature to 325°F (160°C).
-
Prepare the cheesecake filling: In a large mixing bowl, add the softened cream cheese.
-
Use an electric mixer to beat the cream cheese until it is smooth and creamy. Ensure there are no lumps remaining.
-
Gradually beat in the Splenda and sour cream, mixing well until fully incorporated.
-
Add the vanilla and mix until combined.
-
Beat in the eggs one at a time, mixing well after each addition. It’s crucial to add the eggs gradually to prevent overmixing, which can lead to cracks in the cheesecake.
-
Continue beating the filling until it is very smooth and free of any lumps. The smoother the batter, the better the final texture of the cheesecake.
-
Pour the cheesecake filling into the cooled crust.
-
Prepare a water bath: Place the pie dish inside a larger baking pan. Carefully pour hot water into the outer pan, filling it about halfway up the sides of the pie dish. This water bath creates a humid environment in the oven, which helps the cheesecake bake evenly and prevents cracking.
-
Carefully place the baking pan with the cheesecake and water bath into the preheated oven.
-
Bake for 1 hour. After an hour, check for doneness. The cheesecake should be mostly set with a slight jiggle in the center. If it’s still too wobbly, continue baking for another 5-10 minutes, checking frequently.
-
Turn off the oven and let the cheesecake cool in the oven with the door slightly ajar for about an hour. This gradual cooling process helps prevent cracking.
-
Remove the cheesecake from the oven and water bath. Let it cool completely on a wire rack.
-
Cover the cheesecake with plastic wrap and chill in the refrigerator for at least 4 hours, or preferably overnight. Chilling allows the cheesecake to fully set and develop its flavors.
Expert Tips & Tricks
- Prevent Cracking: The key to a crack-free cheesecake is even baking and gradual cooling. Using a water bath is highly recommended. Also, avoid opening the oven door frequently during baking.
- Soften Cream Cheese: Ensure your cream cheese is fully softened before mixing. This will prevent lumps in the filling and create a smoother texture. You can leave the cream cheese at room temperature for a couple of hours, or microwave it in short intervals, checking frequently to avoid melting.
- Sweetener Adjustment: Adjust the amount of Splenda to your preference. Taste the filling before baking and add more if needed.
- Crust Variation: If you’re not a fan of almonds, you can substitute with other nuts like pecans or walnuts.
- Flavor Enhancements: Add a teaspoon of lemon zest to the filling for a bright, citrusy note.
Serving & Storage Suggestions
To serve, slice the cheesecake with a sharp knife. For a clean cut, dip the knife in warm water and wipe it dry between slices. Garnish with fresh berries, a sprinkle of cinnamon, or a dollop of whipped cream (ensure it’s sugar-free for Atkins compliance).
Leftover cheesecake should be stored in an airtight container in the refrigerator. It will last for up to 5 days. For longer storage, you can freeze the cheesecake. Wrap it tightly in plastic wrap and then in foil. Frozen cheesecake can last for up to 2 months. Thaw it in the refrigerator overnight before serving.
Nutritional Information
Here’s an estimate of the nutritional information per serving (based on 12 servings):
| Nutrient | Amount per Serving | % Daily Value |
|---|---|---|
| Calories | 397.7 kcal | N/A |
| Calories from Fat | 338 g | 85% |
| Total Fat | 37.6 g | 57% |
| Saturated Fat | 18.1 g | 90% |
| Cholesterol | 149.4 mg | 49% |
| Sodium | 284.9 mg | 11% |
| Total Carbohydrate | 6.5 g | 2% |
| Dietary Fiber | 2.5 g | 9% |
| Sugars | 1.4 g | 5% |
| Protein | 10.7 g | 21% |
Note: Nutritional information is an estimate and can vary based on specific ingredients used.
Variations & Substitutions
- Coconut Flour Crust: For a nut-free crust, try using coconut flour instead of almond flour. You’ll need to adjust the amount of butter and Splenda accordingly.
- Chocolate Cheesecake: Add unsweetened cocoa powder (about 2 tablespoons) to the filling for a chocolate twist.
- Berry Swirl: Swirl in sugar-free berry preserves into the filling before baking for added flavor and visual appeal.
- Keto-Friendly Sweetener: If you prefer, substitute the Splenda with other keto-friendly sweeteners like erythritol or monk fruit.
FAQs (Frequently Asked Questions)
Q: Can I use regular sugar instead of Splenda?
A: While you can, it will no longer be an Atkins-friendly or low-carb dessert. The Splenda is crucial for maintaining the low-carb nature of the recipe.
Q: Why did my cheesecake crack?
A: Cracking is often caused by uneven baking or rapid temperature changes. Ensure you use a water bath and allow the cheesecake to cool gradually in the oven.
Q: Can I make this cheesecake without a water bath?
A: Yes, but the water bath is highly recommended to prevent cracking and ensure a creamy texture. If you skip it, reduce the baking time slightly and keep a close eye on the cheesecake.
Q: Is it necessary to chill the cheesecake overnight?
A: While you can chill it for a minimum of 4 hours, chilling overnight allows the cheesecake to fully set and develop its flavors, resulting in a better texture and taste.
Q: Can I add extracts to the cheesecake filling?
A: Absolutely! Feel free to add a teaspoon of almond extract, lemon extract, or any other flavor you enjoy to customize the cheesecake to your liking.
Final Thoughts
This Atkins-friendly cheesecake is more than just a dessert; it’s a way to indulge your sweet tooth without compromising your dietary goals. It’s a delicious reminder that healthy eating can be enjoyable and satisfying. I encourage you to try this recipe and make it your own by experimenting with different flavors and variations. Don’t hesitate to share your creations and feedback – I’d love to hear how it turns out! Perhaps pair it with a strong cup of coffee or a sugar-free chocolate sauce for an even more decadent treat. Happy baking!