
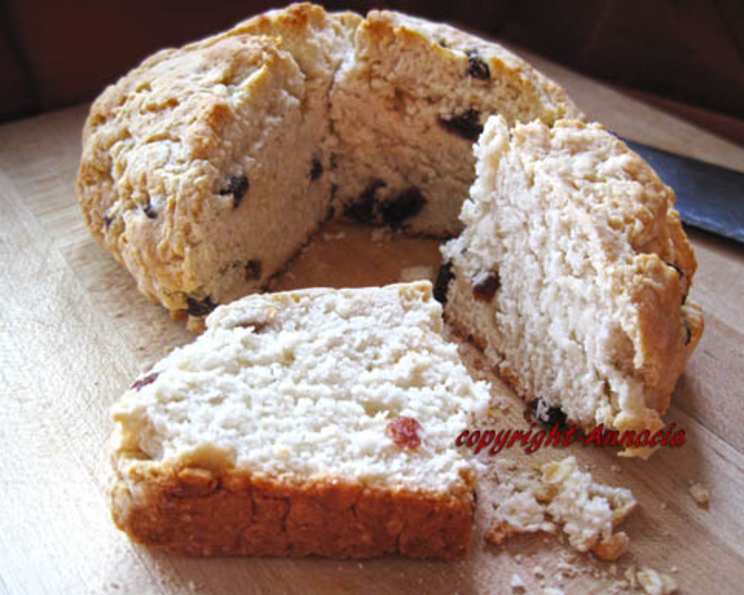
Aussie Damper: Sweet or Savoury – You Decide!
The scent of eucalyptus, the crackling campfire, and the golden glow of dusk – these are the memories that flood back with the taste of damper. As a kid, camping trips with my family always culminated in Dad pulling out his trusty cast iron camp oven. We’d gather around, mesmerized, as he mixed up a batch of damper, the simple bread transforming into something truly special under the dancing flames. The best part? Deciding whether we’d have it with lashings of golden syrup or scattered with herbs and cheese. The beauty of damper lies in its versatility and the memories it evokes.
Recipe Overview
- Prep Time: 10 minutes
- Cook Time: 30 minutes
- Total Time: 40 minutes
- Servings: 6-8
- Yields: 1 damper
- Dietary Type: Vegetarian
Ingredients
Basic Damper:
- 250 g self-raising flour
- 1⁄4 teaspoon salt
- 25 g unsalted butter, chilled and cubed
- 175 ml milk
For a Cheese Damper (Optional):
- 110 g tasty cheese or 100 g cheddar cheese
- Your choice of fresh or dried herbs, such as chopped parsley, chives, or cracked black pepper
For a Sweet Damper (Optional):
- 2 tablespoons golden syrup or 2 tablespoons honey
- 2 tablespoons caster sugar
- 1⁄4 cup sultanas (optional)
Equipment Needed
- Large mixing bowl
- Rounded-blade knife or butter knife
- Baking sheet
Instructions
-
Preheat your oven to 180-190°C (350-375°F). It’s crucial to get the temperature right to ensure the damper cooks evenly. If your oven tends to run hot, opt for the lower end of the temperature range.
-
In a large mixing bowl, stir together the flour and salt. This ensures the salt is evenly distributed throughout the dough, which is key to a balanced flavor.
-
Add the chilled, cubed butter to the flour mixture. Using your fingertips, rub the butter into the flour until the mixture resembles breadcrumbs. The colder the butter, the better – it helps create a tender, crumbly texture. Work quickly to prevent the butter from melting.
-
Add the milk (and any sweet or savoury additions if making a variation). Use a rounded-blade knife or butter knife to stir the ingredients together. Work gently to avoid overmixing the dough. The dough should be fairly soft, but not too sticky. If it’s too dry, add a tablespoon of milk at a time until it comes together.
-
Turn the dough out onto a lightly floured surface. Gently shape the dough into a soft, smooth ball. Avoid kneading the dough excessively, as this will develop the gluten and result in a tough damper.
-
Place the damper ball onto a baking sheet and flatten it gently with your hands. Aim for a disc about 3-4cm (1.5 inches) thick.
-
Using a sharp knife, cut a cross into the top of the damper. This helps the damper cook evenly and allows steam to escape. Brush the top of the damper with a little milk. This will help it achieve a beautiful golden-brown colour.
-
Bake for 30 minutes, or until the damper is golden brown and sounds hollow when tapped on the base. Cooking times may vary depending on your oven, so keep a close eye on it. If the top is browning too quickly, you can loosely tent it with foil.
Variations:
-
Cheese Damper: Before adding the milk, add 100 grams of cheese (tasty or cheddar) to the flour mixture. You can also add any extra herbs of your choice, such as chopped parsley, chives, or cracked black pepper. Sprinkle with a little extra cheese before baking for an extra cheesy crust.
-
Sweet Damper: Add the sweet ingredients (golden syrup/honey, caster sugar, and sultanas) with the milk. The sweetness of the golden syrup or honey beautifully complements the subtle flavour of the damper.
Expert Tips & Tricks
- Don’t overmix the dough! Overmixing develops the gluten, which results in a tough, chewy damper. Mix just until the ingredients come together.
- Chilled butter is key. Cold butter creates steam as it bakes, resulting in a light and fluffy damper.
- If you don’t have self-raising flour, you can make your own by adding 2 teaspoons of baking powder to 250g of plain flour.
- For a richer flavour, substitute a portion of the milk with cream.
- To prevent the base from burning, place a baking stone or an empty baking tray on the rack below the damper.
Serving & Storage Suggestions
Serve your warm damper immediately, while it’s still soft and fluffy. For a savoury damper, generous lashings of butter are essential. A cheese damper pairs perfectly with a bowl of hearty soup or a fresh salad. Sweet damper is delicious with butter, honey, golden syrup, or strawberry jam. It’s also a fantastic accompaniment to a cup of tea or coffee.
Leftover damper can be stored in an airtight container at room temperature for up to 2 days, or in the refrigerator for up to 4 days. To reheat, wrap the damper in foil and warm it in a moderate oven until heated through. You can also slice it and toast it. Note that damper is best eaten fresh; it tends to dry out quickly.
Nutritional Information
Note: Nutritional information is an estimate and may vary based on specific ingredients and serving sizes.
| Nutrient | Amount per Serving | % Daily Value |
|---|---|---|
| Calories | 306.5 kcal | N/A |
| Total Fat | 10.9 g | 16% |
| Saturated Fat | 6.7 g | 33% |
| Cholesterol | 32.2 mg | 10% |
| Sodium | 759 mg | 31% |
| Total Carbohydrate | 42.3 g | 14% |
| Dietary Fiber | 1.1 g | 4% |
| Sugars | 6.3 g | 25% |
| Protein | 9.7 g | 19% |
Variations & Substitutions
- Gluten-Free Damper: Use a gluten-free self-raising flour blend. You may need to add a binding agent like xanthan gum to improve the texture.
- Dairy-Free Damper: Substitute the butter with a plant-based butter alternative and the milk with almond milk, soy milk, or oat milk.
- Herb & Garlic Damper: Add minced garlic and a mix of fresh herbs like rosemary, thyme, and oregano to the flour mixture for a flavourful twist.
- Sun-Dried Tomato & Olive Damper: Add chopped sun-dried tomatoes and Kalamata olives to the dough for a Mediterranean-inspired damper.
- Spiced Damper: Add a teaspoon of mixed spice or cinnamon to the flour mixture for a warm, comforting flavour.
FAQs (Frequently Asked Questions)
Q: Can I make damper without self-raising flour?
A: Yes, you can! Simply use plain flour and add 2 teaspoons of baking powder for every 250g of flour.
Q: Why is my damper tough?
A: The most common reason for a tough damper is overmixing the dough. Be gentle and mix only until the ingredients are just combined.
Q: Can I cook damper in a camp oven over a campfire?
A: Absolutely! That’s the traditional way to make it. Place the damper in a preheated camp oven and cook over hot coals until golden brown and cooked through.
Q: How do I know when the damper is cooked?
A: The damper is cooked when it’s golden brown and sounds hollow when tapped on the base. You can also insert a skewer into the center; it should come out clean.
Q: Can I freeze damper?
A: Yes, you can freeze damper, but the texture may change slightly upon thawing. Wrap it tightly in plastic wrap and then in foil, and freeze for up to 2 months. Thaw completely before reheating.
Final Thoughts
From its humble beginnings as a staple for drovers and stockmen to its place as a beloved camping tradition, damper represents the heart of Australian cuisine. Its simplicity is its charm, and its versatility is its strength. Whether you prefer it sweet or savoury, I encourage you to try this recipe and create your own damper memories. Share it with loved ones around a campfire, or simply enjoy it as a comforting slice of home. And don’t be afraid to experiment with different flavours and variations – the possibilities are endless!