
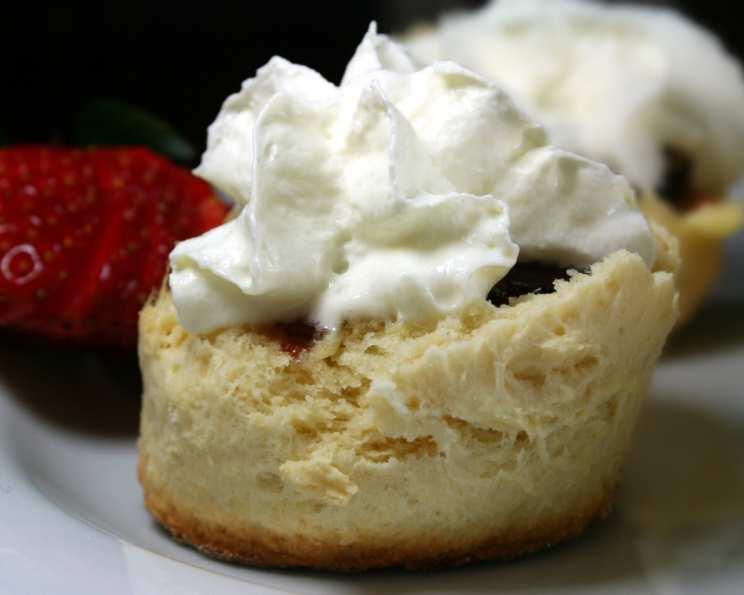
The Ultimate Guide to Perfect Aussie Scones
The scent of freshly baked scones has always transported me back to my childhood. I vividly remember visiting my grandmother’s farm during school holidays. The first thing she’d do is usher me into her warm, flour-dusted kitchen, where a batch of golden scones would be cooling on the wire rack. Slathered with homemade strawberry jam and a dollop of thick cream, they were the epitome of comfort and happiness. Now, decades later, I carry on her tradition, and these Aussie scones never fail to bring a smile.
Recipe Overview
- Prep Time: 10 minutes
- Cook Time: 12-15 minutes
- Total Time: 25-30 minutes
- Yields: Approximately 15 scones (depending on size)
- Dietary Type: Not suitable for gluten-free, dairy-free, or vegan diets (can be adapted – see variations)
Ingredients
- 225g self-raising flour
- 1 teaspoon baking powder
- A dash of salt
- 1 1/2 tablespoons caster sugar
- 1 egg
- 1/2 cup milk
- 50g butter
Equipment Needed
- Large mixing bowl
- Small bowl
- Measuring cups and spoons
- Pastry cutter or knife
- Baking sheet
- Wire rack
Instructions
-
Preheat your oven to a very hot temperature – approximately 225°C (437°F). It’s crucial to have a hot oven for scones to rise properly.
-
Melt the butter gently. You can do this in the microwave in short bursts, or in a small saucepan over low heat. Be careful not to burn it.
-
In a small bowl, beat the egg. Then, add the milk and whisk them together. Set this aside for now.
-
In a large mixing bowl, combine the self-raising flour, baking powder, caster sugar, and salt. Whisk these dry ingredients together thoroughly to ensure even distribution.
-
Pour the melted butter into the bowl of dry ingredients. Then add the egg and milk mixture.
-
Mix everything together gently. The key here is not to overmix. You want to bring the ingredients together just until a dough forms. Overmixing will develop the gluten in the flour, resulting in tough scones. A few streaks of flour are perfectly fine.
-
Lightly flour a clean work surface (like a bench or board).
-
Tip the dough onto the floured surface. Gently bring the dough together, kneading it very lightly just until it forms a smooth ball. Avoid excessive kneading!
-
Pat the dough down to approximately 2cm (about ¾ inch) thick. You can use a rolling pin if you prefer, but gently pressing it down with your hands works just as well.
-
Cut out the scones using a pastry cutter or a sharp knife. If using a cutter, avoid twisting it, as this can seal the edges and prevent the scones from rising fully. A simple, straight downward press is best. You can use various sizes of cutters, depending on the desired size of your scones.
-
Gently push the scraps of dough together. Pat them down again, and cut out more scones. Repeat until all the dough is used. Note that scones made from re-rolled dough might not rise quite as high as the first batch, but they will still be delicious.
-
Place the scones onto an ungreased baking sheet, leaving a little space between them.
-
Bake in the preheated 225°C (437°F) oven for 12-15 minutes, or until they are golden brown on top. Keep an eye on them, as oven temperatures can vary.
-
Once baked, transfer the scones to a wire rack to cool slightly.
-
Serve warm with your favorite accompaniments!
Expert Tips & Tricks
-
Hot Oven is Key: The high heat is essential for creating that signature scone rise. Ensure your oven is fully preheated before putting the scones in.
-
Don’t Overmix: Overmixing develops gluten, leading to tough scones. Mix gently until just combined.
-
Cold Butter Alternative: For a slightly different texture, you can rub cold, cubed butter into the flour mixture (like making pastry) instead of using melted butter. This will create a flakier scone.
-
Egg Wash: For an extra golden and glossy top, brush the scones with a little beaten egg or milk before baking.
-
Make Ahead: You can prepare the dough ahead of time, cut out the scones, and then freeze them on a baking sheet. Once frozen solid, transfer them to a freezer bag. Bake from frozen, adding a few extra minutes to the baking time.
Serving & Storage Suggestions
Serve your warm Aussie scones with generous helpings of clotted cream (or whipped cream), your favorite jam (strawberry is classic), and a pot of freshly brewed tea. They are best enjoyed immediately after baking, while they are still warm and fluffy.
Leftover scones can be stored in an airtight container at room temperature for up to 2 days. They may become slightly drier over time. To refresh them, you can wrap them in foil and warm them in a low oven (around 150°C/300°F) for a few minutes. Alternatively, you can split them and toast them lightly. Scones can also be frozen for longer storage.
Nutritional Information
Please note that these are estimated values and may vary based on specific ingredients and portion sizes.
| Nutrient | Amount per Scone (approx.) | % Daily Value |
|---|---|---|
| Calories | 150 kcal | 8% |
| Total Fat | 7g | 11% |
| Saturated Fat | 4g | 20% |
| Cholesterol | 30mg | 10% |
| Sodium | 100mg | 4% |
| Total Carbohydrate | 20g | 7% |
| Dietary Fiber | 1g | 4% |
| Sugars | 3g | |
| Protein | 3g | 6% |
Variations & Substitutions
- Gluten-Free: Substitute the self-raising flour with a gluten-free blend. You may need to add a little xanthan gum to help bind the dough.
- Dairy-Free: Use a dairy-free milk alternative (like almond, soy, or oat milk) and a dairy-free butter substitute.
- Sweet Variations: Add a handful of raisins, sultanas, or chopped dates to the dough for a fruit scone.
- Savory Variations: Add grated cheese, chopped herbs (like chives or rosemary), or a pinch of garlic powder for a savory twist.
- Lemon Scones: Add the zest of one lemon to the dry ingredients for a bright, citrusy flavor.
FAQs (Frequently Asked Questions)
Q: Why are my scones flat and dense?
A: This is usually caused by overmixing the dough, using old baking powder, or not having the oven hot enough.
Q: Can I use regular flour instead of self-raising flour?
A: Yes, but you’ll need to add extra baking powder. Use 2 teaspoons of baking powder per cup of plain flour.
Q: How can I prevent my scones from being dry?
A: Avoid overbaking them. They should be golden brown but still slightly soft to the touch.
Q: Can I make these scones in a bread machine?
A: While technically possible, it is not recommended, as scones require a gentler hand than most bread machine cycles provide. The dough is likely to be overworked.
Q: What is the best way to reheat scones?
A: Wrap them in foil and warm them in a low oven (around 150°C/300°F) for a few minutes. Alternatively, you can split them and toast them lightly.
Final Thoughts
These Aussie scones are a delightful treat that’s perfect for any occasion. Whether you’re enjoying them with a cup of tea on a quiet afternoon or serving them to guests at a brunch gathering, they’re sure to be a hit. Don’t be intimidated by baking – this recipe is incredibly straightforward, and the results are truly rewarding. So, gather your ingredients, preheat your oven, and get ready to experience the joy of homemade scones. I encourage you to try this recipe and let me know how they turn out. And feel free to experiment with different variations to create your own signature scone! Enjoy!