
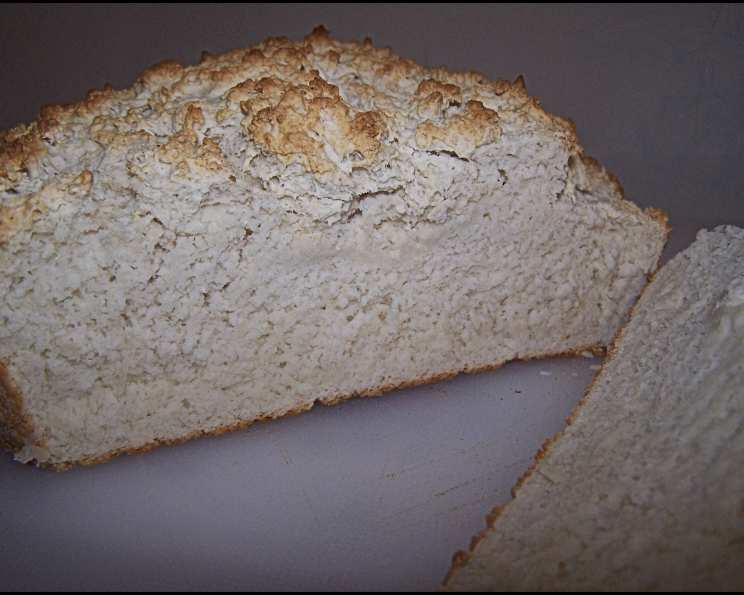
Australian Bush Bread – Damper: A Taste of the Outback
The scent of woodsmoke always brings me back to my childhood camping trips in the Flinders Ranges. We’d spend our days hiking through ancient gorges, the red dust clinging to our boots, and as evening approached, Dad would get a fire roaring. It wasn’t just for warmth; it was for damper. The simple, unleavened bread, baked in the embers, became a ritual, a symbol of our connection to the land. Every bite was a reminder of the vastness and beauty of the Australian outback, and a treasured memory I carry with me to this day.
Recipe Overview
- Prep Time: 15 minutes
- Cook Time: 30 minutes
- Total Time: 45 minutes
- Servings: 6-8
- Yield: 1 Damper
- Dietary Type: Vegetarian
Ingredients
- 4 cups self-raising flour
- ½ teaspoon salt
- 1 ½ cups milk
- Butter, for greasing the pan
- Extra flour, for dusting
Equipment Needed
- Large mixing bowl
- Round baking pan or camp oven
- Oven
Instructions
-
Preheat your oven to 220°C (425°F). If using a camp oven, prepare your campfire until you have hot embers.
-
In a large mixing bowl, sift together the self-raising flour and salt. Sifting is important to ensure the flour is light and aerated, which will contribute to a softer texture in the finished damper.
-
Make a well in the center of the flour mixture. This creates a space to gradually incorporate the wet ingredients into the dry.
-
Pour the milk into the well and begin to mix with your hands or a wooden spoon. Gently bring the flour in from the sides, gradually incorporating it into the milk. Be careful not to overmix at this stage; you want to form a soft, slightly sticky dough. Overmixing will develop the gluten and can result in a tough damper.
-
Grease a round baking pan (approximately 20-23cm/8-9 inches in diameter) generously with butter. Then, dust the pan with extra flour, ensuring all surfaces are coated. This will prevent the damper from sticking and make it easier to remove after baking.
-
Place the dough into the prepared pan. Gently shape it into a round, slightly flattened loaf. Don’t worry about making it perfectly smooth; the rustic appearance is part of the charm of damper.
-
Using a sharp knife, cut a cross into the top surface of the dough. This allows the steam to escape during baking, preventing the damper from cracking unevenly. It also creates a visually appealing crust.
-
If using a camp oven, close the lid and bury it in the hot ashes of your campfire. Ensure the coals are evenly distributed around the oven to provide consistent heat. Bake for approximately 30 minutes, or until golden brown and cooked through.
-
If using a conventional oven, bake for 30 minutes, or until the damper is golden brown and sounds hollow when tapped on the base. The internal temperature should reach around 90-95°C (194-203°F).
-
Once baked, remove the damper from the oven or campfire and let it cool slightly in the pan before transferring it to a wire rack to cool further.
-
Serve warm with butter, jam, honey, or Golden Syrup.
Expert Tips & Tricks
- Don’t have self-raising flour? You can make your own by adding 2 teaspoons of baking powder for every cup of plain flour.
- For a richer flavor, add a tablespoon of butter or lard to the dry ingredients before adding the milk.
- Want a herb-infused damper? Add a handful of chopped fresh herbs like rosemary, thyme, or oregano to the dough.
- If the dough is too sticky, add a little extra flour until it becomes manageable. Conversely, if it’s too dry, add a splash more milk.
- To check for doneness, insert a skewer into the center of the damper. If it comes out clean, it’s ready.
- Adjusting baking time: Ovens can vary. If your damper is browning too quickly, lower the temperature slightly. If it’s not browning enough, increase the baking time by a few minutes.
Serving & Storage Suggestions
Damper is best served warm, straight from the oven or campfire. Cut it into rustic, chunky slices and spread generously with butter, jam, honey, or Golden Syrup. It’s the perfect accompaniment to a cup of tea or coffee, especially when enjoyed outdoors.
Leftover damper can be stored at room temperature in an airtight container for up to 2 days. For longer storage, wrap it tightly in plastic wrap and freeze for up to 2 months. To reheat, thaw completely and then warm in a low oven or microwave until heated through. You can also slice and toast leftover damper for a crisp and delicious snack.
Nutritional Information
Please note that these values are estimates and may vary based on specific ingredients and portion sizes.
| Nutrient | Amount per Serving | % Daily Value |
|---|---|---|
| Calories | 334 kcal | 17% |
| Total Fat | 7g | 9% |
| Saturated Fat | 4g | 20% |
| Cholesterol | 19mg | 6% |
| Sodium | 1212mg | 51% |
| Total Carbohydrate | 59g | 20% |
| Dietary Fiber | 2g | 8% |
| Sugars | 1g | 2% |
| Protein | 8g | 16% |
Variations & Substitutions
- Gluten-Free Damper: Substitute the self-raising flour with a gluten-free self-raising flour blend. You may need to add a binder like xanthan gum to help with the texture.
- Dairy-Free Damper: Use a plant-based milk alternative like almond milk, soy milk, or oat milk instead of cow’s milk.
- Sweet Damper: Add a quarter cup of sugar and a teaspoon of cinnamon to the dry ingredients for a sweeter version. You could also incorporate dried fruit like raisins or sultanas.
- Savory Damper: Add grated cheese, chopped bacon, or sun-dried tomatoes to the dough for a savory twist.
- Beer Damper: Replace the milk with beer for a uniquely flavored damper. The beer adds a subtle depth and complexity to the taste.
FAQs (Frequently Asked Questions)
Q: Why is my damper so dense?
A: Overmixing the dough can lead to a dense damper. Mix just until the ingredients are combined, and avoid kneading.
Q: Can I use plain flour instead of self-raising flour?
A: Yes, but you’ll need to add baking powder to help the damper rise. Use 2 teaspoons of baking powder per cup of plain flour.
Q: How do I prevent the bottom of the damper from burning?
A: Ensure your oven temperature is accurate, and place a baking sheet on the rack below the damper to deflect some of the heat.
Q: Can I make damper ahead of time?
A: Damper is best eaten fresh, but you can prepare the dough ahead of time and store it in the refrigerator for up to 24 hours. Bring it to room temperature before baking.
Q: What’s the best way to reheat damper?
A: Wrap the damper in foil and warm it in a low oven (around 150°C/300°F) for about 15-20 minutes. You can also reheat individual slices in a toaster or microwave.
Final Thoughts
Damper is more than just bread; it’s a taste of Australian history, a connection to the land, and a reminder of simpler times. Whether you bake it in your kitchen oven or over an open campfire, the experience of making and sharing damper is sure to create lasting memories. So gather your ingredients, get your hands floury, and enjoy the simple pleasure of this iconic Aussie classic. We encourage you to share your damper creations and any variations you discover with us. Enjoy!