
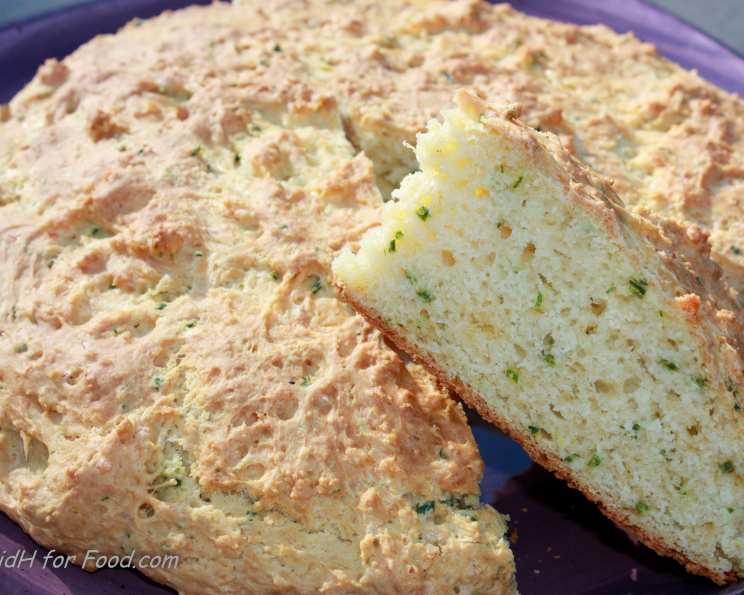
Australian Cheese, Garlic and Chive Damper: A Taste of the Outback in Your Kitchen
The scent of damper always takes me back to childhood camping trips with my family. We’d build a crackling fire under the vast Australian sky, the stars blazing overhead as Dad, a self-proclaimed damper expert, would knead the dough with flour-dusted hands. The anticipation as the damper baked in the camp oven, filling the air with that warm, comforting aroma, was almost unbearable. More often than not, the damper was slightly charred and misshapen, but somehow it always tasted like pure magic, a true taste of the Australian bush. This recipe, elevated with cheese, garlic, and chives, brings a touch of gourmet flair to this rustic classic, creating a truly unforgettable flavour.
Recipe Overview
- Prep Time: 15 minutes
- Cook Time: 15-20 minutes
- Total Time: 30-35 minutes
- Servings: 4
- Yield: 1 Damper Loaf
- Dietary Type: Vegetarian
Ingredients
- 2 cups self-raising flour, sifted
- ¼ teaspoon salt
- 1 ounce (28g) butter, in small pieces
- 1 cup sharp tasty cheese (grated) – Note: In Australia, “tasty cheese” is similar to a sharp cheddar in the US.
- 2 tablespoons grated parmesan cheese
- 1 garlic clove, finely minced
- 2 tablespoons chives, chopped
- ½ cup milk
- ½ cup water
- 1 tablespoon parmesan cheese, extra for sprinkling
Equipment Needed
- Large mixing bowl
- Measuring cups and spoons
- Grater
- Knife
- Baking tray
- Greaseproof paper (optional)
Instructions
-
Preheat your oven to 425°F (220°C). This high heat is crucial for achieving that perfect golden-brown crust and ensuring the damper cooks through evenly.
-
In a large bowl, sift together the self-raising flour and salt. Sifting is important because it aerates the flour and helps create a lighter, more tender damper.
-
Add the butter pieces to the bowl. Using your fingertips, rub the butter into the flour until the mixture resembles breadcrumbs. The goal is to create a fine, even texture without overworking the dough.
-
Add the grated tasty cheese, parmesan cheese, minced garlic, and chopped chives to the flour mixture. Mix well to ensure the ingredients are evenly distributed throughout the dough. These ingredients infuse the damper with delicious flavour.
-
In a separate jug or bowl, combine the milk and water. This liquid mixture will bind the dry ingredients together.
-
Make a well in the center of the flour mixture and pour in most of the milk and water mixture, reserving a little for glazing later.
-
Using a knife or your hands, quickly mix the ingredients together to form a soft dough. Avoid overmixing, as this will result in a tough damper. Aim for a slightly sticky consistency.
-
Turn the dough onto a lightly floured board and knead lightly for just a minute or two. This helps bring the dough together without developing too much gluten.
-
Press the dough into a round shape, approximately 1-1.5 inches thick.
-
Place the round of dough onto a greased baking tray. You can line the tray with baking paper for easy cleanup, if preferred.
-
Using a pastry brush, glaze the top of the damper with the reserved milk and water mixture.
-
Sprinkle the extra parmesan cheese over the glazed surface. This adds a beautiful golden crust and a burst of cheesy flavour.
-
Bake in the preheated oven for 15-20 minutes, or until the damper is golden brown and sounds hollow when tapped on the base. Be sure to keep a close eye on it to prevent burning.
-
Remove the damper from the oven and allow it to cool slightly on the baking tray before slicing and serving.
-
If you prefer, you can also shape the dough into individual dampers (small buns) and bake them for the same time and temperature.
Expert Tips & Tricks
- For a richer flavour, use a high-quality Australian tasty cheddar cheese. The sharper the cheese, the more pronounced the flavour will be in the damper.
- To add more depth to the garlic flavour, you can lightly sauté the minced garlic in a little butter before adding it to the flour mixture. However, be careful not to burn the garlic.
- If you don’t have self-raising flour, you can make your own by adding 2 teaspoons of baking powder per cup of plain flour.
- Don’t be afraid to experiment with different cheeses! A blend of cheddar and mozzarella would also work beautifully.
- For a crispier crust, place a tray of ice cubes on the bottom rack of the oven during baking. The steam will help create a golden, crusty exterior.
Serving & Storage Suggestions
Serve the Australian Cheese, Garlic and Chive Damper warm, sliced with generous pats of butter or a drizzle of good-quality olive oil. It pairs perfectly with soups, stews, or simply enjoyed on its own as a savoury snack.
Leftover damper can be stored in an airtight container at room temperature for up to 2 days, or in the refrigerator for up to 5 days. To reheat, wrap the damper in foil and warm it in a low oven (300°F/150°C) for about 10 minutes. You can also reheat individual slices in a toaster or microwave. The damper can also be frozen for up to 2 months. Thaw completely before reheating.
Nutritional Information
| Nutrient | Amount per Serving | % Daily Value |
|---|---|---|
| Calories | 442 kcal | – |
| Fat | 19.5g | 30% |
| Saturated Fat | 12g | 60% |
| Cholesterol | 57.5 mg | 19% |
| Sodium | 1268 mg | 52% |
| Carbohydrate | 48.7 g | 16% |
| Fiber | 1.7 g | 6% |
| Sugars | 0.4 g | 1% |
| Protein | 17 g | 34% |
Variations & Substitutions
- Gluten-Free Damper: Use a gluten-free self-raising flour blend and add a teaspoon of xanthan gum for improved texture.
- Herb Variations: Experiment with different herbs such as rosemary, thyme, or oregano. Add about 1-2 tablespoons of chopped fresh herbs to the flour mixture.
- Spice it up: Add a pinch of cayenne pepper or some chopped jalapenos for a spicy kick.
- Vegan Damper: Substitute the butter with a vegan butter alternative and the milk with a plant-based milk such as almond or soy milk. Replace the cheese with a vegan cheddar substitute.
- Sun-dried tomato and olive damper: Add ½ cup chopped sun-dried tomatoes and ¼ cup chopped olives for a Mediterranean twist.
FAQs (Frequently Asked Questions)
Q: Can I make this damper without self-raising flour?
A: Yes, you can use plain flour. For every cup of plain flour, add 2 teaspoons of baking powder.
Q: Can I use different types of cheese?
A: Absolutely! Experiment with your favourite cheeses such as cheddar, mozzarella, or even feta.
Q: How do I know when the damper is cooked through?
A: The damper is cooked when it’s golden brown and sounds hollow when tapped on the base. A skewer inserted into the center should come out clean.
Q: Can I make this damper ahead of time?
A: While it’s best enjoyed fresh, you can prepare the dough ahead of time and store it in the refrigerator for up to 24 hours. Bring it to room temperature before baking.
Q: My damper is too dry. What did I do wrong?
A: You may have overmixed the dough or used too much flour. Be careful not to overwork the dough and adjust the amount of liquid as needed to achieve a soft, slightly sticky consistency.
Final Thoughts
This Australian Cheese, Garlic and Chive Damper is more than just a recipe; it’s a taste of the outback, a connection to tradition, and a celebration of simple, delicious flavours. I encourage you to try it, experiment with your favourite ingredients, and share it with friends and family. Whether you’re enjoying it around a campfire under the stars or in the comfort of your own kitchen, I hope this damper brings you as much joy as it has brought me over the years. Let me know what you think! What did you add? How did you serve it? I’d love to hear your stories. Pair it with a hearty stew or a glass of your favourite red wine for a truly unforgettable experience. Happy baking!