
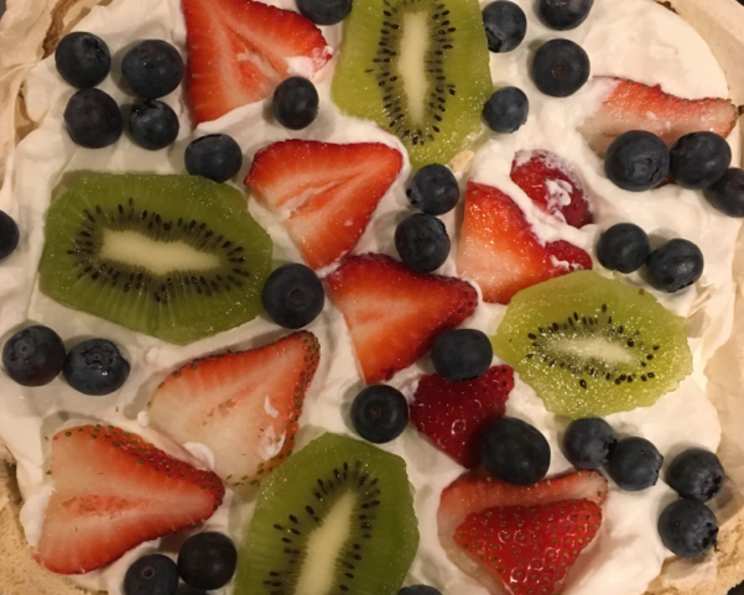
The Unforgettable Australian Pavlova: A Culinary Journey
The first time I tasted Pavlova, I was a wide-eyed backpacker in Sydney. It wasn’t just a dessert; it was an edible postcard of Australia. Sunlight seemed to glint off the snow-white meringue, the tartness of the passionfruit cut through the sweetness, and the whipped cream was as light as the sea breeze. It was a taste of summer, a taste of joy, and a taste I’ve chased ever since in my own kitchen.
Recipe Overview
- Prep Time: 30 minutes
- Cook Time: 35 minutes
- Total Time: 1 hour 5 minutes (plus 1 hour cooling)
- Servings: 6-8
- Yield: 1 pavlova
- Dietary Type: Gluten-Free
Ingredients
For the Meringue:
- 2 egg whites
- ¾ teaspoon vanilla
- ¼ teaspoon cream of tartar
- ⅔ cup sugar (or less, to taste)
For the Filling:
- Fresh fruit (your choice – strawberries, raspberries, kiwi, passionfruit are all excellent)
- Whipping cream
Equipment Needed
- Mixing bowl
- Electric mixer
- Baking sheet
- Wax paper
- Spoon
Instructions
-
Begin by placing the egg whites in a small mixing bowl. Allow them to stand at room temperature for approximately 30 minutes. This step is crucial as it helps the egg whites whip to their fullest volume.
-
While the egg whites are resting, prepare your baking sheet. Draw a 10-inch circle on a piece of wax paper and place it, writing-side down, onto the baking sheet. Alternatively, for individual Pavlovas, draw 10 four-inch circles.
-
Once the egg whites have rested, add the ¾ teaspoon of vanilla and the ¼ teaspoon of cream of tartar. The cream of tartar acts as a stabilizer, helping the meringue hold its shape.
-
Using an electric mixer, beat the egg whites on medium speed until soft peaks begin to form. This is when the mixture starts to look foamy and will hold a gentle peak that droops slightly.
-
Gradually add the ⅔ cup of sugar, one tablespoon at a time, while continuously beating the mixture on high speed. Ensure that each tablespoon of sugar is fully incorporated before adding the next.
-
Continue beating on high speed until very stiff peaks form. This process usually takes around 5 minutes. The meringue should be glossy, smooth, and able to hold a firm, upright peak. You should also notice that the sugar is almost completely dissolved; rubbing a small amount of the mixture between your fingers should reveal very little graininess.
-
Using the back of a spoon, carefully spread the meringue onto the circle you drew on the wax paper. Build up the sides slightly to form a bowl shape. This will create a cavity to hold the whipped cream and fruit later.
-
Place the baking sheet with the meringue into a preheated oven at 300°F (150°C). Bake for 35 minutes.
-
After 35 minutes, turn off the oven and leave the meringue shell inside, with the door closed, for one hour. This allows the meringue to dry out slowly and evenly, preventing cracks. This step is crucial for achieving the characteristic crisp exterior and soft, marshmallowy interior.
-
After the hour of drying, carefully remove the meringue shell from the baking sheet and gently peel off the wax paper.
-
Store the meringue shell in an airtight container until ready to serve. It can keep indefinitely in a cool, dry place.
-
Just before serving, whip your whipping cream until soft peaks form. Gently spoon the whipped cream into the meringue shell.
-
Arrange your choice of fresh fruit on top of the whipped cream. You can use a single type of fruit or create a colorful assortment.
Expert Tips & Tricks
- Perfect Peaks: Make sure your mixing bowl and beaters are completely clean and free of any grease or oil. Even a small amount of fat can prevent the egg whites from whipping properly. A quick wipe down with lemon juice or vinegar can help.
- Sugar Savvy: Granulated sugar works best, but caster sugar (superfine) dissolves even more easily, resulting in an even smoother meringue.
- Slow and Steady: The key to a stable meringue is to add the sugar gradually, allowing it to fully dissolve with each addition. Patience is key here!
- Crack Control: If your pavlova cracks during baking, don’t despair! It won’t affect the taste. You can cleverly disguise any cracks with whipped cream and fruit.
- Flavor Infusion: Try adding a few drops of lemon extract or other flavorings to the meringue mixture for an extra burst of flavor.
Serving & Storage Suggestions
Pavlova is best served immediately after assembling, as the whipped cream can soften the meringue over time. However, you can prepare the meringue shell well in advance and store it in an airtight container at room temperature. The whipped cream and fruit should be added just before serving. Leftover Pavlova can be stored in the refrigerator, but the meringue will soften. It’s best to consume it within 24 hours. Freezing is not recommended, as the texture will be significantly compromised. To elevate the presentation, consider adding a drizzle of fruit sauce or a sprinkle of chopped nuts.
Nutritional Information
| Nutrient | Amount per Serving | % Daily Value |
|---|---|---|
| Calories | 250 kcal | 13% |
| Total Fat | 8g | 12% |
| Saturated Fat | 5g | 25% |
| Cholesterol | 25mg | 8% |
| Sodium | 40mg | 2% |
| Total Carbohydrate | 45g | 15% |
| Dietary Fiber | 1g | 4% |
| Sugars | 35g | – |
| Protein | 2g | 4% |
Note: Nutritional information is an estimate and may vary based on specific ingredients and serving sizes.
Variations & Substitutions
- Tropical Twist: Use tropical fruits like mango, pineapple, and passionfruit for a vibrant and exotic flavor.
- Berry Bonanza: Create a mixed berry Pavlova with strawberries, raspberries, blueberries, and blackberries.
- Chocolate Delight: Swirl melted dark chocolate into the meringue mixture before baking, and top with chocolate shavings.
- Vegan Pavlova: Replace the egg whites with aquafaba (the liquid from canned chickpeas). Whip the aquafaba just like you would egg whites, and follow the rest of the recipe as directed. Use a plant-based whipping cream alternative like coconut cream or soy cream.
- Citrus Zest: Add lemon, lime, or orange zest to the meringue for a bright and refreshing flavor.
FAQs (Frequently Asked Questions)
Q: Why is my meringue cracking?
A: Cracking is often caused by baking the meringue at too high a temperature or cooling it too quickly. Make sure to follow the recipe instructions carefully, especially the slow drying process in the oven.
Q: Can I make Pavlova ahead of time?
A: Yes! The meringue shell can be made a day or two in advance and stored in an airtight container at room temperature. Assemble with whipped cream and fruit just before serving.
Q: What can I do if my egg whites won’t whip properly?
A: Ensure that your mixing bowl and beaters are completely clean and free of any grease or oil. Make sure the egg whites are at room temperature.
Q: Can I use frozen fruit for the topping?
A: While fresh fruit is ideal, you can use frozen fruit if it’s thawed and drained well. Be aware that frozen fruit may release more moisture and soften the meringue more quickly.
Q: How do I prevent the meringue from sticking to the wax paper?
A: Make sure the wax paper is placed writing-side down on the baking sheet. After baking and drying, the meringue should release easily. If it’s still sticking, try gently running a thin spatula underneath.
Final Thoughts
Now, go forth and conquer the Pavlova! Don’t be intimidated by its delicate appearance; this dessert is surprisingly forgiving. Experiment with different fruits, flavor combinations, and presentation styles. Most importantly, have fun and savor the sweet, tangy, and utterly delightful experience of creating your own taste of Australia. And don’t forget to share your creation and feedback – happy baking!