
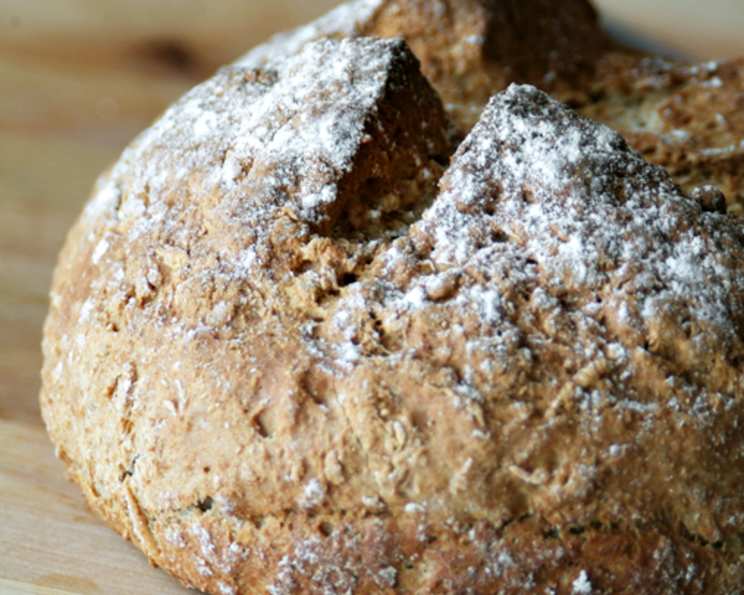
Authentic Irish Soda Bread: A Taste of Home
The scent of freshly baked bread can transport me back to my grandmother’s cozy kitchen in County Cork. I remember standing on a small stool, watching her nimble hands work the dough for her famous soda bread. The aroma of warm flour and a hint of buttermilk filled the air, a promise of simple comfort and hearty nourishment. This bread, crusty on the outside and soft within, was a staple at every family gathering, slathered generously with butter and served with steaming cups of tea. It’s a taste of home that I cherish and one I’m thrilled to share with you.
Recipe Overview
- Prep Time: 15 minutes
- Cook Time: 45 minutes
- Total Time: 60 minutes
- Servings: 8
- Yield: 1 loaf
- Dietary Type: Vegetarian
Ingredients
- 8 ounces wheat flour
- 8 ounces self-rising flour
- 10-14 fluid ounces unsweetened plain yogurt (start with 10, add more as needed)
- 1 tablespoon olive oil
- 1 tablespoon honey
- 1 teaspoon bicarbonate of soda (baking soda)
- ½ teaspoon baking powder
- 1 pinch salt
Equipment Needed
- 8″ (20cm) cake tin (high walls are preferable)
- Large mixing bowl
- Wooden spoon
- Measuring jug
- Sieve
- Knife
- Oven
Instructions
- Begin by greasing and flouring an 8″ (20cm) cake tin. A tin with high walls works best but is not essential. This step prevents the bread from sticking and ensures easy removal after baking.
- Preheat your oven to 190°C/375°F (or 180°C/350°F if using a fan-assisted oven). Accurate oven temperature is crucial for even baking and achieving the perfect crust.
- In a large bowl, sieve together the self-rising flour, bicarbonate of soda, baking powder, and salt. This step is particularly important for the bicarbonate of soda; sieving it ensures it’s evenly distributed, preventing a greenish tinge in the bread.
- Add the wheat flour to the bowl. There’s no need to sieve the wheat flour, just add it directly to the mixture.
- In a jug, mix the unsweetened plain yogurt, honey, and olive oil. Whisk these ingredients together until well combined.
- Pour the yogurt mixture onto the flour mixture in the bowl.
- Stir with a wooden spoon until well mixed and a soft, sticky dough is formed. Be careful not to overmix; the dough should be shaggy and slightly sticky. If the dough seems too dry, add a little more yogurt, a tablespoon at a time, until the desired consistency is achieved.
- Lightly flour a surface for kneading.
- Knead the dough lightly (no more than 20 turns). Over-kneading can result in a tough bread. The goal is simply to bring the dough together into a cohesive mass.
- Form the dough into a round shape. Don’t worry if it doesn’t perfectly fit the tin; it will spread during baking.
- Transfer the dough to the prepared cake tin.
- With a knife, cut a cross across the top of the bread. This helps to portion the bread for slicing into quarters and also allows the bread to expand evenly during baking.
- Place the tin in the preheated oven and bake for 45 minutes.
- Cool slightly in the tin before transferring to a wire rack to cool completely.
- Serve warm or at room temperature with butter, your favorite toppings, and a cup of tea. It’s also delicious toasted!
Expert Tips & Tricks
- Yogurt Matters: The type of yogurt used significantly impacts the bread’s texture. Full-fat yogurt will yield a richer, more tender crumb, while low-fat yogurt may result in a slightly denser bread. I recommend using plain, unsweetened Greek yogurt for the best results. If you only have flavored yogurt on hand, be sure to reduce or omit the honey.
- Don’t Overmix: Overmixing develops the gluten in the flour, leading to a tough, chewy bread. Mix the dough just until the ingredients are combined. A few streaks of flour are perfectly fine.
- Baking Time Variation: Oven temperatures can vary, so keep a close eye on the bread during baking. If the top is browning too quickly, tent it with foil to prevent burning. The bread is done when a toothpick inserted into the center comes out clean.
- Add-Ins: Feel free to customize your soda bread with add-ins like raisins, dried cranberries, chopped nuts, or seeds. Incorporate these ingredients during the kneading stage for even distribution.
- Kneading is Key: Light kneading is enough. This is not like a normal bread recipe.
Serving & Storage Suggestions
Irish soda bread is best enjoyed fresh, preferably within a day or two of baking. Serve it warm with a generous pat of butter, alongside a hearty soup, stew, or with a full Irish breakfast. Leftovers can be stored at room temperature in an airtight container for up to 2 days, or in the refrigerator for up to 5 days. To reheat, wrap the bread in foil and warm it in a low oven (150°C/300°F) for about 10-15 minutes. You can also toast slices for a quick and easy snack. For longer storage, slice the bread and freeze it in a freezer-safe bag for up to 2 months. Thaw completely before reheating.
Nutritional Information
| Nutrient | Amount per Serving | % Daily Value |
|---|---|---|
| Calories | 244 kcal | N/A |
| Calories from Fat | N/A | 14% |
| Total Fat | 3.9 g | 6% |
| Saturated Fat | 1.2 g | 5% |
| Cholesterol | 4.9 mg | 1% |
| Sodium | 580.4 mg | 24% |
| Total Carbohydrate | 45.8 g | 15% |
| Dietary Fiber | 3.8 g | 15% |
| Sugars | 4.1 g | N/A |
| Protein | 7.9 g | 15% |
Note: Nutritional information is an estimate and may vary based on specific ingredients and preparation methods.
Variations & Substitutions
- Buttermilk Substitution: If you don’t have yogurt, you can use buttermilk as a substitute. Buttermilk will give the bread a slightly tangier flavor.
- Whole Wheat Soda Bread: Replace half of the wheat flour with whole wheat flour for a nuttier, more rustic flavor.
- Savory Soda Bread: Add chopped herbs like rosemary, thyme, or chives to the dough for a savory twist. You can also add grated cheese for extra flavor.
- Sweet Soda Bread: Add dried fruit such as raisins or currants for a touch of sweetness.
- Gluten-Free Soda Bread: While this recipe relies on wheat flour, experimenting with gluten-free flour blends can yield satisfying results. Use a blend that includes xanthan gum for binding.
FAQs (Frequently Asked Questions)
Q: Why is it important to sieve the bicarbonate of soda with the self-rising flour?
A: Sieving the bicarbonate of soda ensures even distribution, preventing a greenish tinge in the finished bread.
Q: Can I use all-purpose flour instead of wheat flour?
A: Yes, you can substitute all-purpose flour for the wheat flour. However, the texture of the bread may be slightly different.
Q: How do I know when the soda bread is done?
A: The bread is done when it sounds hollow when tapped on the bottom and a toothpick inserted into the center comes out clean.
Q: Can I make this bread ahead of time?
A: Soda bread is best enjoyed fresh, but you can make it a day ahead and store it at room temperature in an airtight container.
Q: What is the best way to reheat leftover soda bread?
A: Wrap the bread in foil and warm it in a low oven (150°C/300°F) for about 10-15 minutes, or toast slices for a quick snack.
Final Thoughts
There’s nothing quite like the simple pleasure of homemade Irish soda bread. This recipe, passed down through generations, offers a taste of authentic Irish hospitality. I encourage you to try it, experiment with different flavors, and share it with loved ones. Don’t be intimidated by baking; this recipe is wonderfully forgiving, even for beginners. Pair it with a steaming bowl of Irish stew, a cup of strong tea, and enjoy a little slice of Ireland right in your own kitchen. And, of course, let me know how yours turns out! I’d love to hear about your experience and any variations you create. Sláinte!