
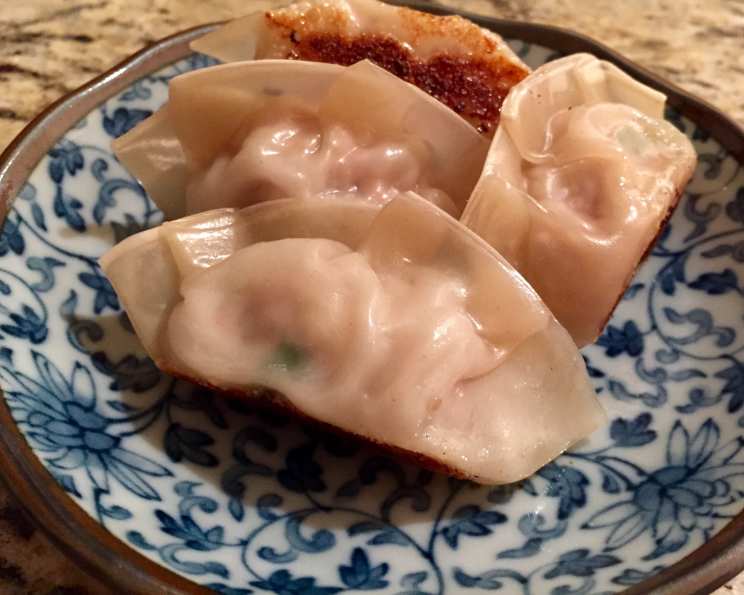
Authentic Japanese Gyoza: A Culinary Journey
The first time I tasted truly authentic gyoza was in a tiny, bustling ramen shop tucked away in a Kyoto alleyway. Steam billowed from the open kitchen, the air thick with the aroma of soy sauce, ginger, and sizzling pork. As I bit into the perfectly crisp-bottomed dumpling, the savory filling burst in my mouth – a symphony of textures and flavors that transported me. From that moment on, I was on a quest to recreate that unforgettable experience in my own kitchen.
Recipe Overview
- Prep Time: 30 minutes
- Cook Time: 10 minutes
- Total Time: 40 minutes
- Servings: 4-6
- Yield: 30 gyoza
- Dietary Type: Varies (can be adapted)
Ingredients
- 1 (30 sheet) package gyoza wrappers or wonton wrappers
- 2/3 lb ground pork
- 1/3 lb cabbage
- 1 bunch green onions or 1 bunch garlic chives (known in Japanese as nira)
- 1 inch piece of fresh gingerroot, ground
- 1 garlic clove, minced
- 2 tablespoons soy sauce
- 1 tablespoon sake
- 1 tablespoon sesame seed oil
- 1 teaspoon salt
- Pepper, to taste
- Vegetable oil, for cooking
- Water, for steaming
Equipment Needed
- Large mixing bowl
- Cutting board
- Sharp knife
- Garlic press (optional)
- Grater (for ginger)
- Skillet with a lid
- Measuring spoons and cups
Instructions
-
Begin by preparing the cabbage and nira (or green onions). Finely shred the cabbage. Mince the nira or green onions. The smaller the pieces, the better they will integrate into the filling.
-
In a large mixing bowl, combine the shredded cabbage, minced nira (or green onions), ground pork, ground fresh ginger root, minced garlic, soy sauce, sake, sesame seed oil, salt, and pepper.
-
Use your hands to thoroughly mix all the ingredients together until well combined. The mixture should be slightly sticky and evenly distributed. This step is crucial for the final flavor and texture of the gyoza. Don’t be afraid to get your hands dirty!
-
Now it’s time to assemble the gyoza. Place one gyoza wrapper (or wonton wrapper) in the palm of your hand.
-
Place approximately 1 tablespoon of the pork mixture in the center of the wrapper. Avoid overfilling, as this can make the gyoza difficult to seal.
-
Dip your finger in water and lightly wet the entire edge of the wrapper. This will act as a glue to help seal the gyoza.
-
Fold the wrapper in half to form a half-moon shape. Pinch the edges firmly together to seal, starting from the center and working your way outwards.
-
For a decorative crimp, use your fingers to create small pleats along one edge of the gyoza. This not only looks beautiful but also helps to ensure a tight seal. There are many ways to crimp gyoza, so experiment and find a technique you enjoy!
-
Repeat steps 4-8 until all the filling is used.
-
Heat a skillet over low heat and grease it lightly with vegetable oil.
-
Arrange the gyoza in the skillet in a single layer, making sure they are not touching each other.
-
Cook the gyoza over low heat until the bottoms are slightly browned and crispy, about 5-7 minutes. Keep a close eye on them to prevent burning.
-
Once the bottoms are browned, add ¼ cup of water to the skillet.
-
Immediately cover the skillet with a lid and cook for a couple of minutes. The water will create steam that helps to cook the filling and the wrappers.
-
Remove the lid and continue to cook until all the water has evaporated and the gyoza are cooked through. The wrappers should be translucent and the filling should be cooked to an internal temperature of 160°F (71°C).
-
Serve the gyoza immediately with your favorite gyoza dipping sauce.
Expert Tips & Tricks
- Cabbage Preparation: To remove excess moisture from the cabbage, sprinkle it with salt after shredding and let it sit for 10-15 minutes. Then, squeeze out the excess water before adding it to the filling. This will prevent the gyoza from becoming soggy.
- Wrapper Sealing: A good seal is crucial to prevent the filling from leaking out during cooking. Ensure the edges of the wrapper are thoroughly moistened with water.
- Freezing Gyoza: You can easily freeze uncooked gyoza for later use. Arrange the gyoza on a baking sheet lined with parchment paper and freeze until solid. Then, transfer them to a freezer-safe bag or container. Cook them directly from frozen, adding a few extra minutes to the cooking time.
- Perfect Crisp: For extra crispy bottoms, after the water has evaporated, add a tablespoon of sesame oil to the pan and continue cooking until golden brown.
- Even Cooking: Keep the heat low to medium to ensure the filling cooks through without burning the wrappers.
Serving & Storage Suggestions
Serve your freshly cooked gyoza hot, directly from the skillet. Arrange them artfully on a plate and garnish with a sprinkle of sesame seeds and chopped green onions for a pop of color.
Leftover cooked gyoza can be stored in an airtight container in the refrigerator for up to 3 days. To reheat, pan-fry them again with a little oil until heated through and crispy, or microwave until warm (though they will lose some crispness).
Cooked gyoza are best enjoyed fresh, but can be frozen as well. Allow them to cool completely, then arrange them in a single layer on a baking sheet lined with parchment paper. Freeze until solid, then transfer to a freezer bag. Reheat by pan-frying from frozen.
Nutritional Information
| Nutrient | Amount per Serving | % Daily Value |
|---|---|---|
| Calories | 350 kcal | 18% |
| Total Fat | 20g | 31% |
| Saturated Fat | 7g | 35% |
| Cholesterol | 75mg | 25% |
| Sodium | 800mg | 33% |
| Total Carbohydrate | 20g | 7% |
| Dietary Fiber | 2g | 8% |
| Sugars | 3g | – |
| Protein | 25g | 50% |
Note: Nutritional information is an estimate and may vary based on specific ingredients and portion sizes.
Variations & Substitutions
- Vegetarian Gyoza: Substitute the ground pork with finely chopped mushrooms, tofu, and glass noodles.
- Chicken Gyoza: Use ground chicken instead of pork for a leaner option.
- Shrimp Gyoza: Combine finely chopped shrimp with some ginger and scallions for a delicious seafood twist.
- Spicy Gyoza: Add a pinch of chili flakes or a dash of chili oil to the filling for a spicy kick.
- Gluten-Free Gyoza: Look for gluten-free gyoza wrappers, which are becoming increasingly available.
- Dipping Sauce Variations: Experiment with different dipping sauces, such as ponzu sauce, a mixture of soy sauce and rice vinegar, or a spicy peanut sauce.
FAQs (Frequently Asked Questions)
Q: Can I use wonton wrappers instead of gyoza wrappers?
A: Yes, you can use wonton wrappers, but they are slightly thicker than gyoza wrappers. Be sure to cook them a bit longer to ensure they are fully cooked through.
Q: How do I prevent the gyoza from sticking to the pan?
A: Make sure the skillet is well-greased with vegetable oil and that you cook the gyoza over low to medium heat. Avoid overcrowding the pan.
Q: Can I make the gyoza filling ahead of time?
A: Absolutely! The filling can be made up to 24 hours in advance and stored in the refrigerator. This allows the flavors to meld together even more.
Q: How do I know when the gyoza are cooked through?
A: The wrappers should be translucent, and the filling should be cooked to an internal temperature of 160°F (71°C).
Q: What is the best way to serve gyoza?
A: Gyoza are traditionally served with a dipping sauce made from soy sauce, rice vinegar, and sesame oil. You can also add a little chili oil or grated ginger to the sauce for extra flavor.
Final Thoughts
Making gyoza from scratch might seem a bit daunting at first, but trust me, it’s a rewarding experience. There’s a unique satisfaction in creating these little pockets of flavor, and once you get the hang of the folding technique, it becomes quite therapeutic. Gather your friends or family, put on some music, and make it a gyoza-making party! Share your creations with loved ones, and don’t forget to experiment with different fillings and dipping sauces to find your perfect combination. Enjoy the delicious journey!