
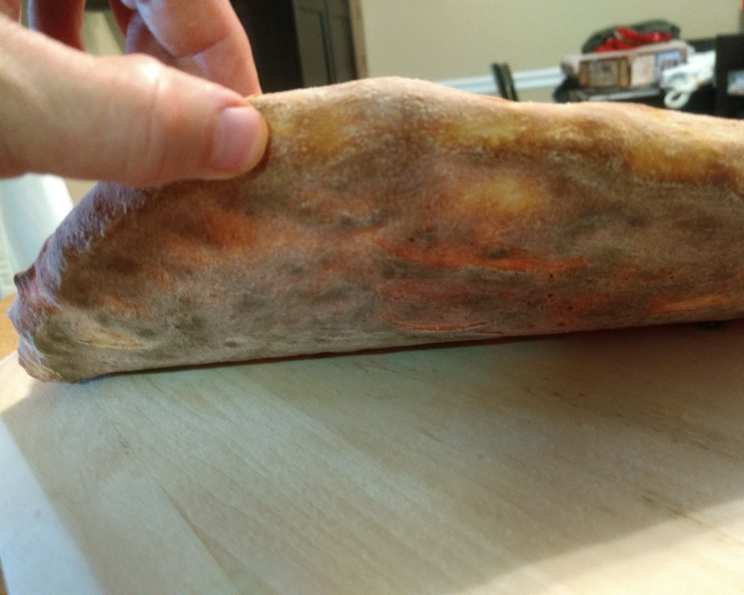
Mastering the Art of Authentic New York-Style Pizza Dough
The aroma of baking bread has always been my culinary siren song, but it was the unmistakable scent of a New York pizzeria that truly captured my heart. I remember as a child, stepping into a bustling shop in Little Italy, the air thick with the promise of perfectly charred crust, tangy tomato sauce, and bubbling mozzarella. The pizzaiolo, a maestro of dough, expertly tossed and stretched, transforming simple ingredients into edible masterpieces. That memory is what fuels my pursuit of the perfect homemade NY-style pie, a quest that begins and ends with the dough.
Recipe Overview
- Prep Time: 20 minutes (plus overnight rest)
- Proofing Time: 2 hours
- Cook Time: 12-15 minutes
- Total Time: Approximately 24 hours, 20 minutes
- Yield: 1 x 16-inch pizza
- Dietary Type: Vegetarian (easily adaptable to vegan)
Ingredients
- 300g Bread Flour (Preferably All Trumps, but King Arthur Bread Flour works well)
- 6g Sugar
- 6g Salt
- 5g Active Dry Yeast
- 5g Extra Virgin Olive Oil
- 180g Water
Equipment Needed
- Stand Mixer with Dough Hook
- Blender (optional, for initial mixing)
- Large Bowl (for resting the dough)
- Pizza Stone or Baking Sheet
- Pizza Peel (optional)
Instructions
-
Combine Dry Ingredients: In the bowl of your stand mixer (or in a blender, if you prefer the initial mixing method), add the bread flour, sugar, salt, and active dry yeast. Mix on low speed with the dough hook attachment (or pulse in the blender) until these ingredients are thoroughly combined. This ensures even distribution and optimal yeast activation.
-
Add Water and Begin Mixing: With the mixer on low speed, gradually add the water. Continue mixing until the dough begins to come together, forming a shaggy mass. It won’t be perfectly smooth at this stage, and that’s okay. We’re just looking for the ingredients to start incorporating.
-
Incorporate the Olive Oil: Add the extra virgin olive oil to the dough. Continue mixing on low speed until the oil is fully incorporated and the dough starts to become smoother. This may take a few minutes. The oil adds flavor and contributes to a slightly crispier crust.
-
Knead the Dough: Increase the mixer speed to medium-low and knead the dough for approximately 5-7 minutes, or until it becomes smooth and elastic. The dough should pull away from the sides of the bowl and form a cohesive ball. Alternatively, if you prefer to knead by hand, turn the dough out onto a lightly floured surface and knead until it reaches the same silky, elastic texture.
-
Divide the Dough (if applicable): If you are making a larger batch of dough, this is the point where you would divide it into individual dough balls. For this recipe, we’re aiming for a single 16-inch pizza, so no division is necessary.
-
First Rise (Cold Fermentation): Lightly oil a large bowl. Place the dough ball in the bowl, turning to coat all sides with oil. Cover the bowl tightly with plastic wrap or a lid. Place the bowl in the refrigerator and let the dough rest overnight (at least 12 hours, but up to 24 hours is ideal). This cold fermentation process develops complex flavors and improves the dough’s texture.
-
Second Rise (Proofing): Remove the dough from the refrigerator. Place the dough on a lightly floured surface, gently shape it into a round. Place the dough in the lightly oiled bowl, cover it and let it proof at room temperature for about 2 hours. The dough should almost double in size. This allows the yeast to become active again and creates a light, airy dough.
-
Preheat Your Oven: About 30 minutes before you’re ready to bake, preheat your oven to its highest temperature (typically 500-550°F or 260-290°C). Place a pizza stone or baking steel in the oven while it preheats. This will help to create a crispy, evenly cooked crust.
-
Shape the Dough: Gently stretch and shape the dough into a 16-inch circle. Be careful not to deflate the dough too much. You can use your hands or a rolling pin, but hand-stretching is preferred for a more authentic texture.
-
Top the Pizza: Transfer the dough to a lightly floured pizza peel (or a baking sheet lined with parchment paper). Add your desired toppings. Start with a thin layer of tomato sauce, followed by mozzarella cheese, and then any other toppings you like.
-
Bake the Pizza: Carefully slide the pizza onto the preheated pizza stone or baking steel in the oven. Bake for 12-15 minutes, or until the crust is golden brown and the cheese is melted and bubbly. Rotate the pizza halfway through baking to ensure even cooking.
-
Cool and Serve: Remove the pizza from the oven and let it cool for a few minutes before slicing and serving.
Expert Tips & Tricks
- Flour Choice Matters: Using high-protein bread flour like All Trumps or King Arthur Bread Flour is crucial for developing the strong gluten network needed for a chewy, yet crisp crust.
- Cold Fermentation is Key: Don’t skip the overnight cold fermentation in the refrigerator. This slow fermentation process develops the dough’s flavor and texture far more effectively than a quick rise at room temperature.
- High Heat is Essential: The high heat of a pizza oven (or a very hot home oven with a pizza stone) is essential for creating that signature charred crust.
- Don’t Overload the Toppings: Resist the temptation to pile on too many toppings, as this can make the crust soggy. Less is often more when it comes to pizza toppings.
- Adjust Baking Time as Needed: Every oven is different, so adjust the baking time accordingly. Keep a close eye on the pizza and remove it when the crust is golden brown and the cheese is melted and bubbly.
- If your dough is too sticky: Add flour 1 tbsp at a time while kneading until the dough comes together in a ball.
- If your dough is too dry: Add water 1 tsp at a time while kneading until the dough is properly hydrated.
Serving & Storage Suggestions
Serve your freshly baked New York-style pizza immediately for the best flavor and texture. A simple drizzle of olive oil, a sprinkle of fresh basil, or a dusting of red pepper flakes can elevate the presentation.
Leftover pizza can be stored in the refrigerator for up to 3 days. To reheat, you can use the oven (for a crispier crust), a skillet (for a slightly softer crust), or the microwave (for convenience, but the crust may become soggy).
For longer storage, you can freeze leftover pizza slices. Wrap each slice tightly in plastic wrap and then place them in a freezer-safe bag or container. Frozen pizza can be stored for up to 2 months. To reheat, bake the frozen slices in a preheated oven at 375°F (190°C) until heated through.
Nutritional Information
(Estimated, per slice based on 8 slices per pizza, toppings not included)
| Nutrient | Amount per Serving | % Daily Value |
|---|---|---|
| Calories | 250 kcal | 13% |
| Total Fat | 5g | 8% |
| Saturated Fat | 1g | 5% |
| Cholesterol | 0mg | 0% |
| Sodium | 350mg | 15% |
| Total Carbohydrate | 45g | 15% |
| Dietary Fiber | 2g | 8% |
| Sugar | 1g | – |
| Protein | 8g | 16% |
Variations & Substitutions
- Vegan Pizza: Substitute the mozzarella cheese with a vegan cheese alternative. There are many great vegan mozzarella options available on the market. You can also get creative with your toppings, using vegetables, plant-based meats, and flavorful sauces.
- Gluten-Free Pizza: While achieving a truly authentic NY-style crust with gluten-free flour is challenging, you can experiment with gluten-free flour blends specifically designed for pizza crusts. Be sure to follow the instructions on the flour package for best results.
- Whole Wheat Pizza: Substitute up to 50% of the bread flour with whole wheat flour for a healthier, nuttier flavor. Keep in mind that whole wheat flour absorbs more water, so you may need to adjust the hydration level slightly.
- Herb-Infused Dough: Add dried herbs like oregano, basil, or rosemary to the dough for an extra layer of flavor.
FAQs (Frequently Asked Questions)
Q: Why is cold fermentation important for pizza dough?
A: Cold fermentation allows the yeast to work slowly, developing complex flavors and creating a more extensible dough that’s easier to stretch.
Q: Can I use all-purpose flour instead of bread flour?
A: While you can, bread flour is recommended for its higher protein content, which results in a chewier, more structured crust. All-purpose flour will produce a softer crust.
Q: How do I prevent my pizza crust from sticking to the pizza stone?
A: Make sure your pizza stone is thoroughly preheated and lightly dust your pizza peel with flour or cornmeal before transferring the pizza.
Q: My dough is too sticky. What should I do?
A: Gradually add a small amount of flour (1 tablespoon at a time) while kneading until the dough becomes less sticky and easier to handle.
Q: Can I freeze the pizza dough for later use?
A: Yes, you can freeze the dough after the first rise (cold fermentation). Wrap it tightly in plastic wrap and store it in the freezer for up to 2 months. Thaw it in the refrigerator overnight before using.
Final Thoughts
Creating authentic New York-style pizza dough at home might seem daunting, but with a little patience and attention to detail, you can achieve pizzeria-quality results. Don’t be afraid to experiment with different toppings and find what you like best. Gather your friends and family, crank up the oven, and prepare to enjoy a taste of New York right in your own kitchen. This recipe is a starting point, so feel free to tweak it to your liking and let me know how it turns out. Happy baking!