
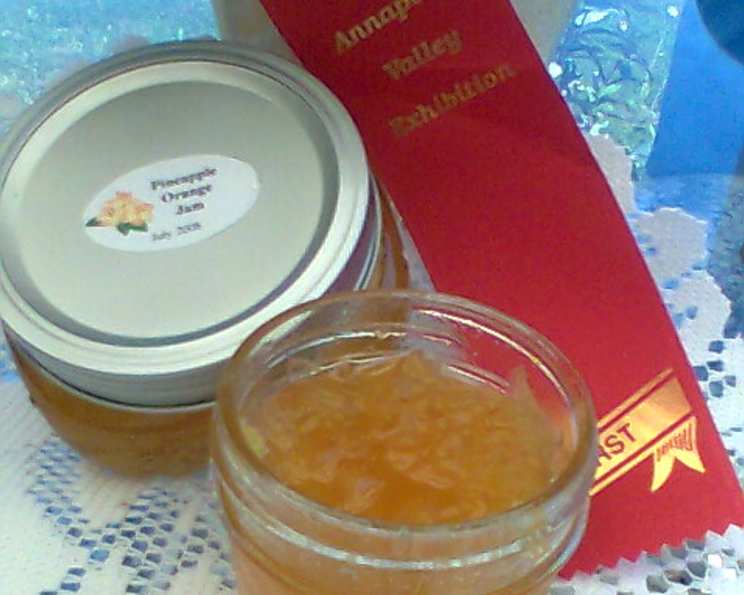
Award-Winning Pineapple Preserves
The scent of cooked pineapple always transports me back to my grandmother’s kitchen in Hawaii. She’d have a pot simmering on the stove, the sweet, tangy aroma mingling with the salty air drifting in from the ocean. It wasn’t just a jam; it was a piece of sunshine captured in a jar, a taste of home that she shared with everyone. The golden hue and vibrant flavor instantly brightened any breakfast table, making even the simplest toast feel like a tropical escape.
Recipe Overview
- Prep Time: 5 minutes
- Cook Time: 20 minutes
- Total Time: 25 minutes
- Yields: About 2 cups
- Dietary Type: Vegan, Gluten-Free, Dairy-Free
Ingredients
- 20 ounces crushed pineapple in juice, undrained
- 2 cups granulated sugar
Equipment Needed
- Large saucepan
- Wooden spoon or heat-resistant spatula
- Candy thermometer (optional)
- Sterilized jars and lids (for canning)
- Water bath canner (for canning)
Instructions
-
In a large, heavy-bottomed saucepan, combine the crushed pineapple (with its juice) and the granulated sugar.
-
Place the saucepan over medium-high heat and bring the mixture to a rolling boil. A rolling boil is when the bubbles vigorously rise to the surface even with continuous stirring.
-
Once boiling, reduce the heat slightly to maintain a steady boil and cook for approximately 20 minutes, stirring constantly. This is crucial to prevent the preserves from sticking to the bottom of the pan and burning.
-
Continue stirring until the mixture has thickened considerably. You’ll know it’s getting close when it coats the back of a spoon.
-
For more precise doneness, use a candy thermometer. The preserves are ready when they reach 220°F (104°C), which is the jelling stage at sea level. If you live at a higher altitude, you may need to adjust the temperature slightly – subtract 2 degrees Fahrenheit for every 1,000 feet above sea level.
-
Once the preserves have reached the desired consistency and temperature, immediately remove the saucepan from the heat.
-
If you plan to can the preserves for long-term storage, immediately pour the hot preserves into hot, sterilized jars, leaving about ¼ inch of headspace at the top. Headspace is the distance between the top of the preserves and the lid of the jar.
-
Wipe the rims of the jars clean with a damp cloth to remove any spilled preserves. This ensures a good seal.
-
Place the sterilized lids on the jars and screw on the bands fingertip-tight. Fingertip-tight means tightening the bands until you feel resistance, then backing off slightly.
-
Process the jars in a boiling water bath canner for 5 minutes. To do this, lower the filled jars into the boiling water, ensuring they are completely submerged by at least 1 inch of water. Bring the water back to a boil, then start timing.
-
After 5 minutes, carefully remove the jars from the canner and place them on a clean towel-lined surface.
-
Cover the jars with a clean towel to prevent drafts and allow them to cool undisturbed for 12-24 hours. As the jars cool, you should hear a popping sound as the lids seal.
-
After cooling, check the seals by pressing down on the center of each lid. If the lid doesn’t flex or pop back up, it’s properly sealed. If a jar doesn’t seal, refrigerate the preserves and use them within a few weeks.
Expert Tips & Tricks
- Preventing Burning: The most critical step is constant stirring. Don’t leave the pot unattended, especially during the later stages of cooking.
- Judging Doneness: If you don’t have a thermometer, place a small spoonful of the hot preserves on a chilled plate. Let it cool for a minute, then gently push it with your finger. If it wrinkles slightly, it’s ready. If it’s still runny, continue cooking for a few more minutes and test again.
- Sterilizing Jars: Sterilize jars by boiling them in water for 10 minutes. Keep them hot until ready to fill. You can also sterilize them in a dishwasher.
- Batch Size: While it’s tempting to double or triple the recipe, it’s best to stick to smaller batches. Larger batches can take significantly longer to cook and may not set properly.
- Adjusting Sweetness: This recipe is moderately sweet. If you prefer a less sweet preserve, you can reduce the sugar slightly, but be aware that sugar acts as a preservative, so reducing it too much may affect the shelf life.
- Foam Control: As the pineapple mixture cooks, foam may form on the surface. Skim it off with a spoon to ensure a clearer final product.
- Pineapple Quality: Using high-quality, ripe pineapple will result in the best flavor. Fresh pineapple can be used if you crush it yourself, but ensure the juice is also included.
- Lemon Juice Boost: Add a tablespoon of lemon juice near the end of cooking to brighten the flavor and help with gelling, especially if your pineapple isn’t very acidic.
Serving & Storage Suggestions
These pineapple preserves are incredibly versatile. Spread them on toast, biscuits, or scones for a delightful breakfast or brunch. They are also fantastic as a filling for cakes, pastries, and tarts. Use them as a glaze for grilled ham or pork, or serve them alongside creamy cheeses for a sweet and savory appetizer.
- Unopened, properly canned jars can be stored in a cool, dark place for up to 1 year.
- Once opened, refrigerate the preserves and use them within a few weeks.
- If you don’t plan to can the preserves, store them in an airtight container in the refrigerator for up to 2 weeks.
- Freezing is not recommended as it can alter the texture of the preserves.
Nutritional Information
| Nutrient | Amount per Serving (approx. 1 tbsp) | % Daily Value |
|---|---|---|
| Calories | 50 kcal | 3% |
| Total Fat | 0g | 0% |
| Saturated Fat | 0g | 0% |
| Cholesterol | 0mg | 0% |
| Sodium | 0mg | 0% |
| Total Carbohydrate | 13g | 4% |
| Dietary Fiber | 0g | 0% |
| Sugars | 13g | |
| Protein | 0g | 0% |
Note: Nutritional information is an estimate and may vary based on specific ingredients and portion sizes.
Variations & Substitutions
- Spiced Pineapple Preserves: Add a pinch of ground cinnamon, ginger, or cloves to the mixture while cooking for a warm, spiced flavor.
- Tropical Twist: Incorporate shredded coconut or diced mango for a more exotic flavor profile.
- Pineapple-Ginger Preserves: Add finely grated fresh ginger to the preserves for a zesty kick. About 1-2 teaspoons of grated ginger is a good starting point.
- Pineapple-Jalapeño Preserves: For a sweet and spicy combination, add finely diced jalapeño pepper (remove seeds for less heat) to the preserves while cooking. Start with a small amount and adjust to your preference.
- Citrus Infusion: Add the zest of one lemon or lime to brighten the flavor and enhance the tanginess.
FAQs (Frequently Asked Questions)
Q: Why aren’t my preserves jelling?
A: Several factors can prevent proper jelling, including insufficient cooking time, not enough sugar, or naturally low-pectin fruit. Ensure you cook the preserves to the correct temperature (220°F at sea level) and use the specified amount of sugar. Adding a tablespoon of lemon juice can also help.
Q: Can I use fresh pineapple instead of canned?
A: Yes, you can use fresh pineapple, but ensure it is ripe and juicy. Chop or crush the pineapple well, and include all the juice released. Canned pineapple often has a more consistent acidity level, which can aid in jelling.
Q: How do I know if my jars are properly sealed?
A: After cooling, press down on the center of each lid. If the lid doesn’t flex or pop back up, it’s properly sealed. You should also hear a popping sound as the jars cool, which indicates a seal has formed.
Q: Can I reduce the amount of sugar in this recipe?
A: While you can reduce the sugar slightly, be aware that sugar acts as a preservative. Reducing it too much may affect the shelf life and texture of the preserves. Consider using a sugar substitute designed for preserving, but follow the manufacturer’s instructions carefully.
Q: What if my preserves are too thick?
A: If the preserves become too thick during cooking, you can add a tablespoon or two of water or pineapple juice to thin them out. Stir well and heat through.
Final Thoughts
Making these award-winning pineapple preserves is a delightful journey, transforming simple ingredients into a jar of sunshine. Whether you’re a seasoned canner or a beginner in the kitchen, this recipe offers a taste of tropical bliss that’s perfect for sharing or savoring on your own. Don’t hesitate to experiment with variations and find your signature twist. And remember, every spoonful is a little piece of paradise. So, grab your saucepan, gather your ingredients, and let’s create some magic together!